Latest News
Using ZimaCube Pro for 4K Video Editing: A Perfect Experience with Thunderbolt Connection to Mac
![]() Vicky Du - Jul 16, 2024
Vicky Du - Jul 16, 2024
In a busy editing studio, time always flies. Every second seems particularly precious, especially when you face 4K resolution video footage. John, a young editor, is struggling with an important short film project with an imminent deadline. At this time, the new member of the studio – ZimaCube Pro – makes his debut.
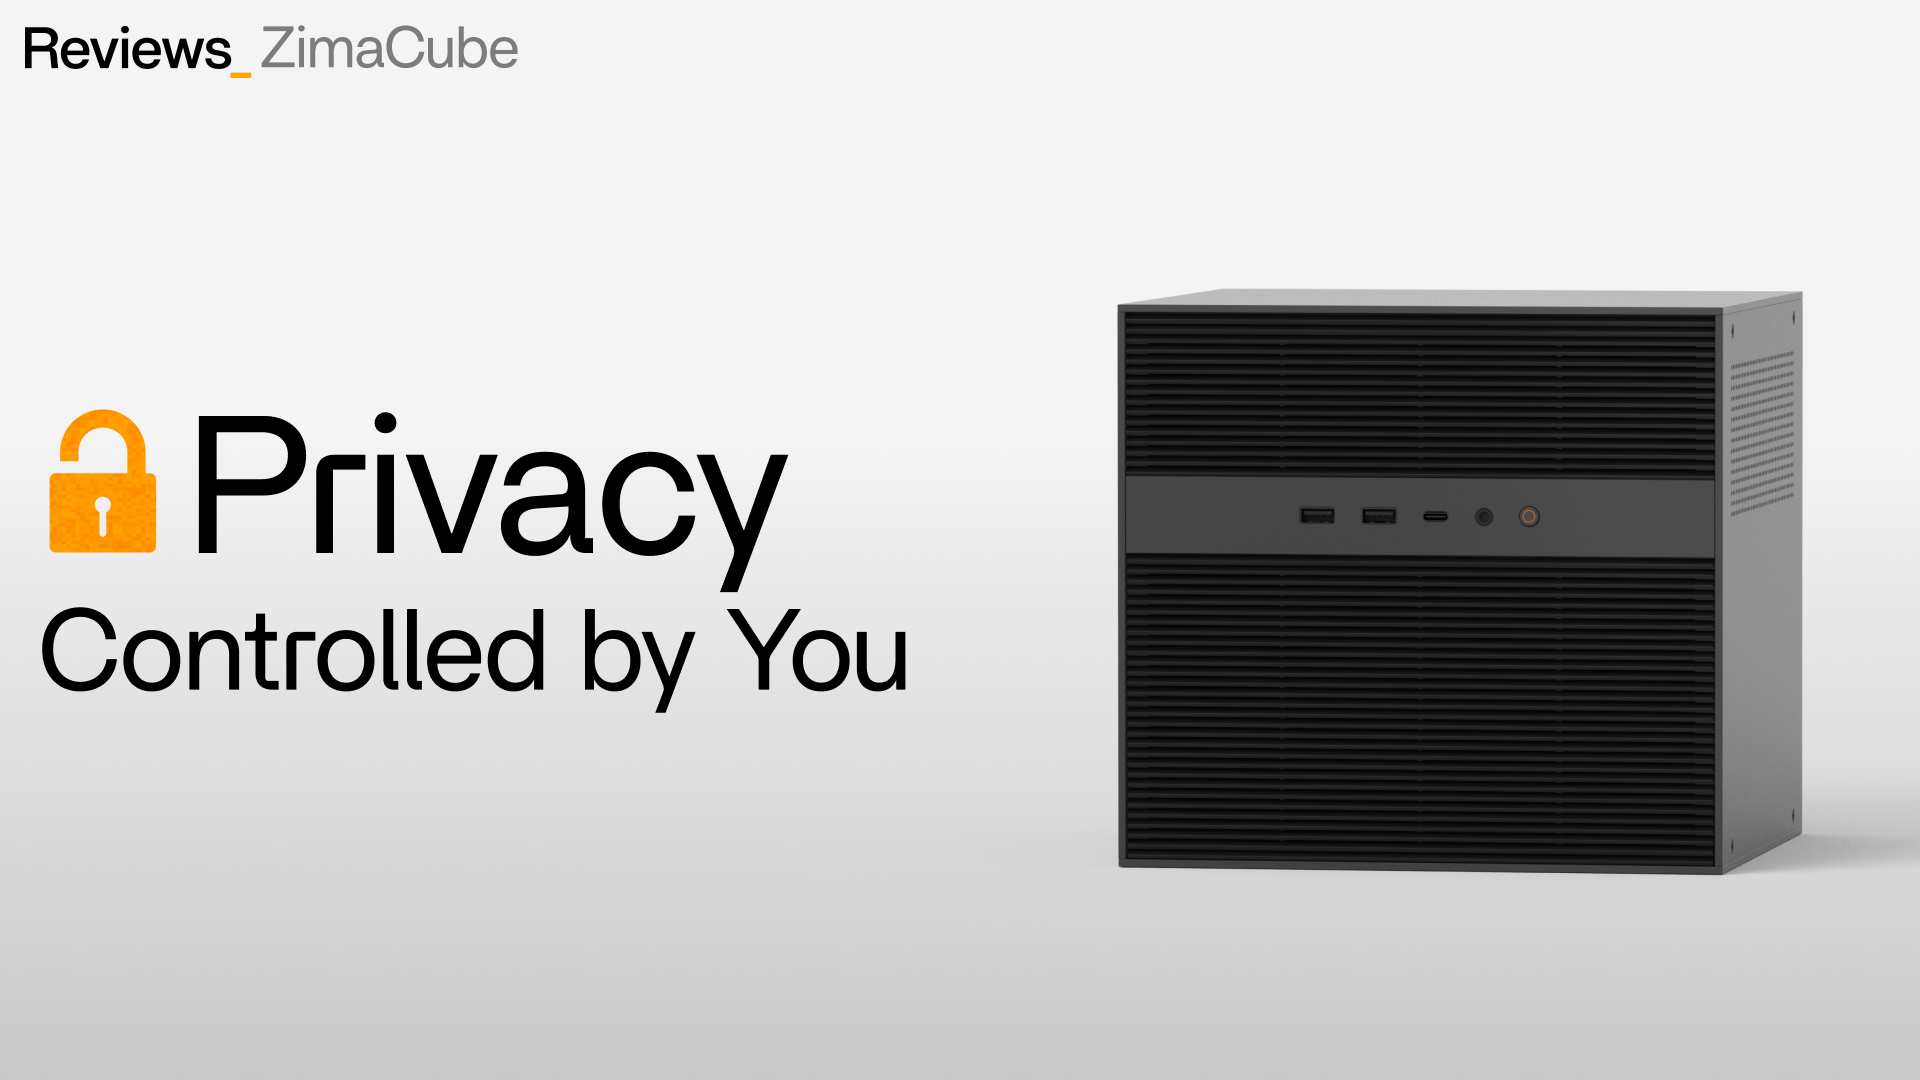
The ZimaCube Pro, a device with amazing performance and large storage capacity, especially its two Thunderbolt interfaces, caught John’s attention. He decided to take a gamble and connect the ZimaCube Pro to his Mac to see if this device could truly change his work efficiency.
At the moment when the lightning wire was connected, a miracle happened. The high-speed data transmission opened John’s eyes. The material import that used to take a long time to wait now only takes a few seconds. The Stuttering and delay in the editing process are also swept away, and the creation becomes so smooth and natural. John feels an unprecedented pleasure, as if every mouse click is leading him to the peak of creation.
This is not just an equipment upgrade, but a revolution in the way we work. John realizes that the perfect combination of ZimaCube Pro and Thunderbolt interface will inject endless power into every future creation. He can’t wait to share this wonderful experience with more people.
Are you also looking for an efficient and stable solution to improve work efficiency? Follow John’s footsteps and explore the surprises brought by ZimaCube Pro together.
Part I: Preparation Work
Connection step
- Prepare ZimaCube Pro and Mac computers, as well as a Thunderbolt cable that supports Thunderbolt 4.
- Insert one end of the Thunderbolt cable into the Thunderbolt interface of the ZimaCube Pro and the other end into the Thunderbolt interface of the Mac computer.
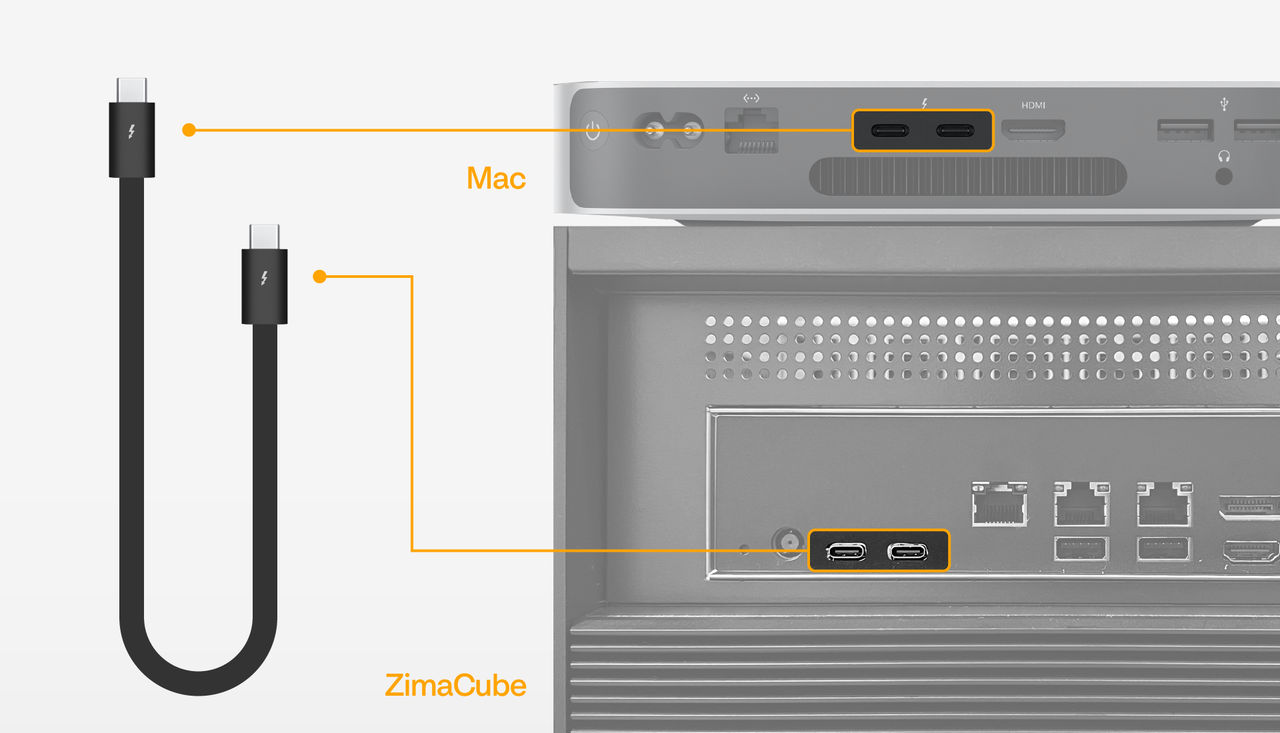
- Make sure both devices are turned on and confirm that the connection is established.
Part II: Software Settings
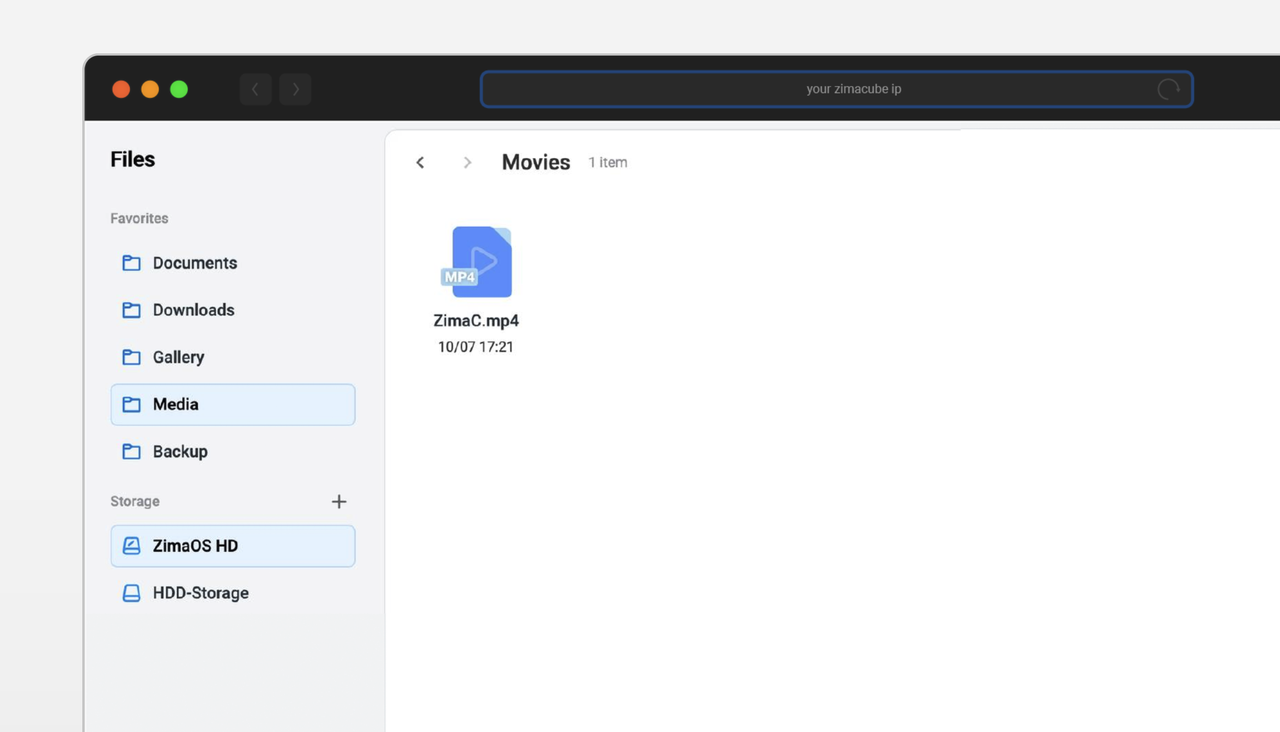
System configuration:Select the video folder you want to edit and click “Share”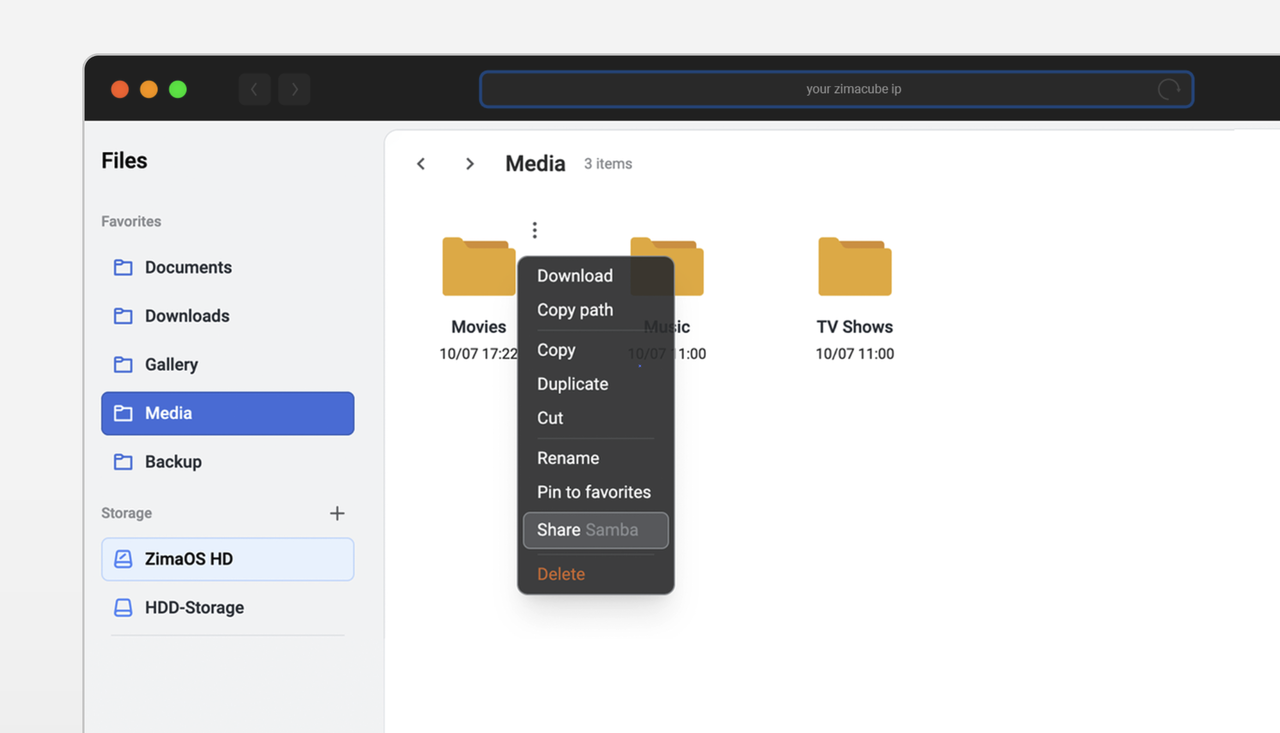
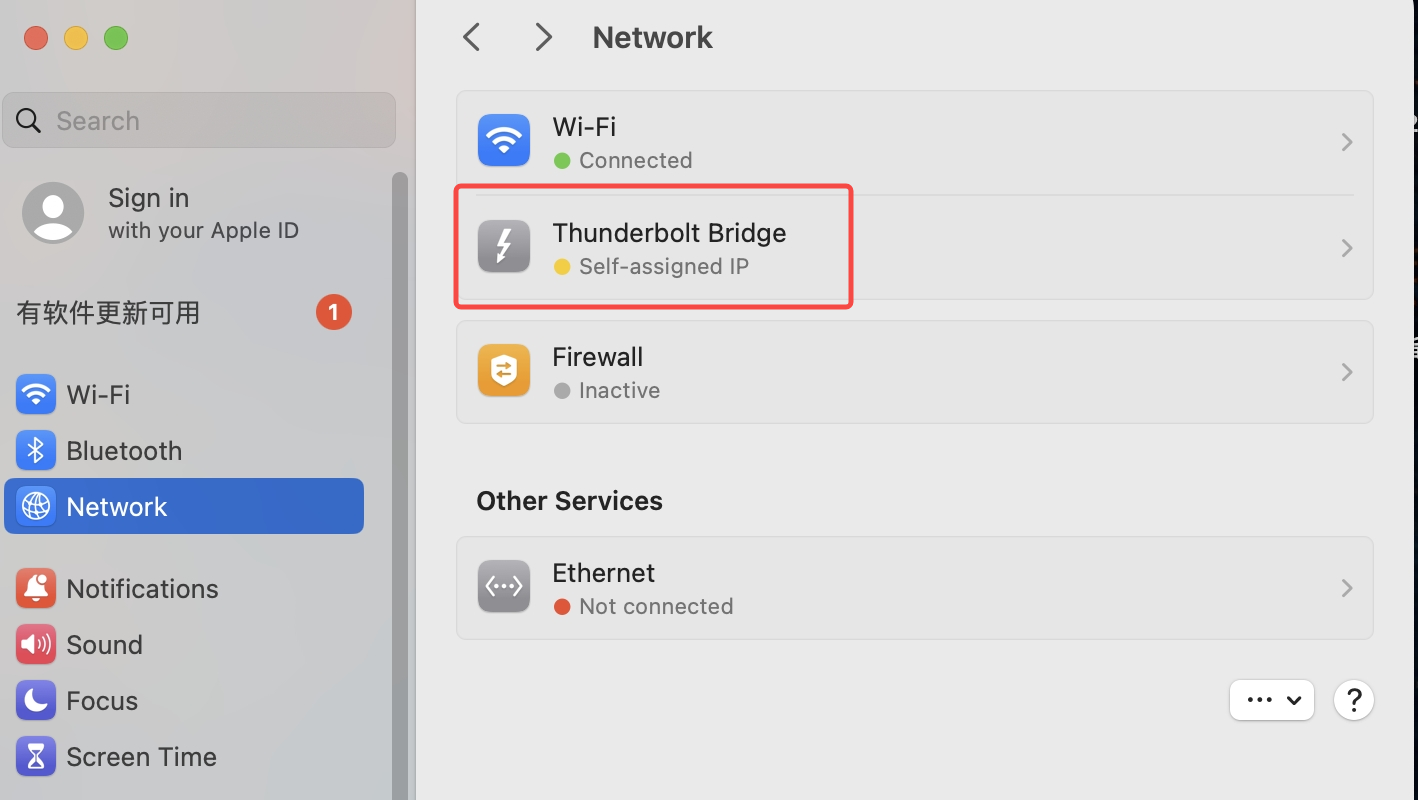
 On a Mac, hold down “command + K” shortcut to add the shared path for ZimaCube Pro.
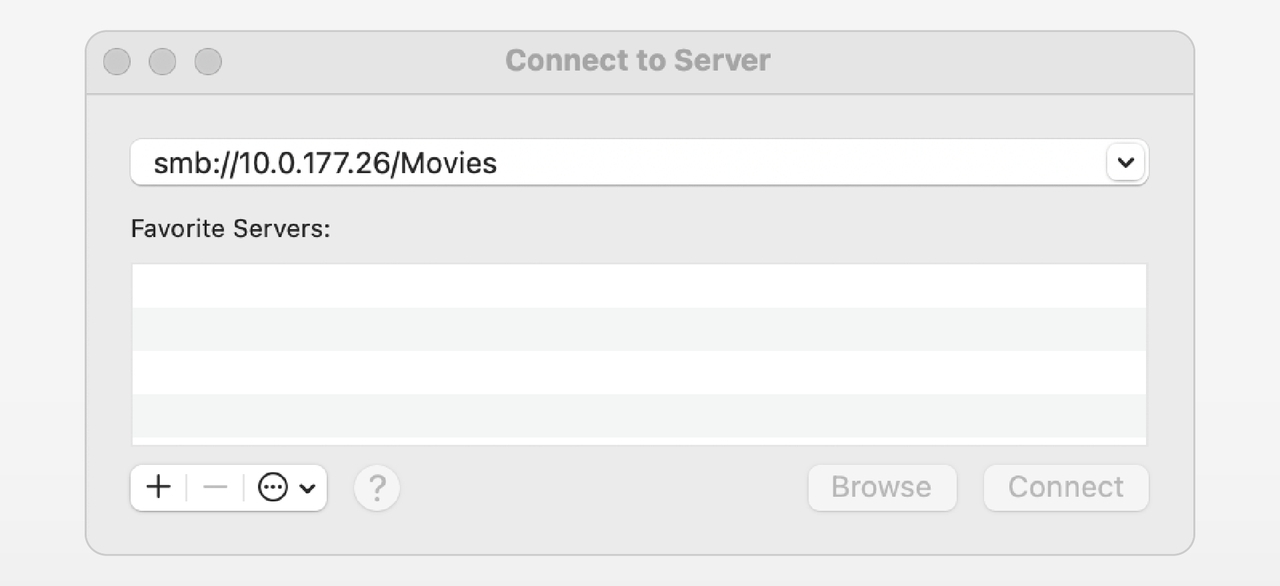
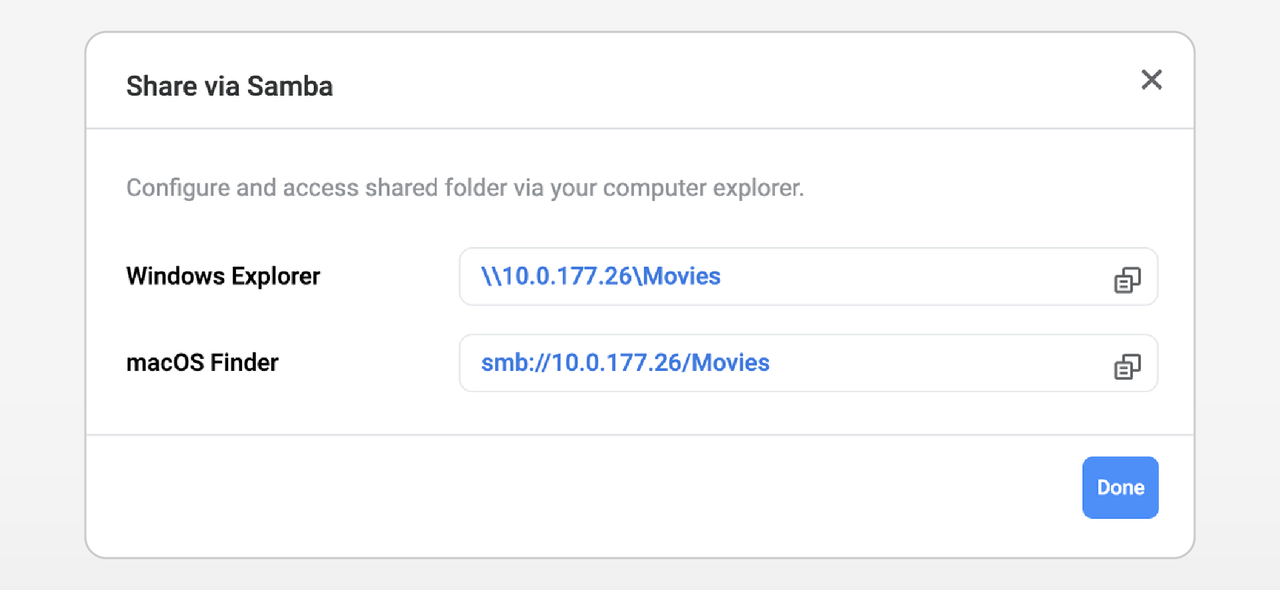
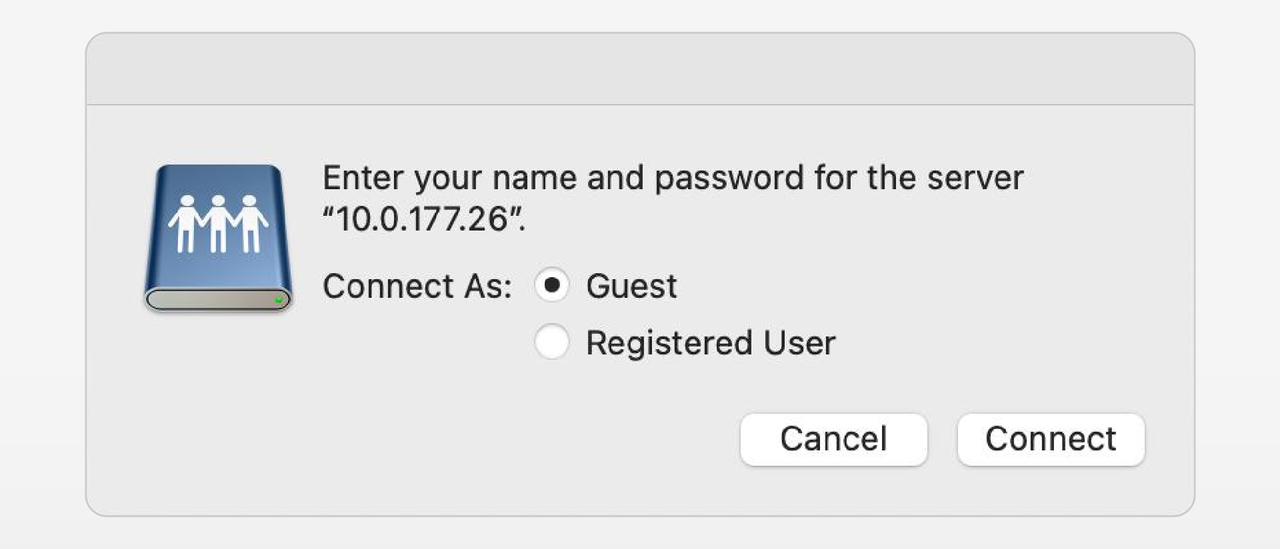 Click “Connect”, now you can see the video on ZimaCube Pro, which has appeared on the Mac.
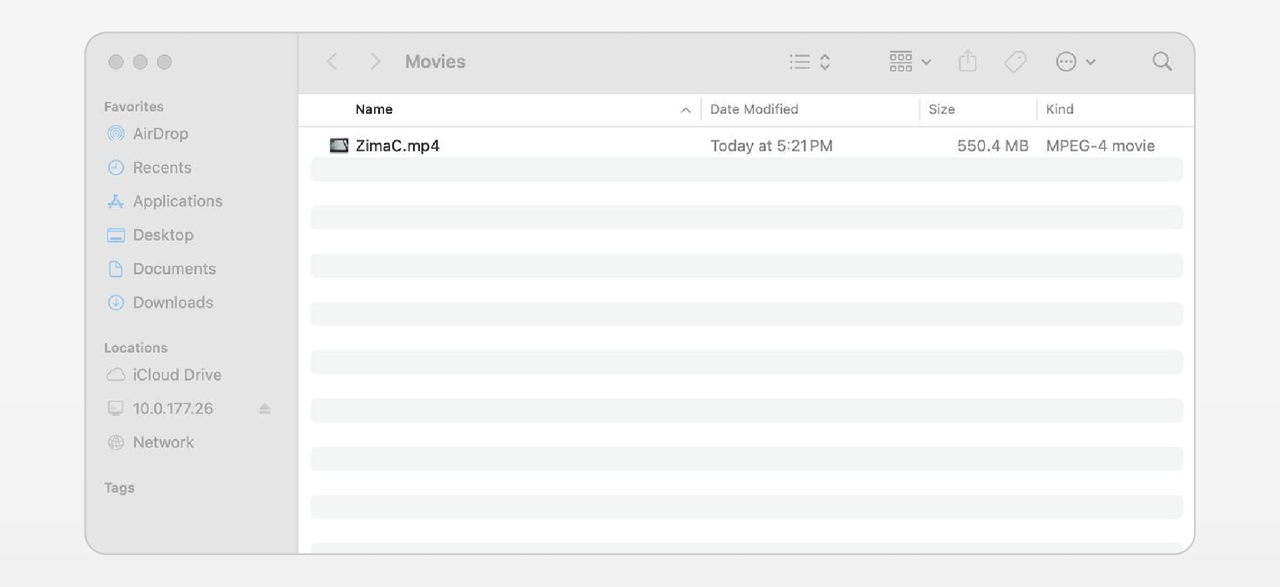
Part III: Practical Operation
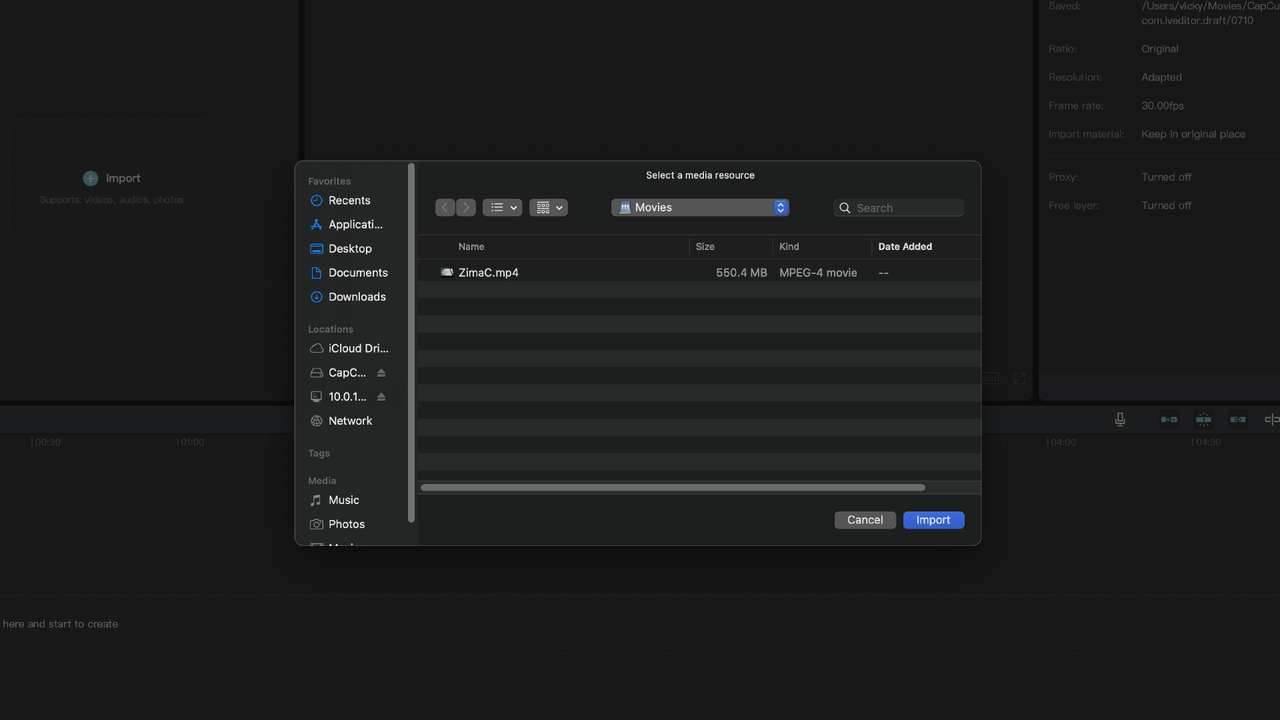
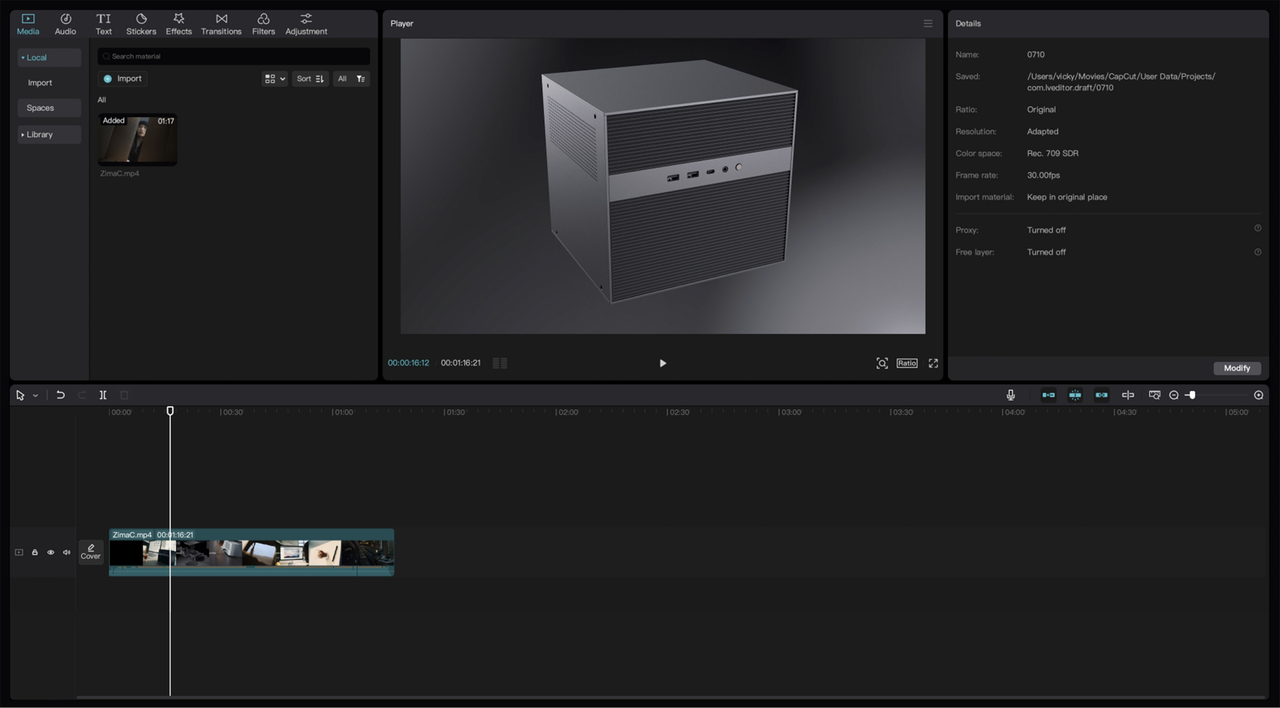
Import and manage materials- In the video editing software, select “File” > “Import” > “Media”.
- Browse to the shared folder of ZimaCube Pro, select the 4K video footage to be imported, and click “Import”
Part IV: Performance and Advantages
After connecting through the Thunderbolt interface, test the data transmission speed. Using iPerf for testing on Mac, you can see the high-speed transmission capability provided by the Thunderbolt interface.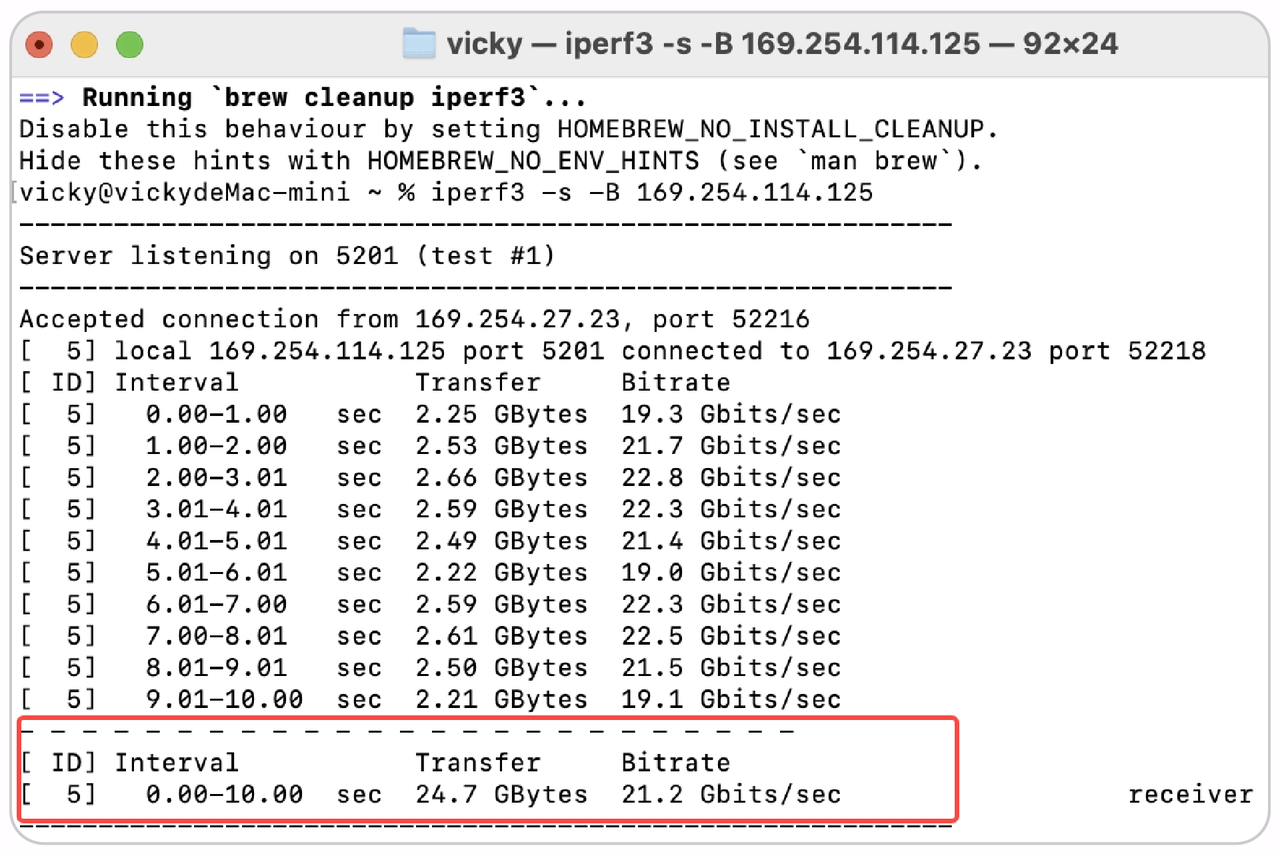
Advantage summary
Efficient data transfer: The Thunderbolt interface provides data transfer speeds of up to 20Gbps, greatly improving the efficiency of material import and export.
Large capacity storage: ZimaCube Pro supports multiple hard drives and can provide 164TB +storage space to meet the needs of large 4K video projects.
Stability and reliability: the Thunderbolt interface connection is more stablethan network storage, reducing lag and delay during editing.
Conclusion
Using ZimaCube Pro and Mac for 4K video editing not only improves work efficiency, but also brings a more stable and smooth editing experience. With the guidance in this article, users can easily configure and use this powerful editing system to achieve efficient video creation.