Media Servers
How to Watching Videos Anywhere with Jellyfin Media Server – ZimaBoard
John Guan - May 28, 2023
Nowadays, the consumption of media has experienced a significant shift. Gone are the days of physical media formats like DVDs and Blu-rays dominating the entertainment landscape. With the proliferation of high-speed internet connections and the advent of streaming services, people now prefer to access their favorite movies, TV shows, and videos digitally.
As digital media collections grow larger and more diverse, the need for efficient organization and seamless access becomes paramount. This is where media servers come into play. Media servers are software applications or dedicated hardware devices that centralize and manage media files, allowing users to access and stream their content from various devices.
Part 1. What You Should Know about Jellyfin Media Server
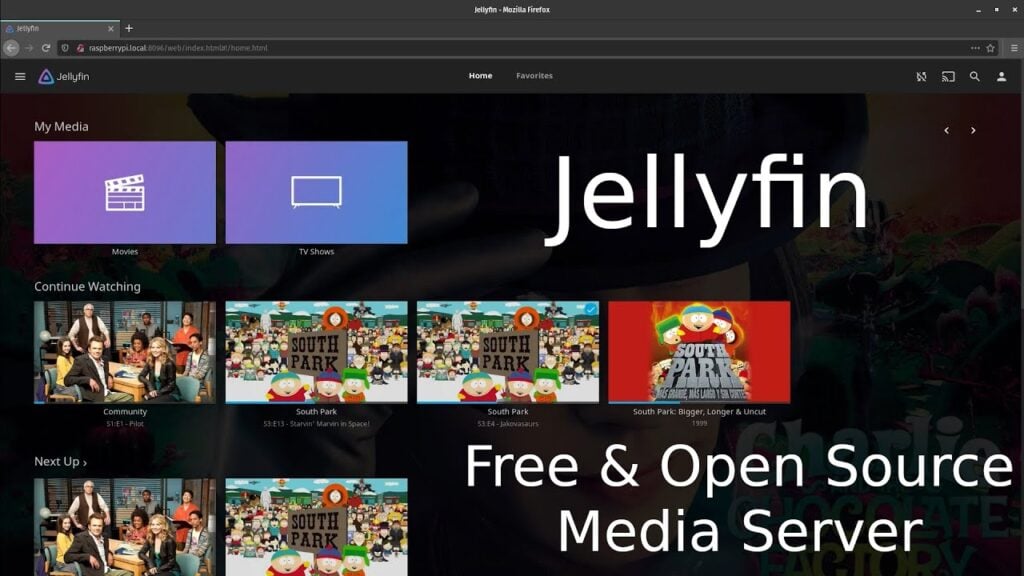
Jellyfin is an open-source media server that enables you to organize, stream, and share your video content. It works by centralizing your media library on a server, which can then be accessed and streamed on various devices. Jellyfin uses a client-server architecture, where the server hosts the media library and the clients connect to it for playback.
1. Key features and benefits of using Jellyfin
Jellyfin offers a wide range of features and benefits that enhance your video streaming experience. Some of the key features include:
Media Organization: Jellyfin allows you to organize your video library by creating collections, adding metadata, and managing subtitles and artwork. This makes it easy to navigate and find your favorite movies and TV shows.
Multi-User Support: With Jellyfin, you can create multiple user profiles, each with its own customized settings and watch history. This enables personalized recommendations and individualized playback options.
Live TV and DVR: Jellyfin supports live TV streaming and allows you to record your favorite shows with its built-in DVR functionality. This transforms your media server into a comprehensive home entertainment hub.
Transcoding: Jellyfin supports on-the-fly transcoding, which ensures smooth playback on different devices with varying network speeds and capabilities. This feature optimizes video quality and eliminates compatibility issues.
2. Jellyfin Media Server Supported platforms and devices
Jellyfin is designed to be highly compatible and supports a wide range of platforms and devices. Some of the supported platforms include:
Windows: Jellyfin can be installed on Windows operating systems, allowing you to set up your media server on a Windows-based ZimaBoard.
Linux: Jellyfin has extensive support for various Linux distributions, making it a versatile option for Linux enthusiasts.
macOS: If you have a macOS device, you can install Jellyfin and enjoy seamless video streaming using ZimaBoard.
Docker: Jellyfin can also be deployed using Docker, which provides flexibility and ease of installation on compatible devices.
In addition to the supported platforms, Jellyfin offers client applications for various devices, including:
Web Browsers: You can access your Jellyfin Media Server directly through web browsers on different operating systems.
Mobile Devices: Jellyfin has dedicated apps for iOS and Android devices, allowing you to stream videos on your smartphones and tablets.
Smart TVs and Streaming Devices: Jellyfin can be installed on smart TVs, streaming devices like Roku and Amazon Fire TV, and even game consoles such as Xbox and PlayStation.
3. Jellyfin Media Server Installation and setup process on ZimaBoard SBC
Configuration: After installation, you will need to configure Jellyfin by accessing the web interface. Follow the setup wizard to select your preferred language, set up your media library, and customize the server settings.
Adding Media: Once the initial configuration is complete, you can start adding your video files to Jellyfin. Organize your media library, import metadata, and customize the artwork to enhance the visual experience.
Remote Access: To access your Jellyfin Media Server remotely, you will need to set up port forwarding on your router and configure secure remote connections. This allows you to stream videos even when you are away from home.
Part 3. Exploring ZimaBoard as a Media Server Solution
In the modern digital era, the ability to watch videos anywhere has become a fundamental part of our entertainment experience. With the combination of Jellyfin Media Server and ZimaBoard, you can create a powerful media streaming solution that allows you to access your favorite videos wherever you go.
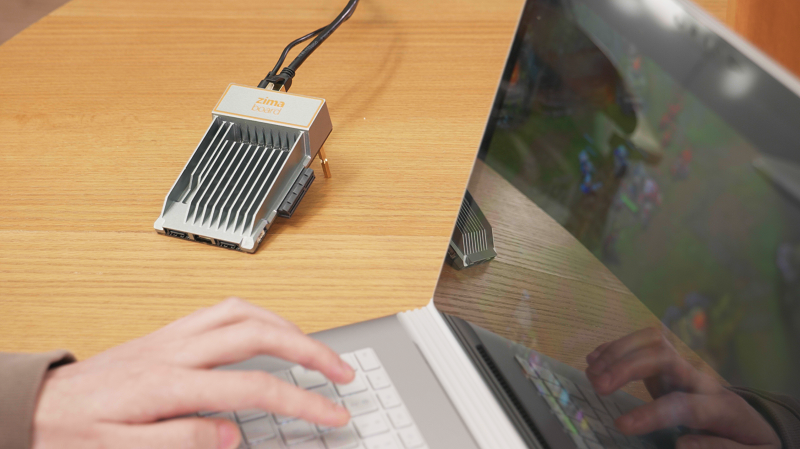
ZimaBoard Media Server is a high-performance single-board computer specifically designed for a variety of applications, including media streaming. Its purpose is to provide a compact yet powerful hardware solution that can handle the demands of media server software like Jellyfin. With ZimaBoard, you can transform any location into your personal entertainment hub, allowing you to watch videos anywhere with ease.
1. Hardware specifications and capabilities of ZimaBoard
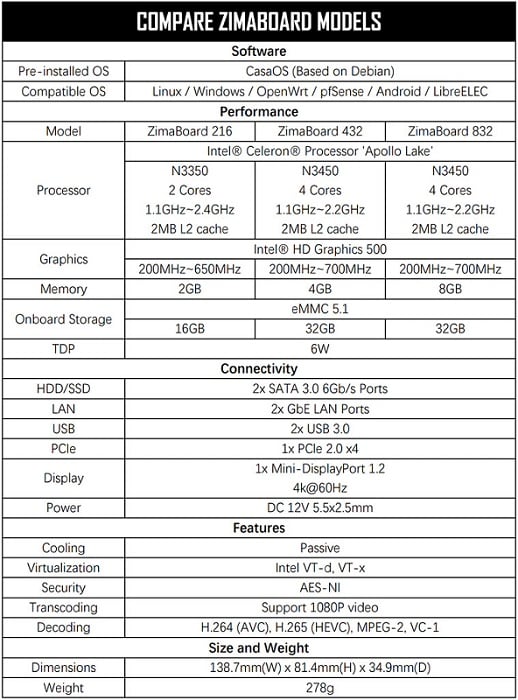
ZimaBoard boasts impressive hardware specifications that make it an ideal choice for media streaming. Some of its key features include:
Processor: ZimaBoard is equipped with a powerful and energy-efficient Intel Celeron processor, ensuring smooth video playback and transcoding capabilities.
Memory: With 8GB memory capacity, ZimaBoard can handle multiple video streams simultaneously without any performance degradation.
Storage: ZimaBoard offers various storage options, including 32 GB onboard storage and expandable storage through external devices such as SSDs or hard drives. This ensures that you have enough space to store your extensive video library.
Connectivity: ZimaBoard provides a wide range of connectivity options, including Ethernet, allowing you to connect to your network and other devices effortlessly.
2. Compatibility with Jellyfin and other media server software
One of the significant advantages of ZimaBoard is its compatibility with Jellyfin and other media server software. Whether you choose Jellyfin, Plex, or any other media server solution, ZimaBoard can seamlessly integrate with these platforms, providing you with a reliable and efficient media streaming experience.
This compatibility allows you to leverage the features and functionalities of popular media server software while taking advantage of ZimaBoard’s powerful hardware capabilities.
The Advantages of using ZimaBoard for media streaming
Using ZimaBoard for media streaming offers several advantages:
High Performance: ZimaBoard’s robust hardware specifications ensure smooth and uninterrupted video playback, even when streaming high-definition content or transcoding videos on the fly.
Versatility: ZimaBoard supports a wide range of media formats, making it compatible with various video files, ensuring that you can access and stream your entire video library without any compatibility issues.
Portability: With its compact size, ZimaBoard is highly portable, allowing you to take your media server with you wherever you go. Whether you’re traveling or visiting a friend’s house, you can easily set up your media server and enjoy your videos on any compatible device.
Customizability: ZimaBoard offers flexibility and customization options, allowing you to tailor your media streaming setup to your specific preferences. You can expand your storage capacity, connect additional peripherals, or even install other software to enhance your media server experience.
Part 4. How to Setting Up Jellyfin Media Server with ZimaBoard SBC
Setting up Jellyfin with ZimaBoard is an excellent way to create a versatile and powerful media streaming solution. By combining Jellyfin’s robust media server software with the capabilities of ZimaBoard, you can enjoy seamless access to your video library from anywhere.
1. Preparing the ZimaBoard for Jellyfin installation
Before installing Jellyfin, it’s important to ensure that your ZimaBoard is ready for the setup process. Here are some key steps to follow:
Ensure Power and Connectivity: Connect your ZimaBoard to a power source and ensure that it is properly connected to your network through an Ethernet cable.
Check Operating System Compatibility: Verify that your ZimaBoard’s operating system is compatible with Jellyfin. Most popular operating systems like Windows, Linux, and macOS should be compatible.
Update Firmware and Software: It’s recommended to update your ZimaBoard’s firmware and operating system to the latest versions to ensure optimal performance and compatibility.
2. Step-by-step guide to installing Jellyfin on ZimaBoard
Installing Jellyfin on ZimaBoard is a straightforward process. Follow these steps to set it up:
Download Jellyfin: Visit the Jellyfin website and download the appropriate installation package for your ZimaBoard’s operating system-Casaos.
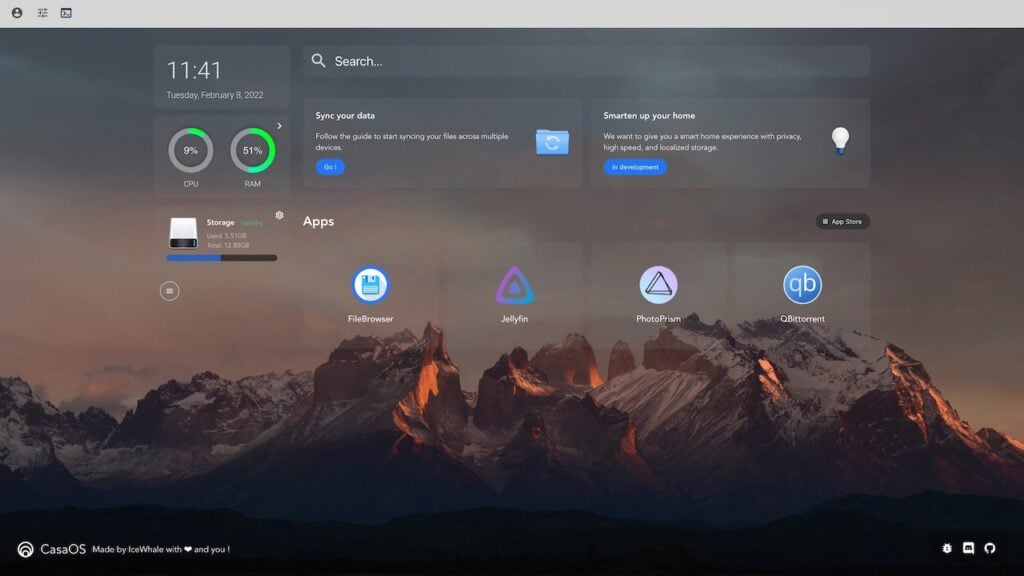
Install Jellyfin: Once the download is complete, follow the on-screen instructions to install Jellyfin on your ZimaBoard. The installation process may vary depending on your operating system, but it typically involves running the installation package and following the prompts.
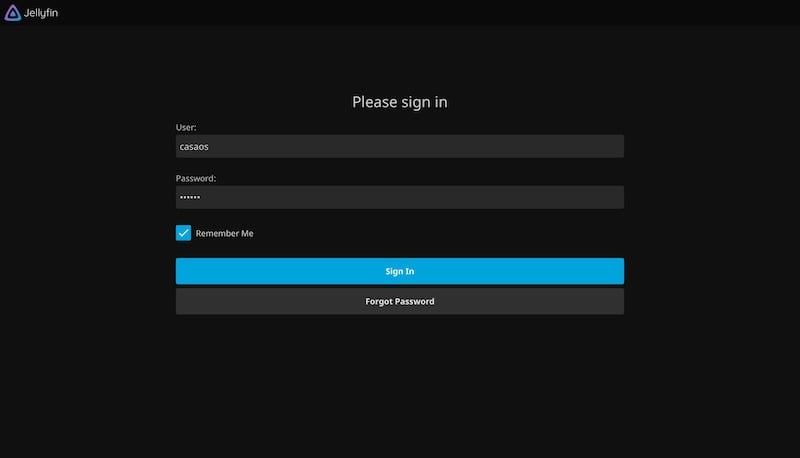
Launch Jellyfin: After the installation is complete, launch the Jellyfin application on your ZimaBoard. It should open a web interface that allows you to access and configure Jellyfin.
3. Configuring Jellyfin for optimal performance on ZimaBoard
To ensure the optimal performance of Jellyfin on your ZimaBoard, consider the following configuration steps:
Initial Setup Wizard: The first time you access Jellyfin, you will be guided through an initial setup wizard. Follow the instructions to choose your preferred language, configure metadata agents, and set up your media libraries.
Transcoding Settings: Adjust the transcoding settings based on your ZimaBoard’s capabilities and network bandwidth. Consider factors such as video quality, streaming resolution, and subtitle encoding.
User Management: Set up user accounts and manage permissions to control access to your media libraries. This allows you to create individual profiles for different users and personalize their viewing experience.
4. Connecting storage devices and organizing media libraries
To start enjoying your videos on Jellyfin, you need to connect storage devices and organize your media libraries. Follow these steps:
Connect External Storage: If your ZimaBoard has limited onboard storage, consider connecting external storage devices such as SSDs or hard drives to expand your storage capacity.
Add Media Libraries: Within the Jellyfin web interface, navigate to the Libraries section and add your media folders from the connected storage devices. Jellyfin will scan and index your media files, making them accessible for streaming.
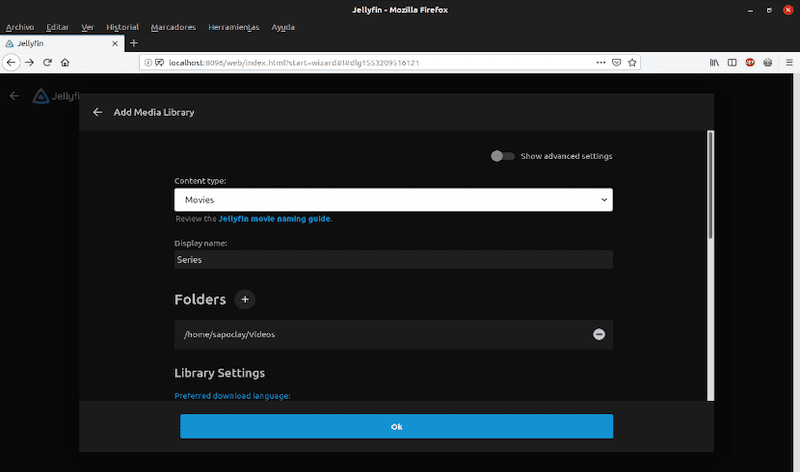
Organize Metadata and Artwork: To enhance the visual appeal of your media library, Jellyfin allows you to download and manage metadata and artwork. This includes fetching movie posters, TV show descriptions, and other relevant information.
Part 5. How to Accessing and Streaming Media Anywhere with Jellyfin
1. Jellyfin’s web interface and its features
Jellyfin offers a user-friendly web interface that allows you to access and manage your media library. Some of the key features of Jellyfin’s web interface include:
User-friendly Interface: The web interface is designed to be intuitive and easy to navigate, allowing you to browse and search for your favorite videos effortlessly.
Library Organization: Jellyfin’s web interface provides tools to organize your media library, allowing you to create collections, playlists, and tags for efficient categorization and navigation.
Playback Controls: The web interface includes playback controls that allow you to adjust video quality, enable subtitles, and control playback speed for a personalized viewing experience.
User Management: The web interface also allows you to manage user accounts, set permissions, and customize individual profiles for a personalized viewing experience for each user.
2. Exploring Jellyfin mobile apps for on-the-go streaming
Jellyfin offers mobile apps for iOS and Android devices, providing a seamless streaming experience on the go. Here are some benefits of using Jellyfin mobile apps:
Mobile Streaming: The mobile apps allow you to stream your videos directly to your mobile device, enabling you to enjoy your favorite content wherever you are.
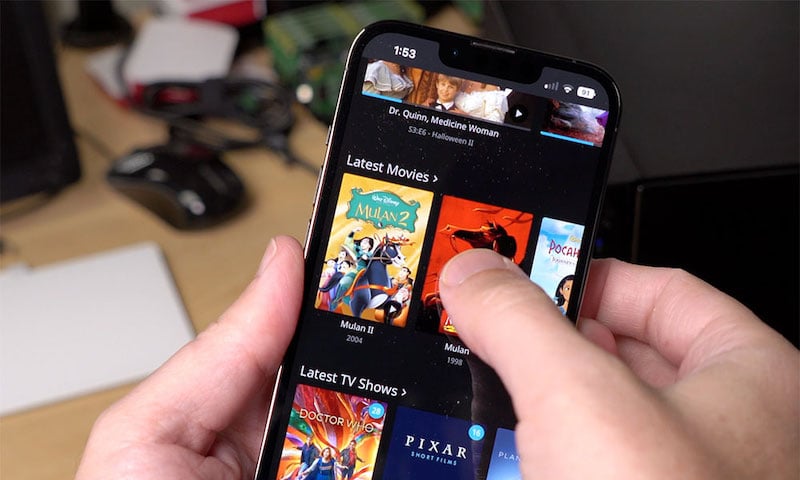
Sync and Offline Viewing: With Jellyfin mobile apps, you can sync your media libraries for offline viewing. This means you can download videos to your device and watch them without an internet connection.
Mobile Sync: The mobile apps provide a convenient way to synchronize your watch history, playback progress, and library updates across different devices, ensuring a seamless transition between devices.
Remote Control: The mobile apps also function as a remote control, allowing you to navigate through your media library and control playback on compatible devices.
3. Casting media to compatible devices using Jellyfin
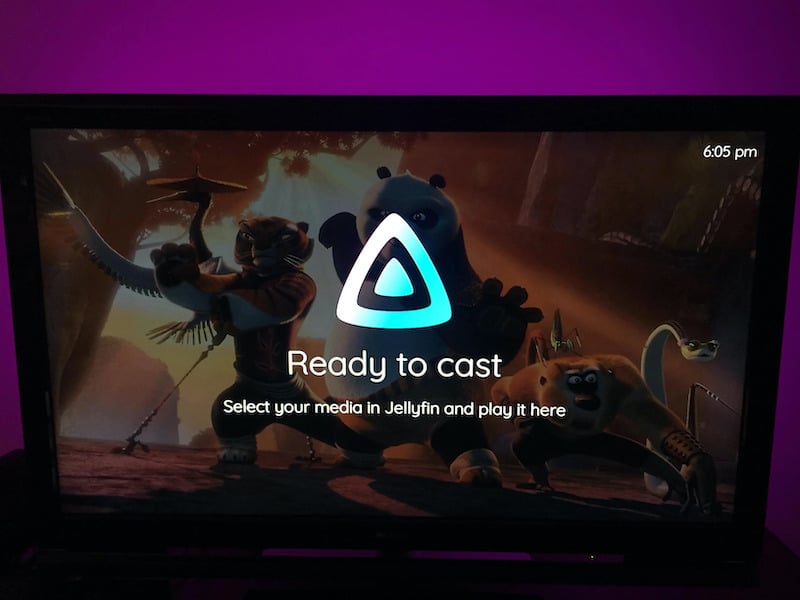
Jellyfin supports casting media to compatible devices, enabling you to enjoy your videos on a larger screen. Here’s how you can cast media using Jellyfin:
Compatible Devices: Jellyfin supports popular casting protocols such as Chromecast, DLNA, and AirPlay. Ensure that your target device supports one of these protocols.
Casting Process: From the Jellyfin web interface or mobile app, select the media you want to cast and choose the compatible device from the cast menu. The media will be streamed to the selected device for playback.
Control and Playback: Once the media is cast, you can use the Jellyfin interface on your device to control playback, adjust settings, and navigate through your media library.
4. Remote access and streaming outside the local network
Jellyfin allows you to access and stream your media outside the local network, enabling you to watch videos anywhere. Here’s how you can set up remote access:
Port Forwarding: Configure port forwarding on your router to allow incoming connections to your ZimaBoard running Jellyfin. This ensures that you can access Jellyfin remotely.
Dynamic DNS: If your internet service provider assigns you a dynamic IP address, consider using a dynamic DNS service to associate a domain name with your ZimaBoard. This allows you to access Jellyfin using a domain name instead of an IP address.
Secure Connections: To ensure secure remote access, enable SSL/TLS encryption for Jellyfin. This protects your data and prevents unauthorized access to your media server.
Authentication and Security: Jellyfin provides options to set up authentication methods, such as username/password or OAuth, to add an extra layer of security to your remote access.
Final Verdict:
With Jellyfin Media Server and ZimaBoard, watching videos anywhere becomes a reality. The combination of Jellyfin’s versatile features and ZimaBoard’s powerful hardware ensures a seamless and immersive home entertainment experience. So, unleash the power of your home entertainment system, dive into the world of Jellyfin and ZimaBoard, and enjoy your favorite videos anytime, anywhere.
