Prepare tools
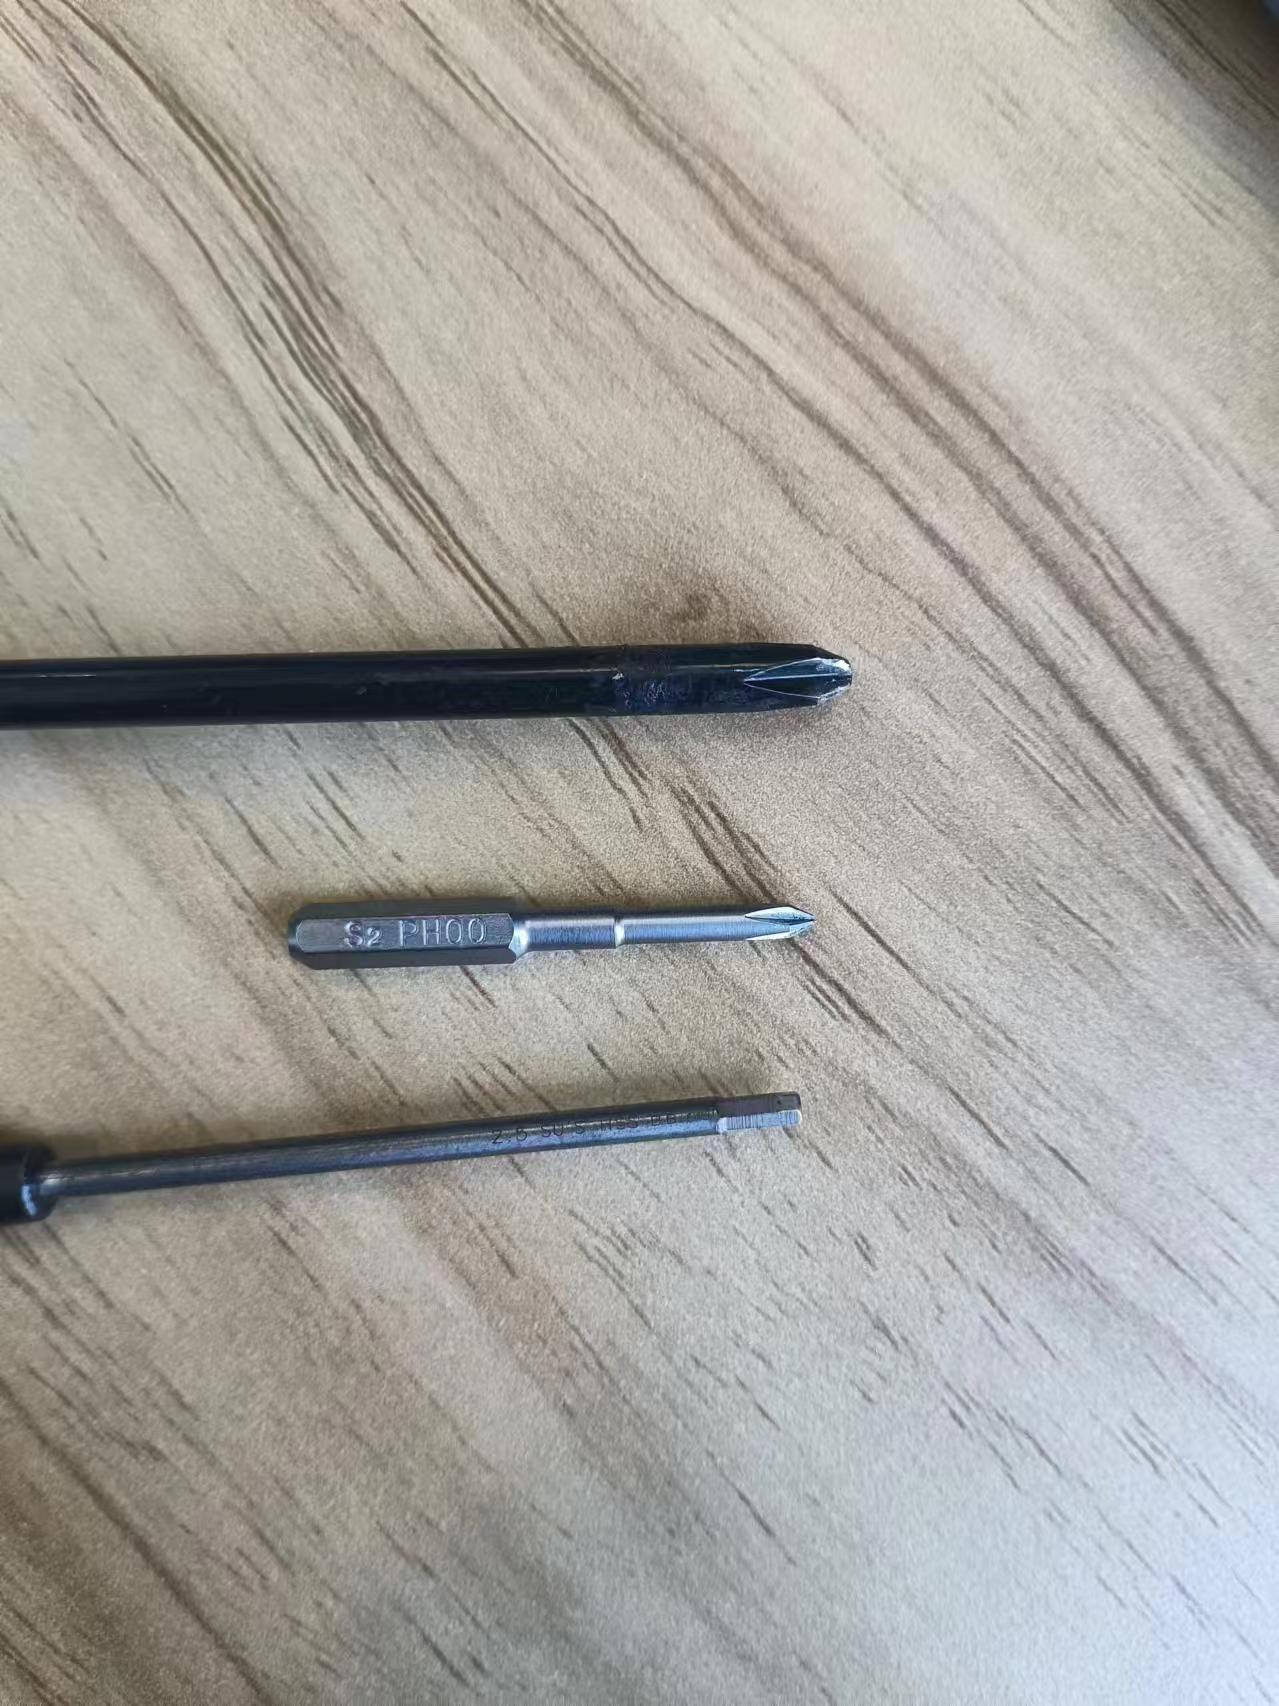
Different types of screwdrivers
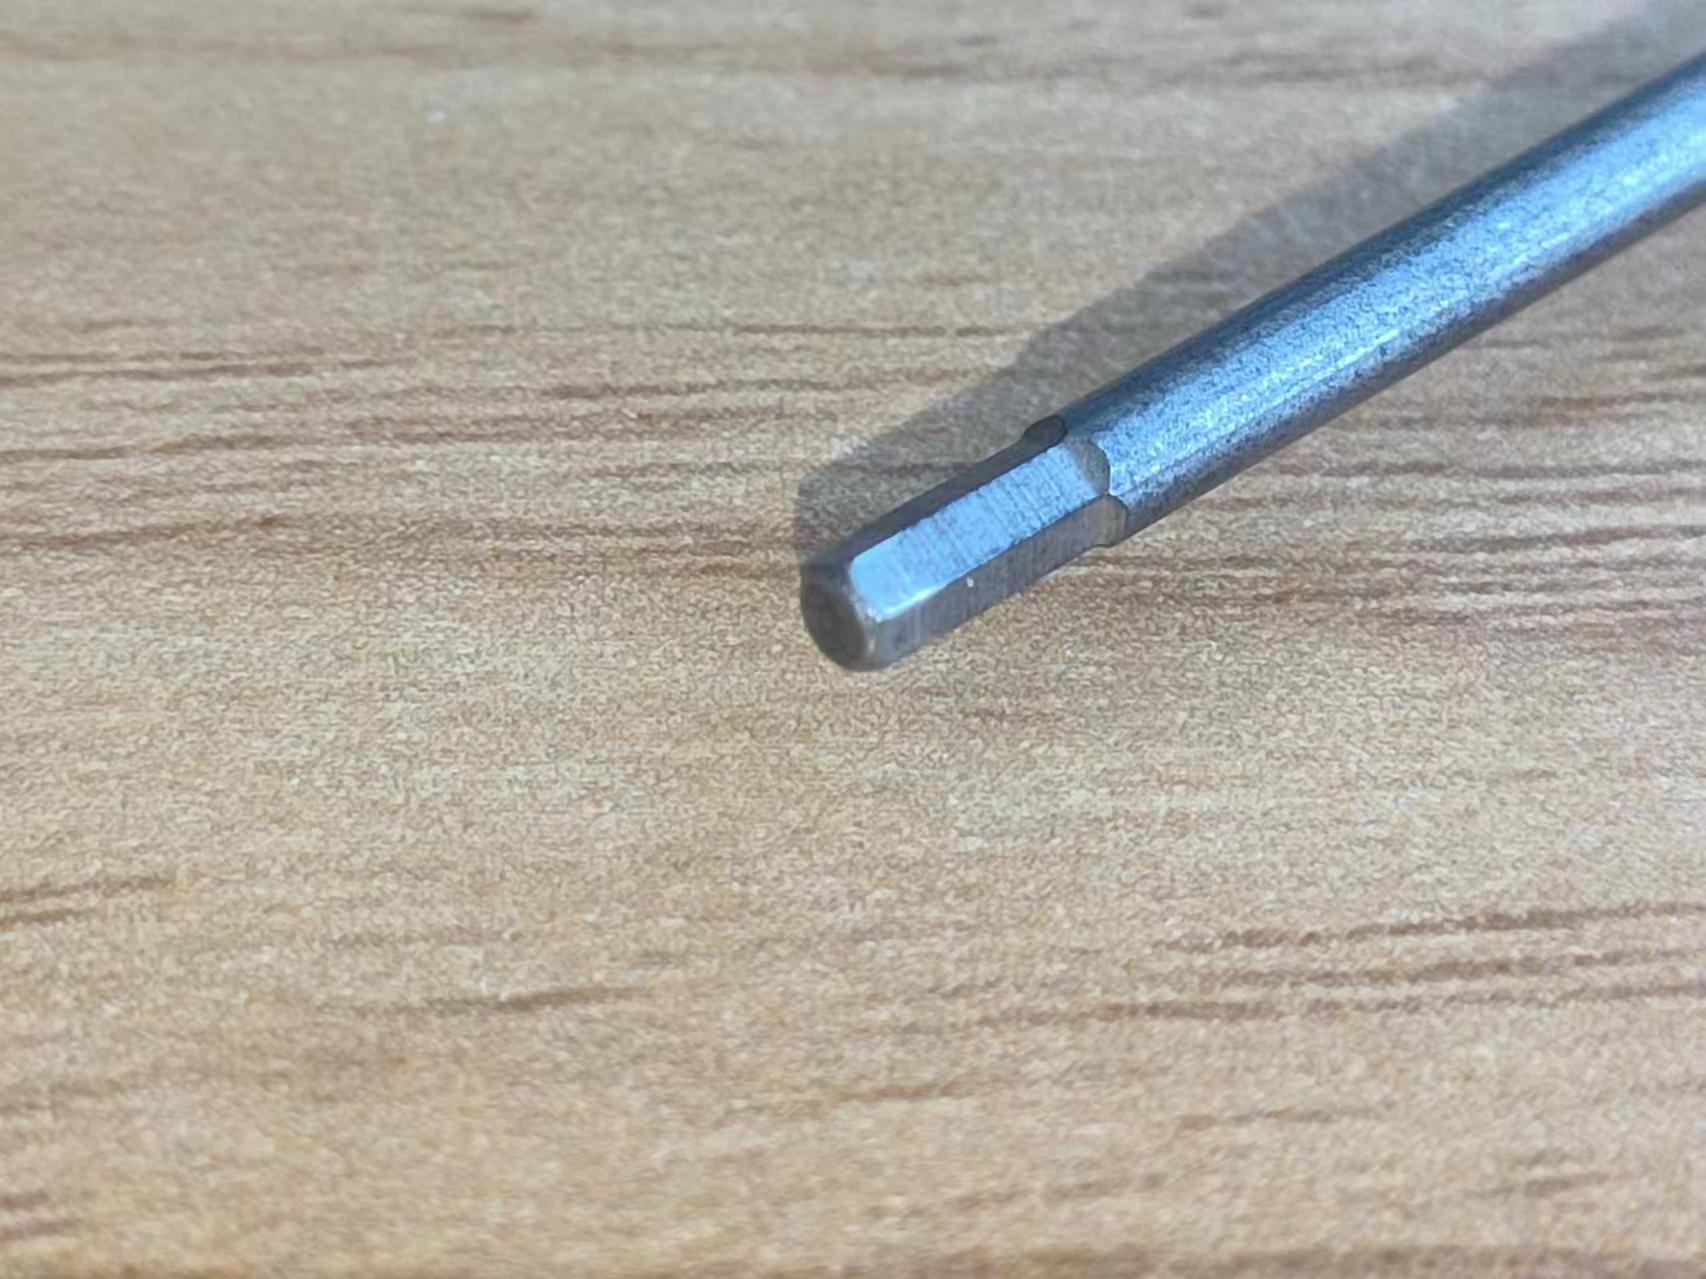
The screwdrivers you need are:
- 2.0mm diameter hexagon screwdriver
- 3.0mm diameter cross screwdriver
- 2.0mm diameter cross screwdriver
(Save the screws at each step to avoid losing them)
Step
Power off
- Unplug the power cord
Before disassembling the device, make sure it is completely turned off and remove all devices on the interface.
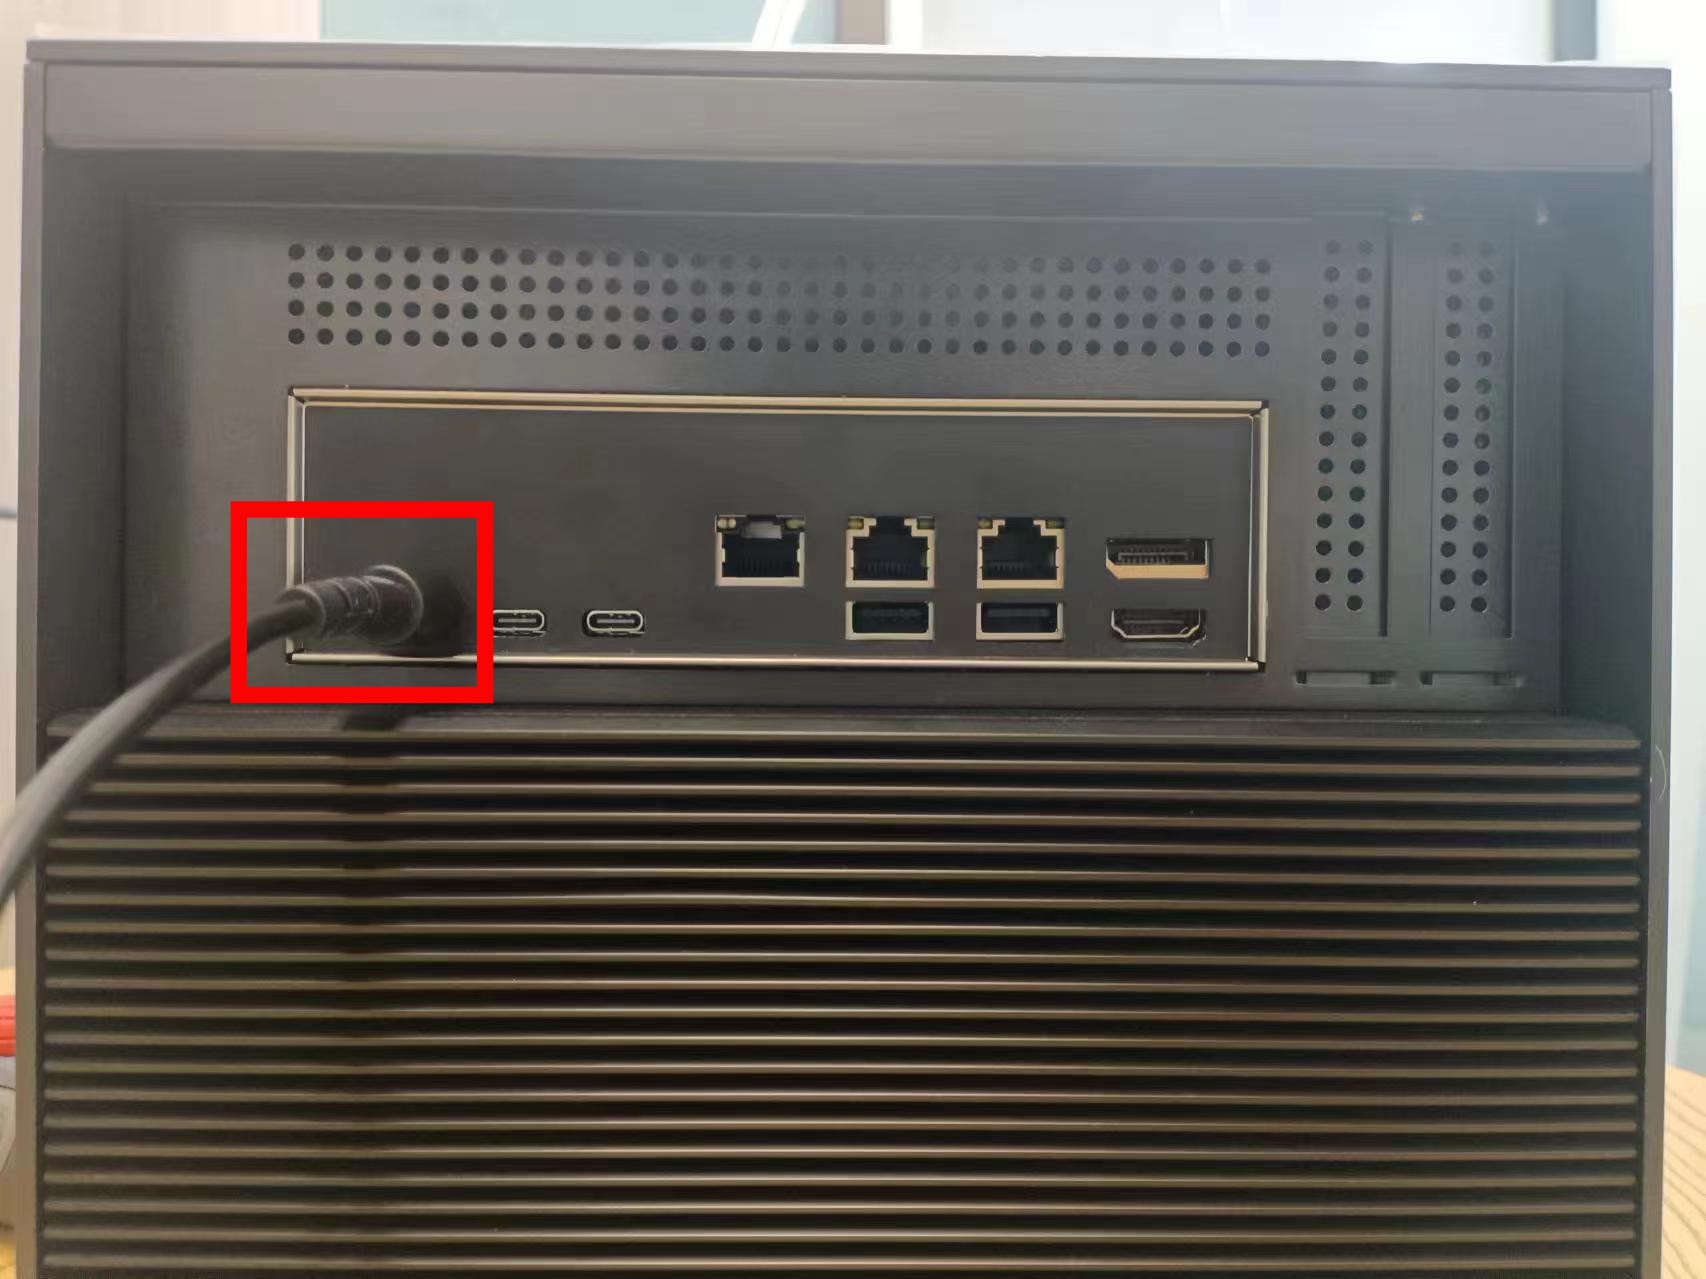
Disassembly of the upper part of the machine
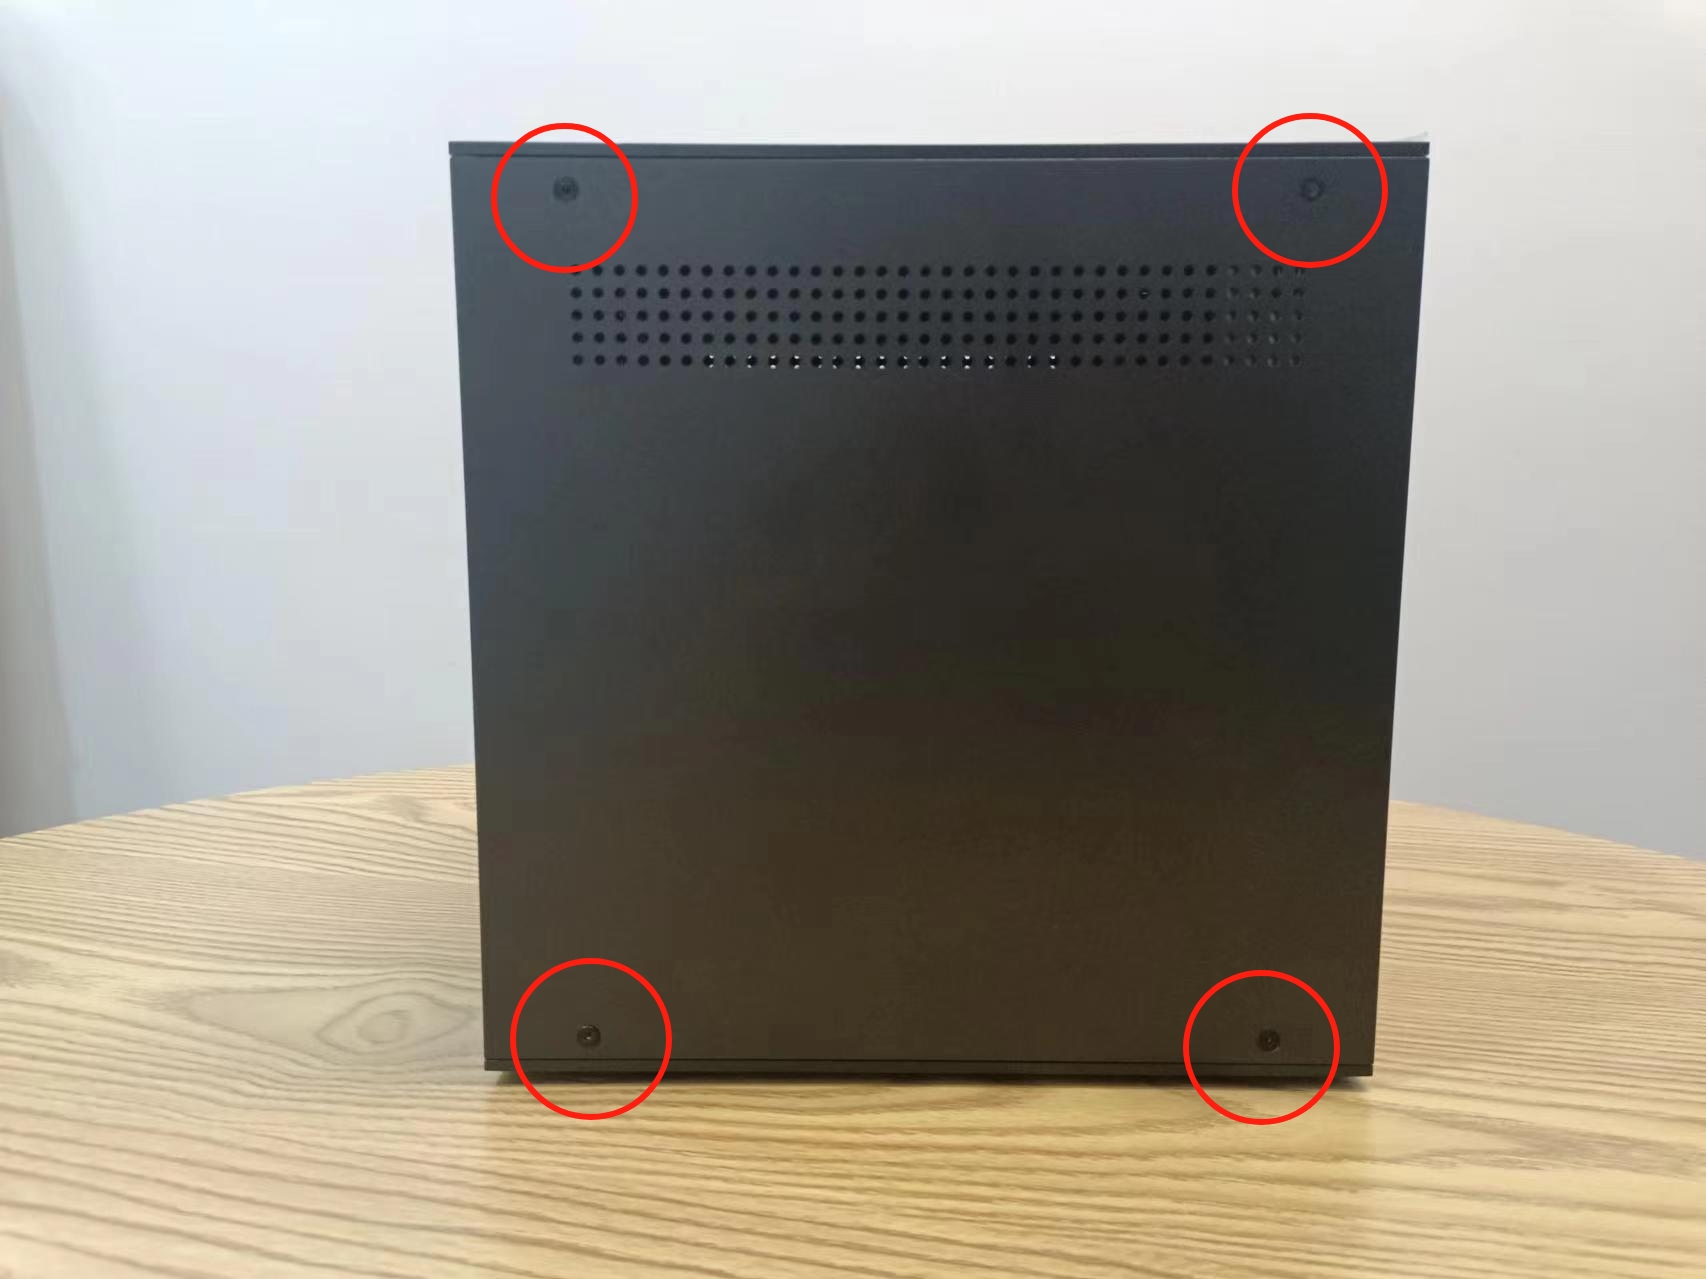
Disassembly of the top cover of the case
- Unscrew the circled area in the picture with screws, and do the same on the other side
- Lift the top cover along the edge
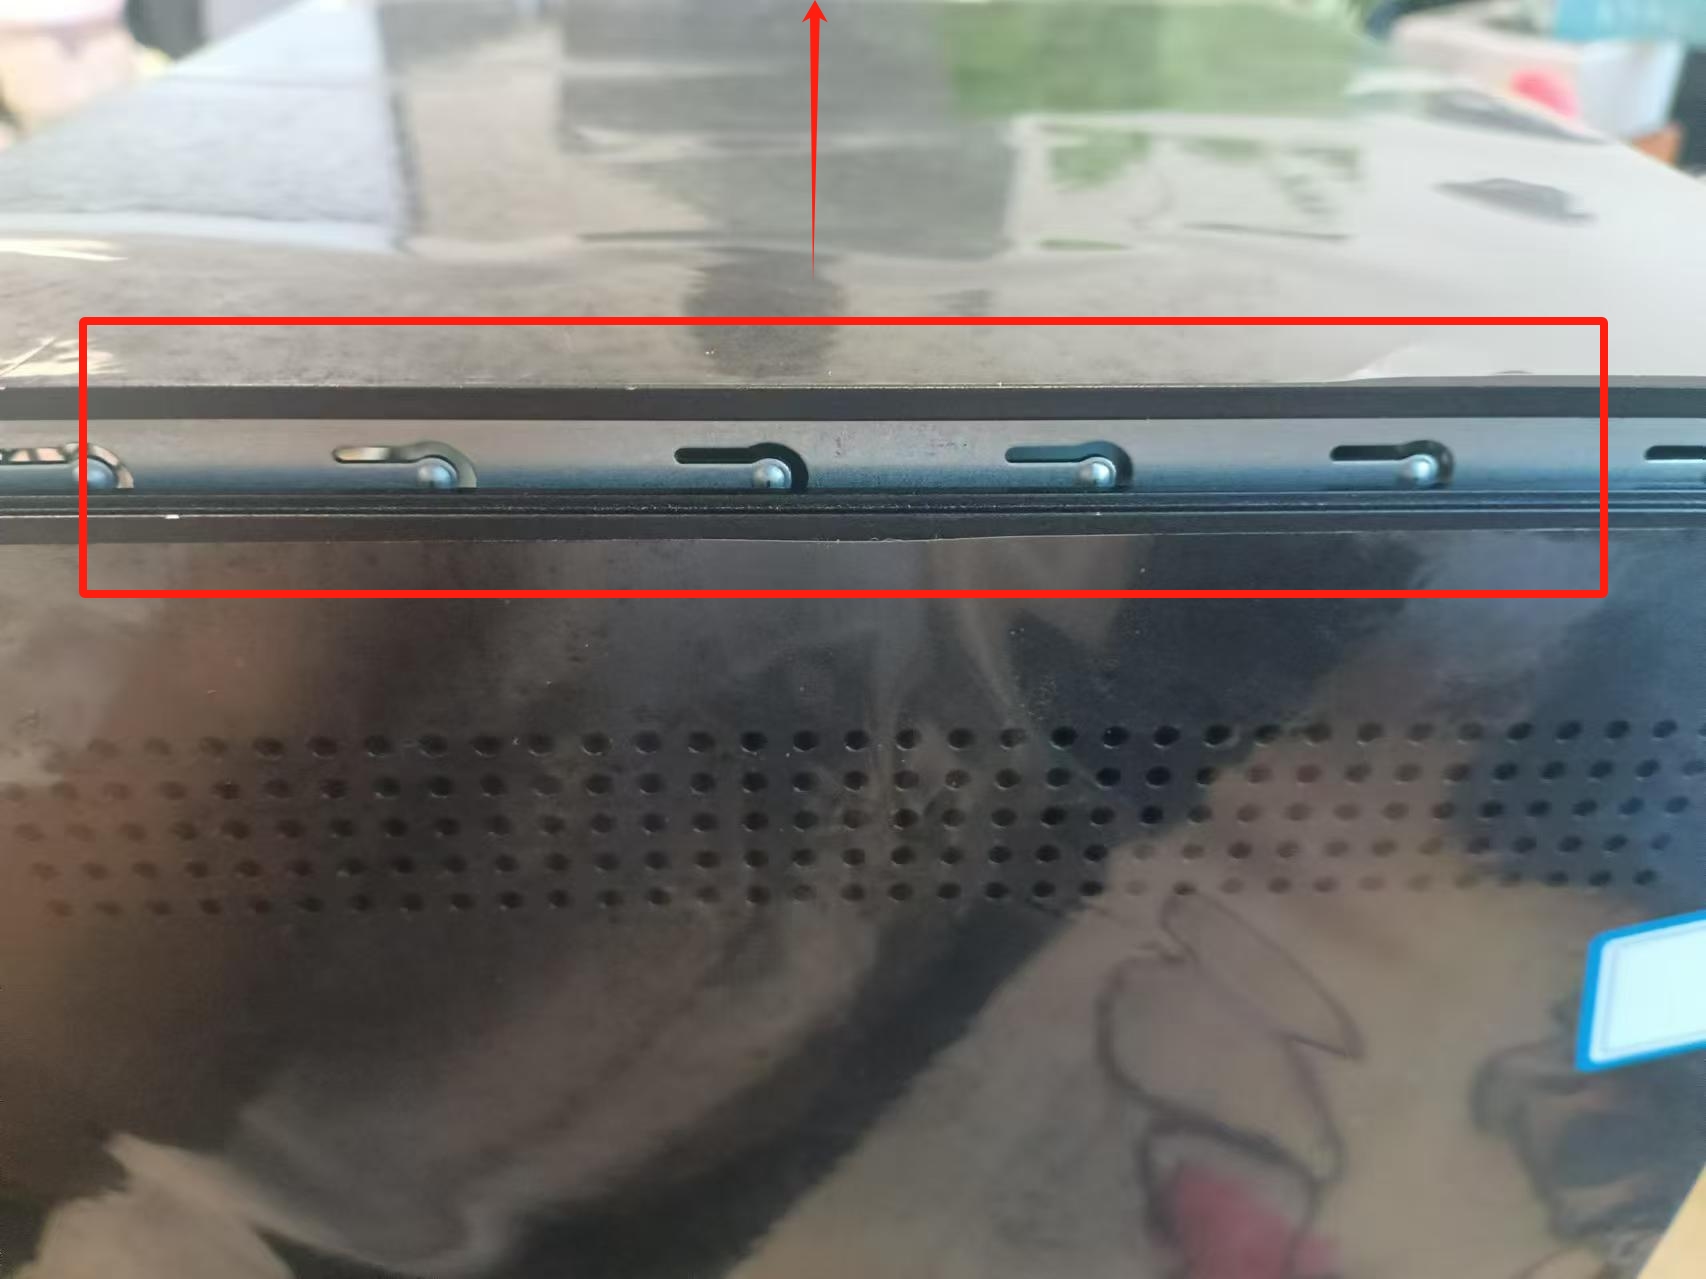
Disassembly of the side shell
- Push the side top cover upward to disengage the buckle and then remove it
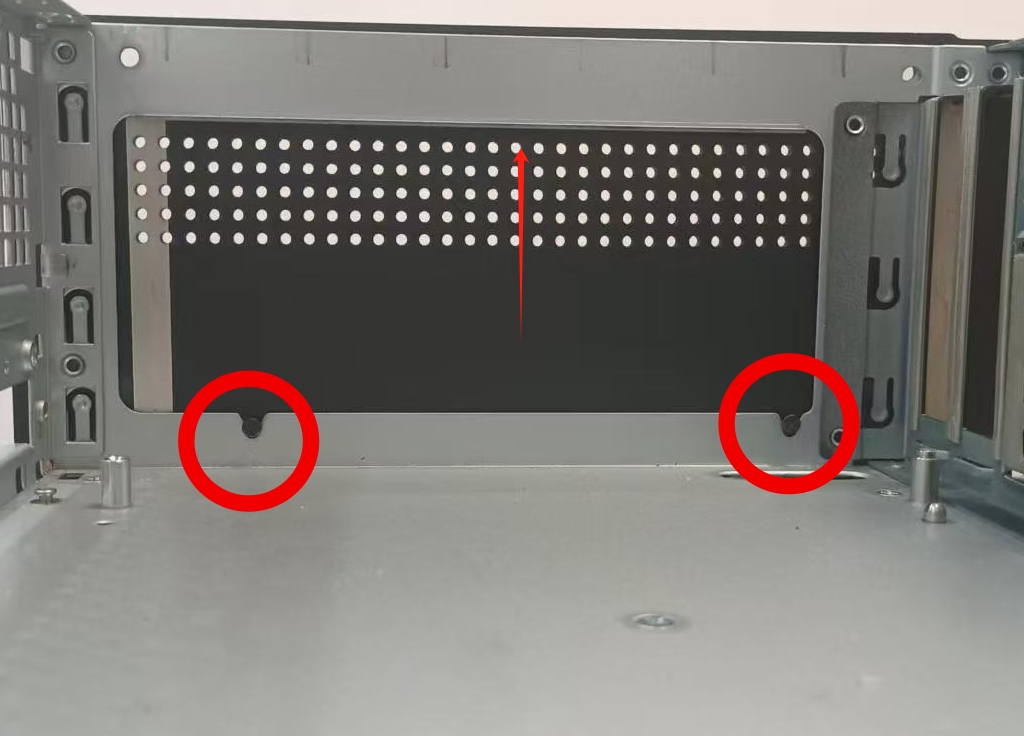
1. WiFi USB Disassembly
- Open the top cover Disassembly Tutorial
- Unplug the WiFi USB on the motherboard
WiFi USB replacement
Plug in the replacement USB
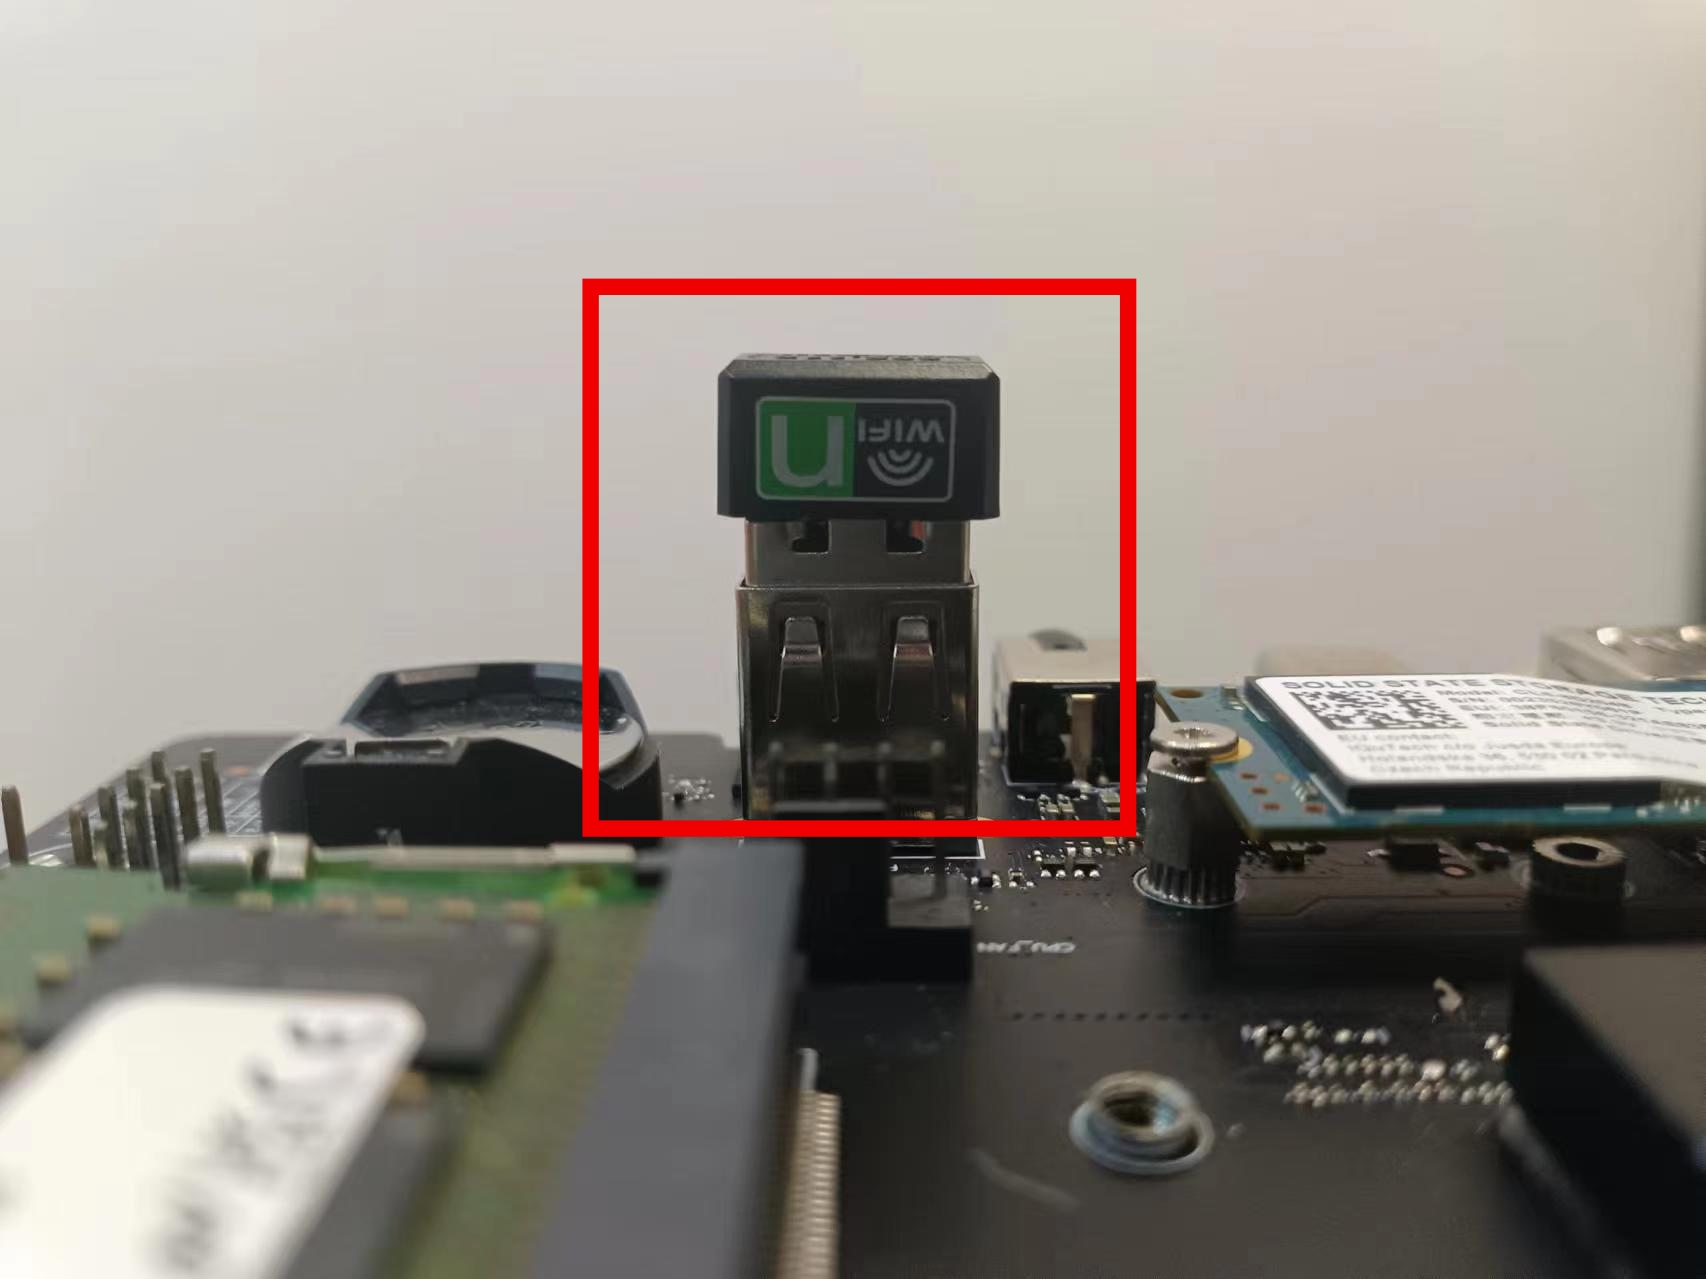
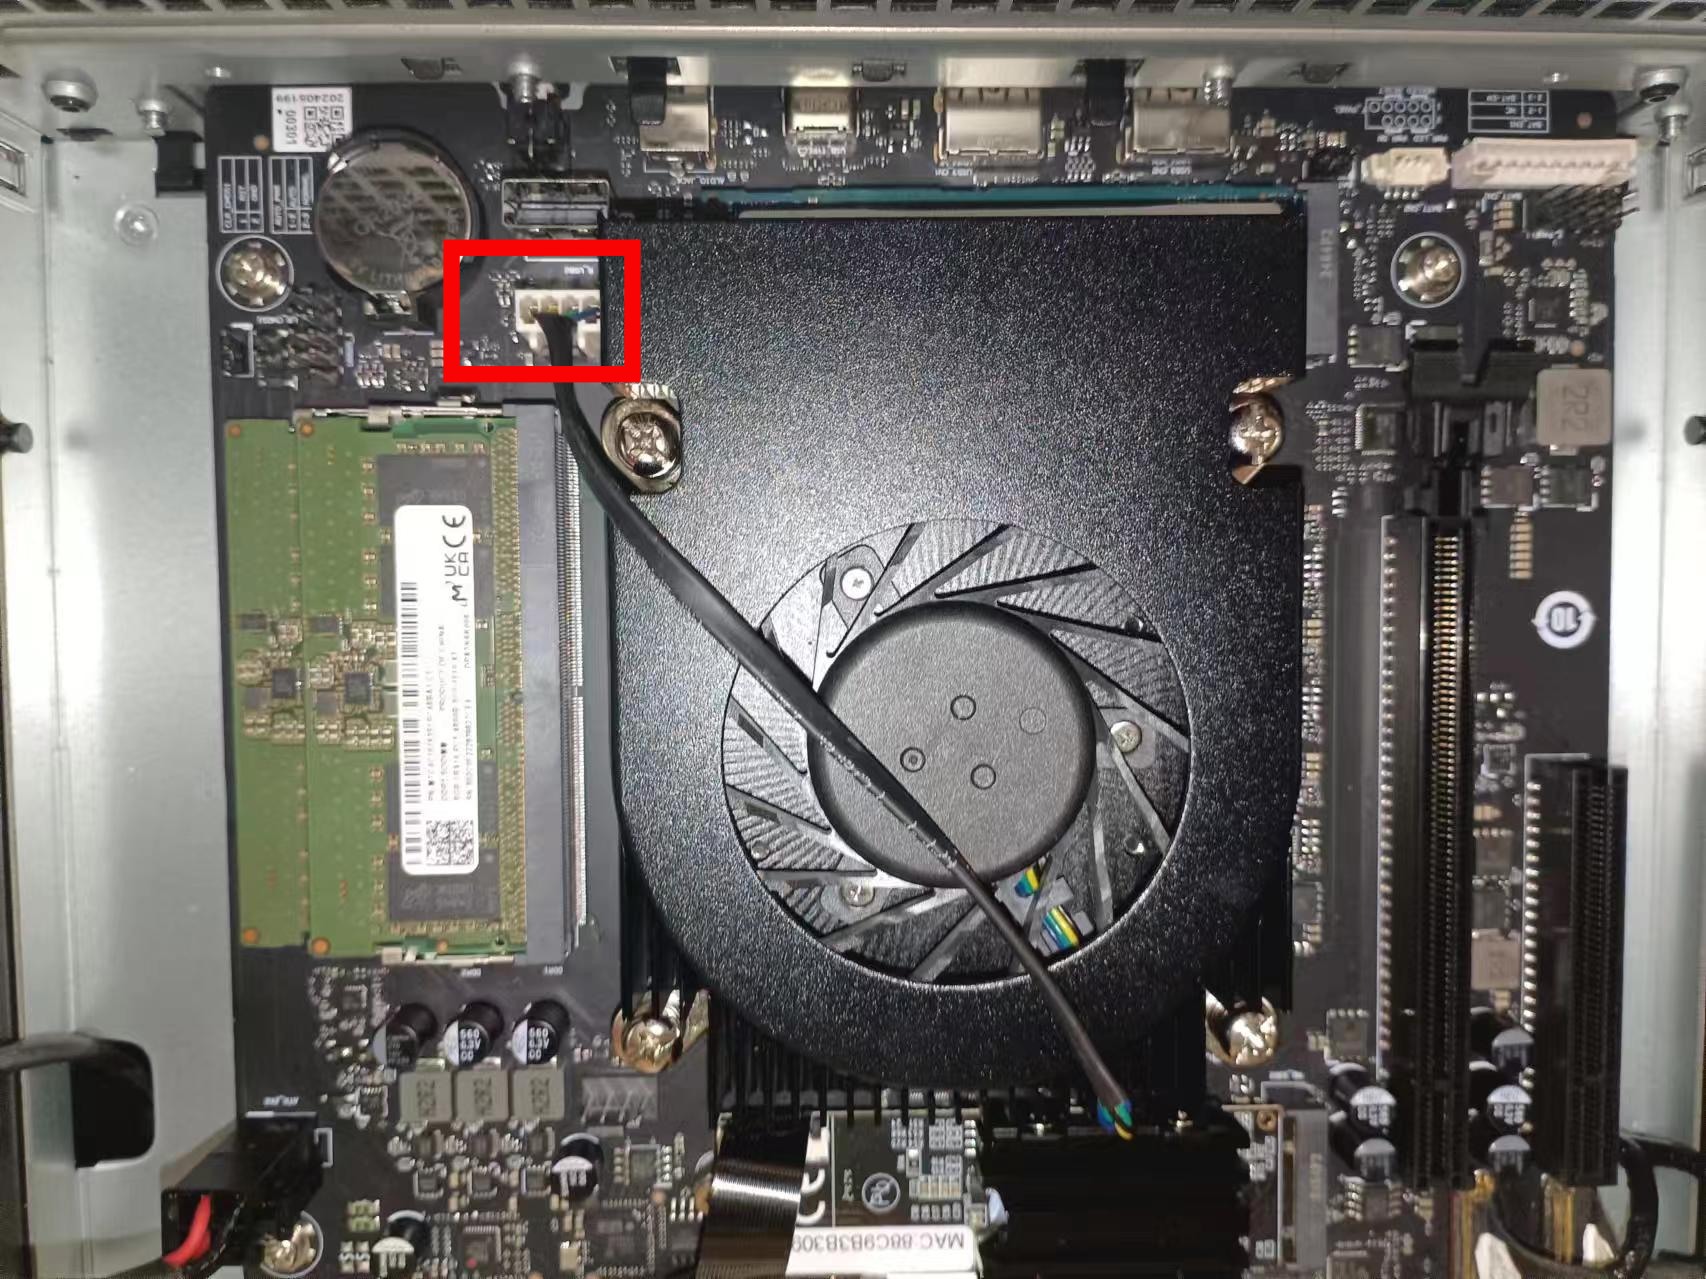
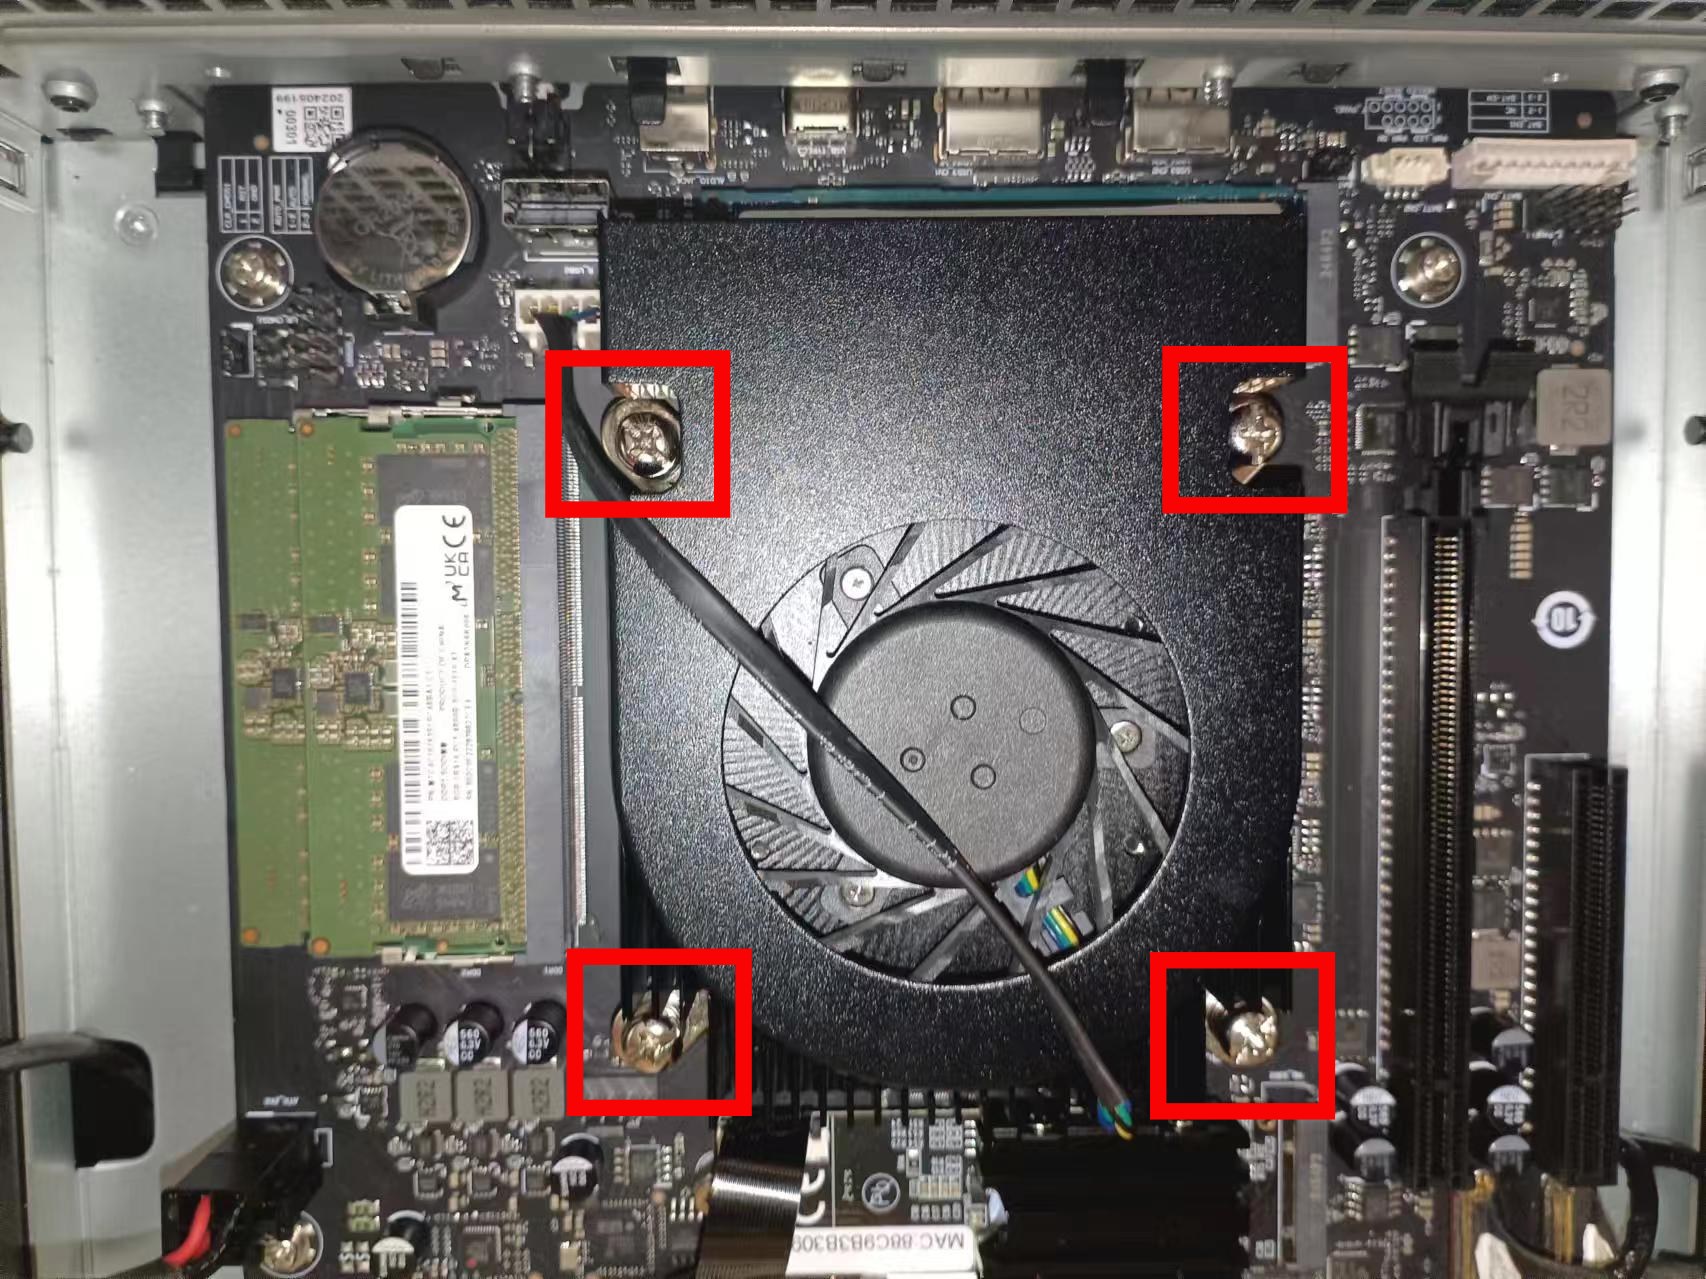
2. CPU cooling fan disassembly
- Open the back cover Disassembly Tutorial
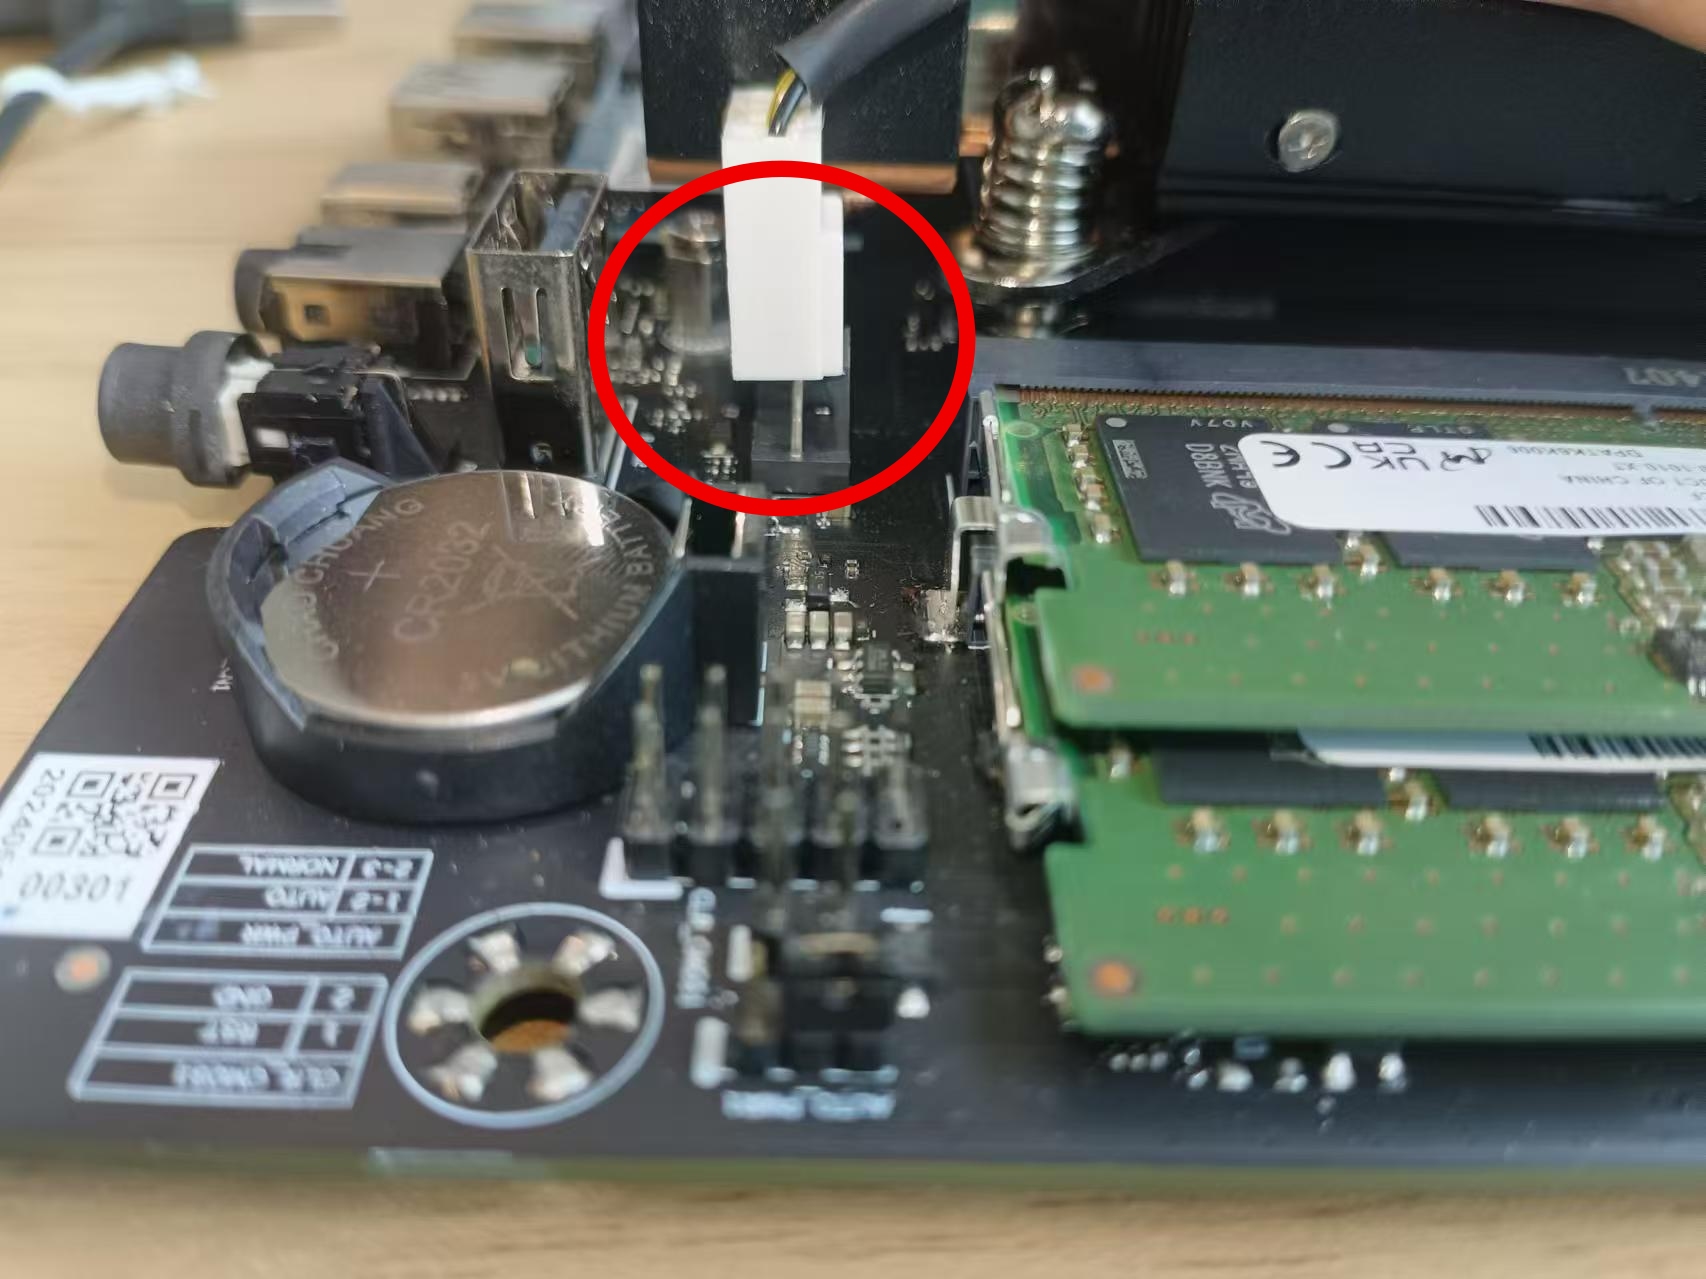
- Unplug the power supply of the fan
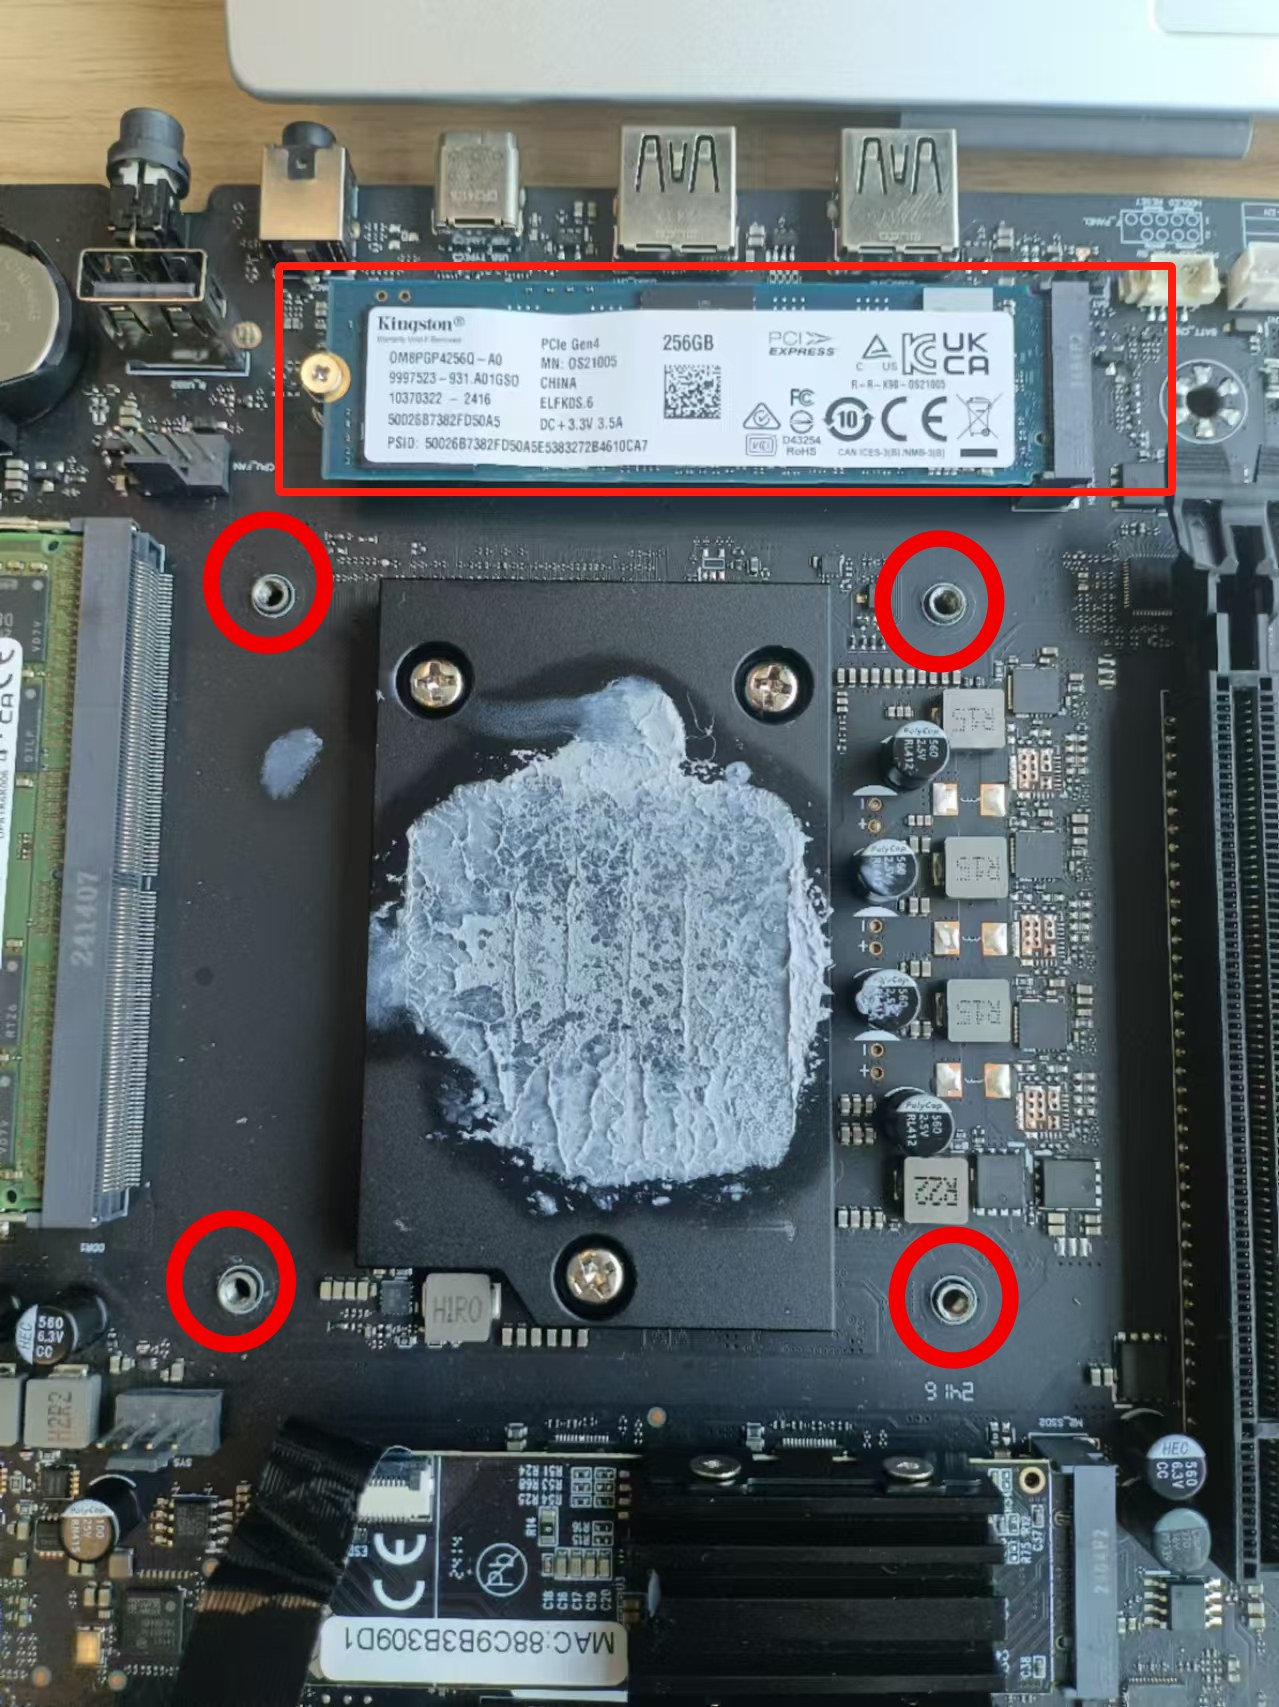
- Then unscrew the screws at the four corners
- At this time, the cooling fan can be taken out
 |
 |
|---|
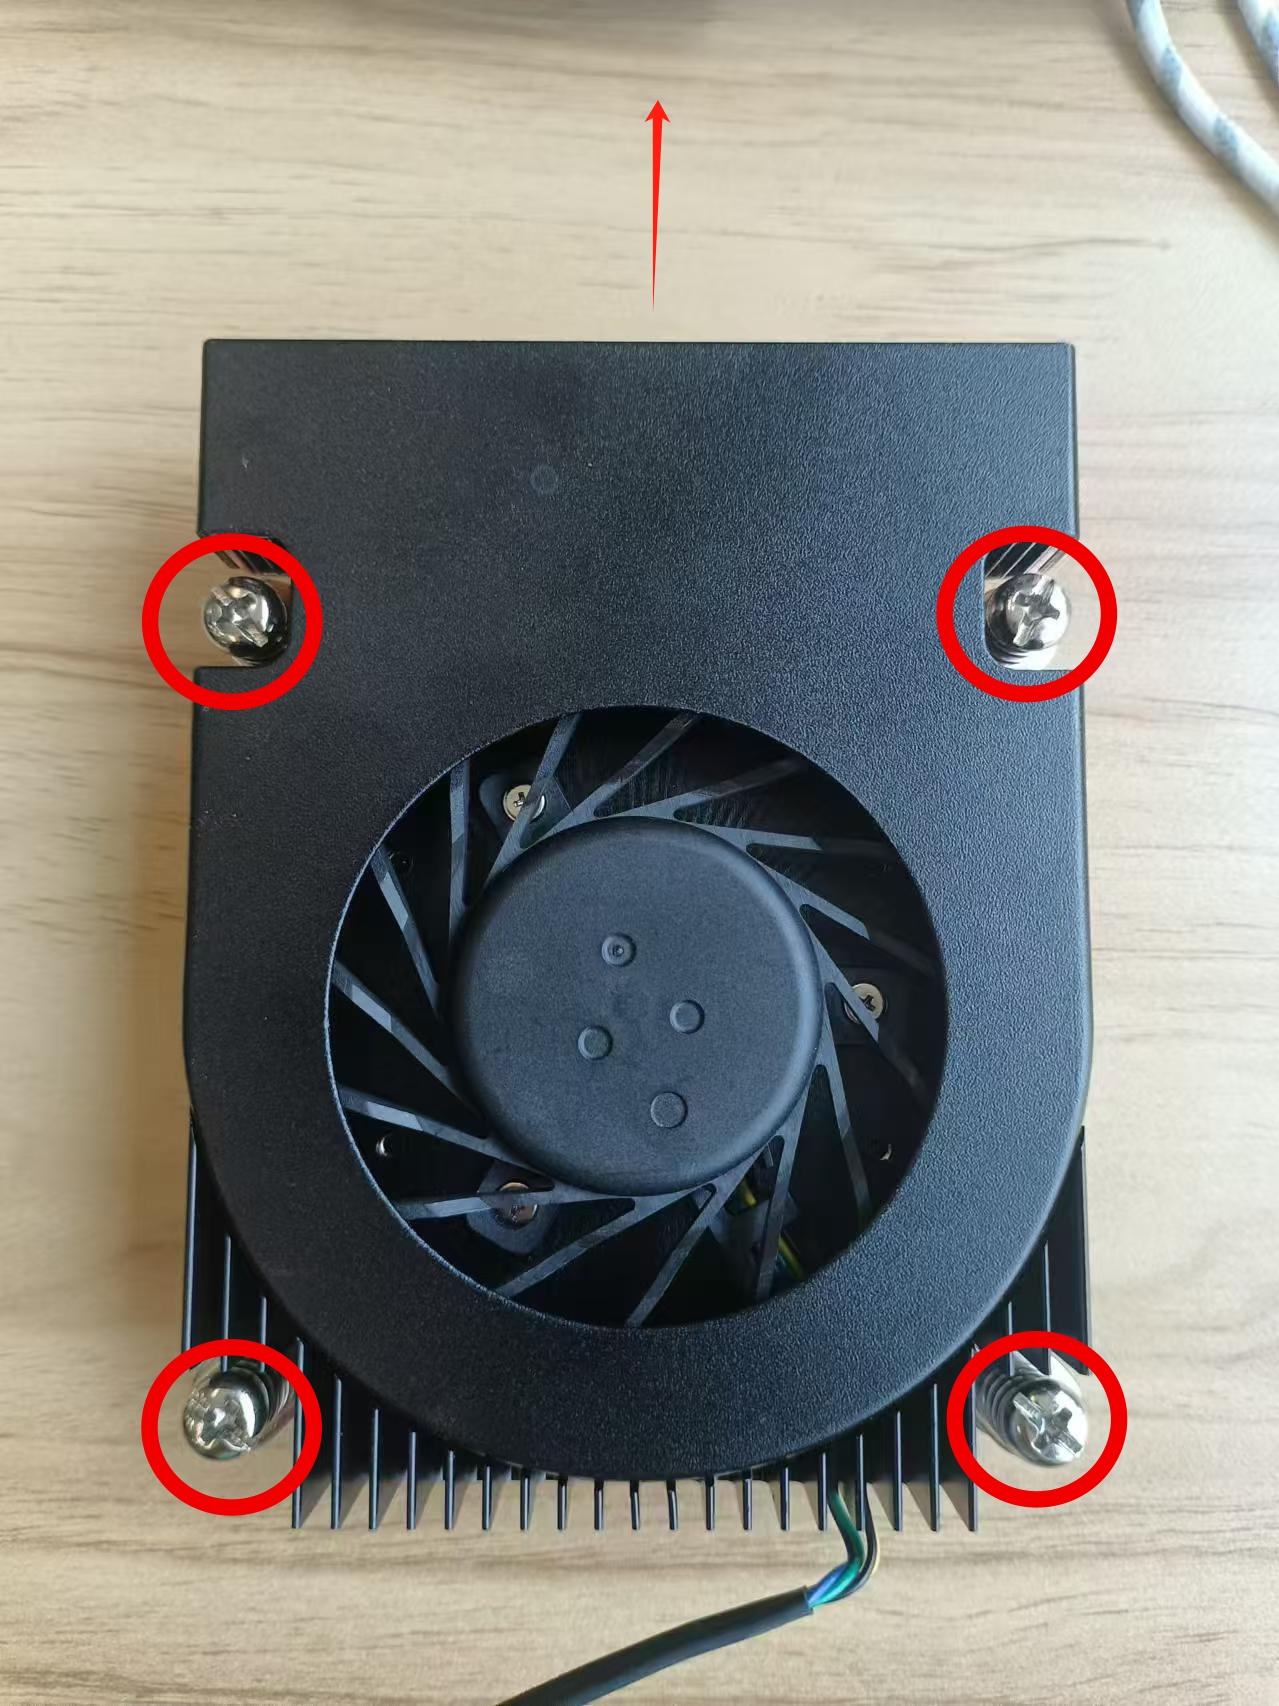
Replace fan
- Align the four screws on the fan to be replaced with the four screw holes on the motherboard, and place the air outlet towards the system disk (in the middle picture box).
Note: tighten the screws on the four sides in turn, otherwise it will lift up
 |
 |
|---|
- Plug the fan power supply into the power socket
3. Memory removal
- Removing the top cover Disassembly Tutorial
- Removing the fan Disassembly Tutorial
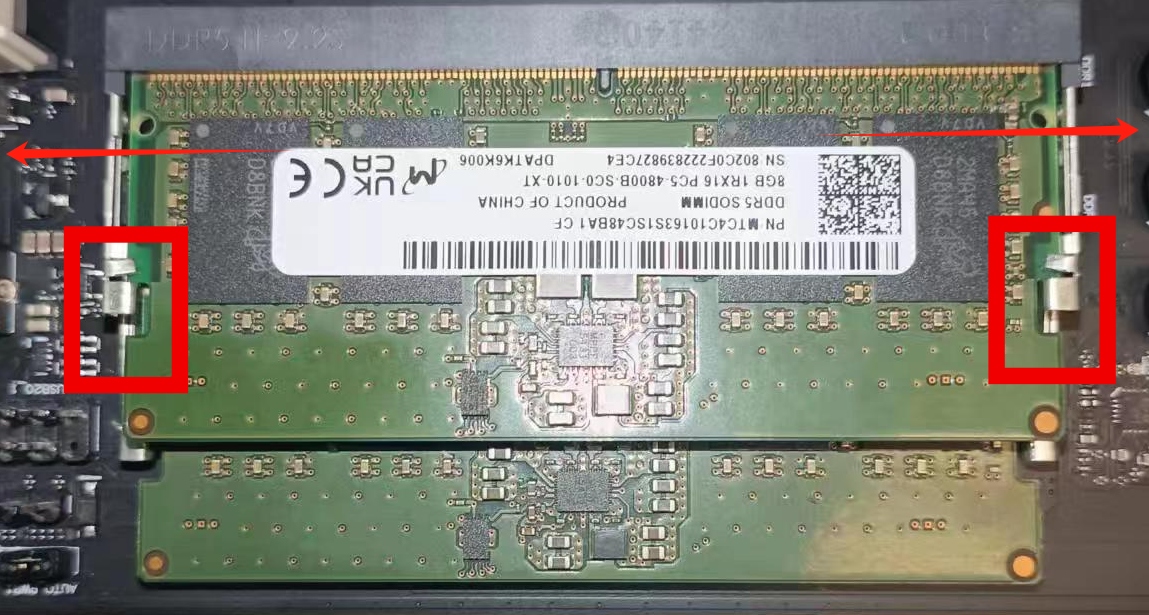
- Pry open the locks on both sides
- The memory stick pops up automatically
- Take out the memory diagonally
- Second block synchronous operation
Replace the memory stick
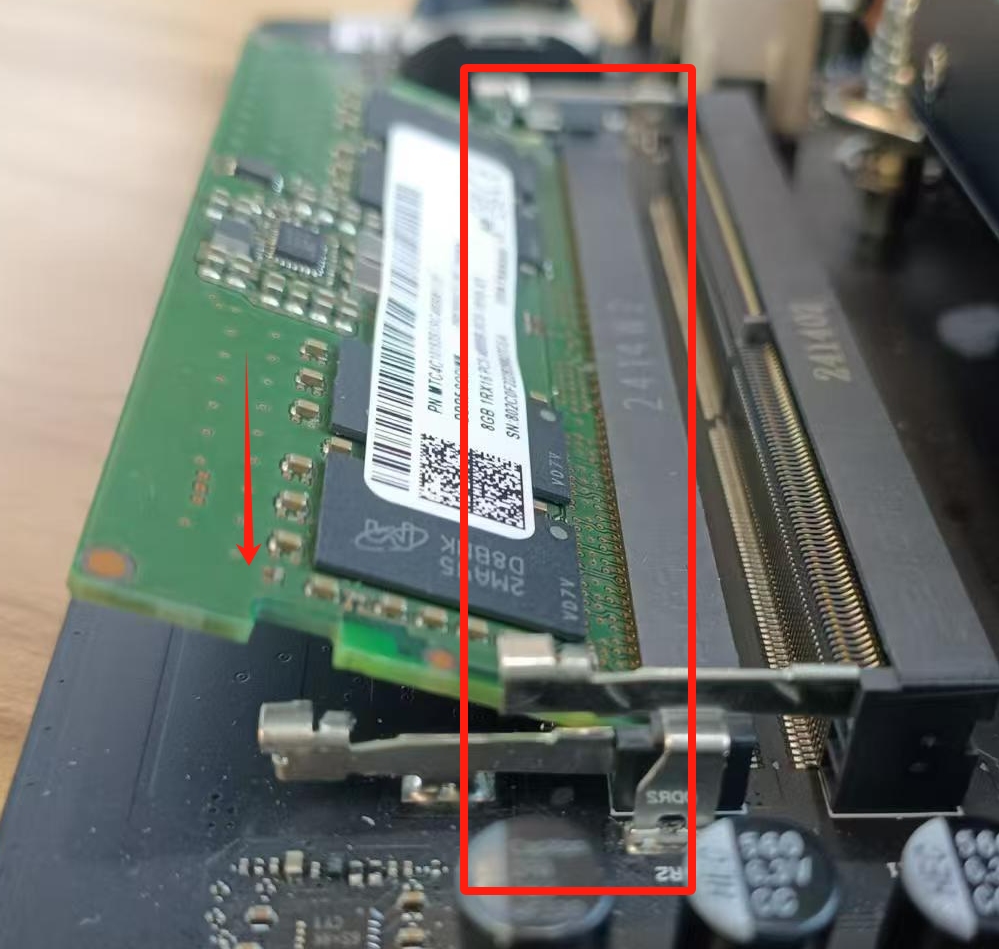
Replace the memory stick
Insert the memory stick diagonally and press down (installation is completed with a click)
Synchronize the second block with this operation
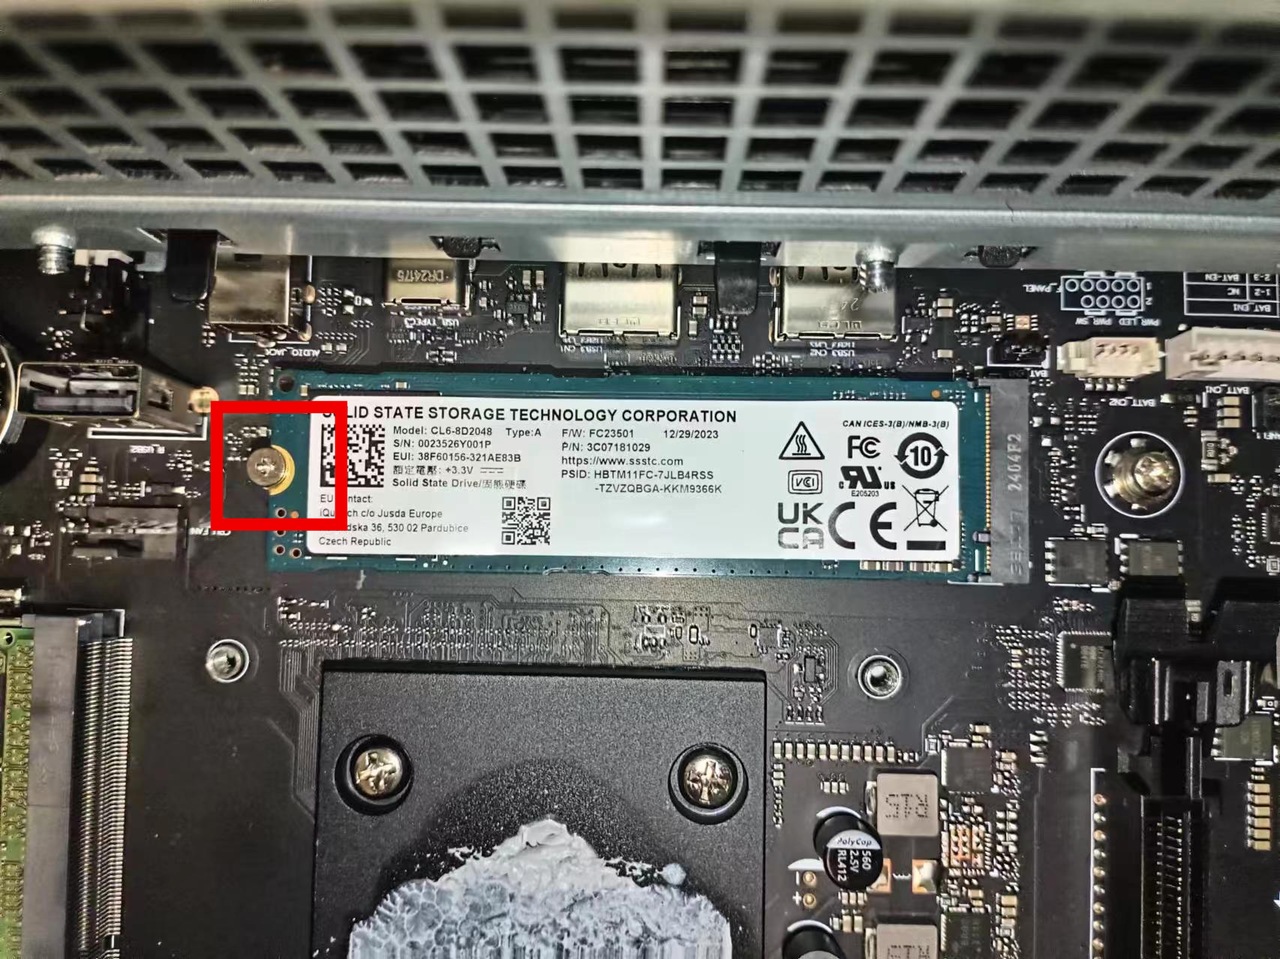
4. Remove the hard disk
Front: Remove the top cover Disassembly Tutorial
- Use a screwdriver to unscrew the fixing screws in the red circle
- Lift the hard disk
- Take out the hard disk diagonally upward
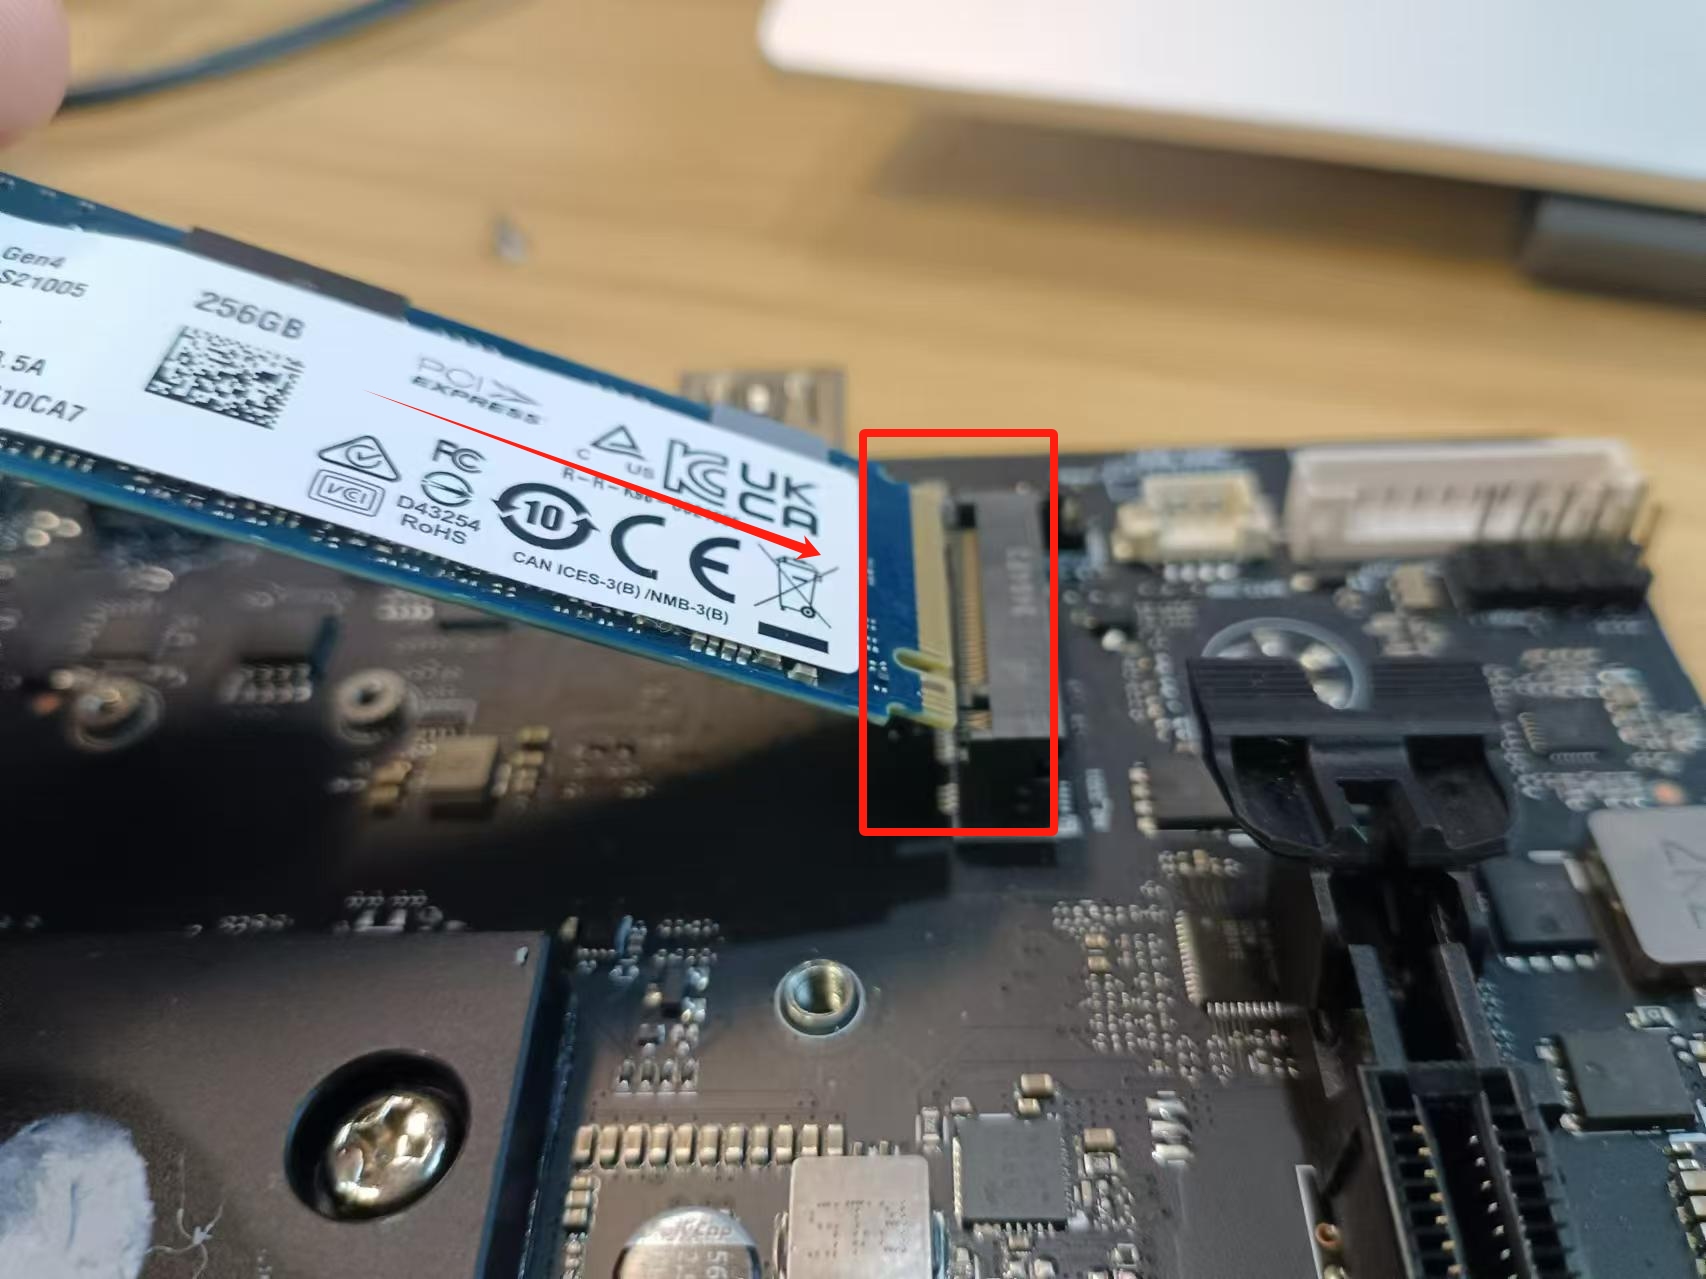
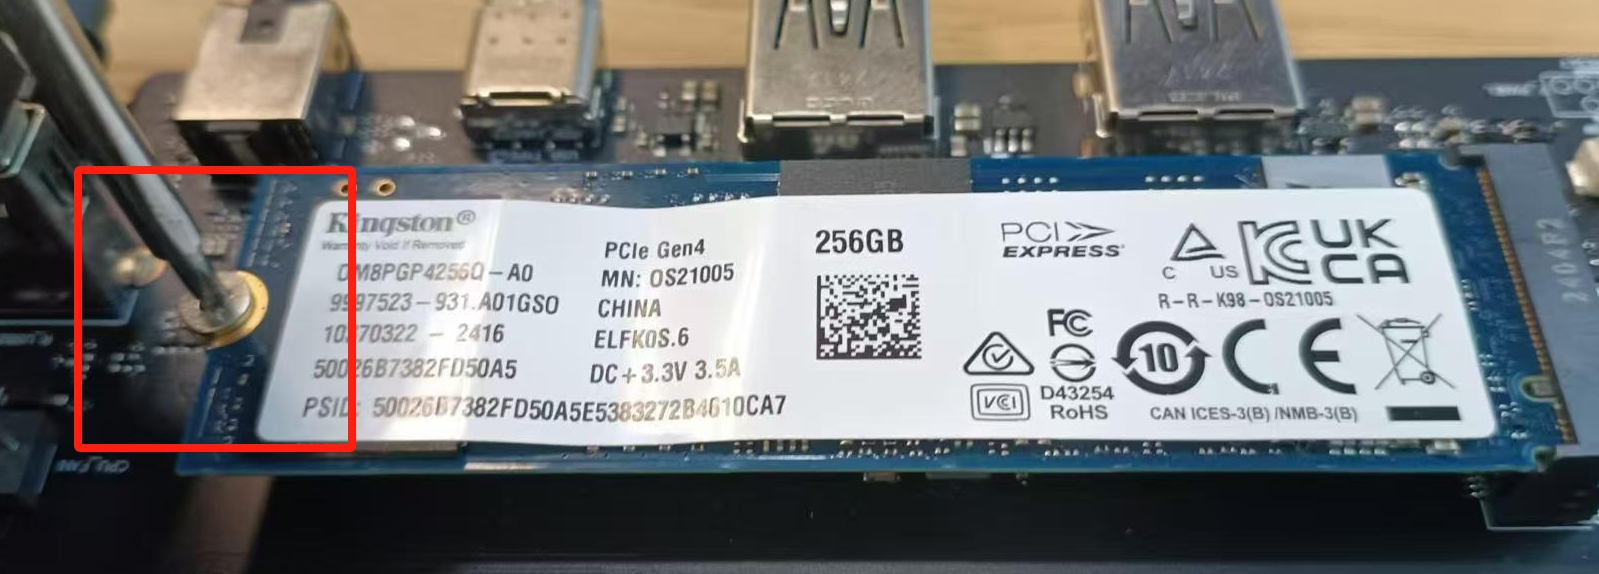
Replace hard drive
Insert the hard disk to be replaced diagonally downward at 30~45°, then lay the hard disk flat and tighten the screws
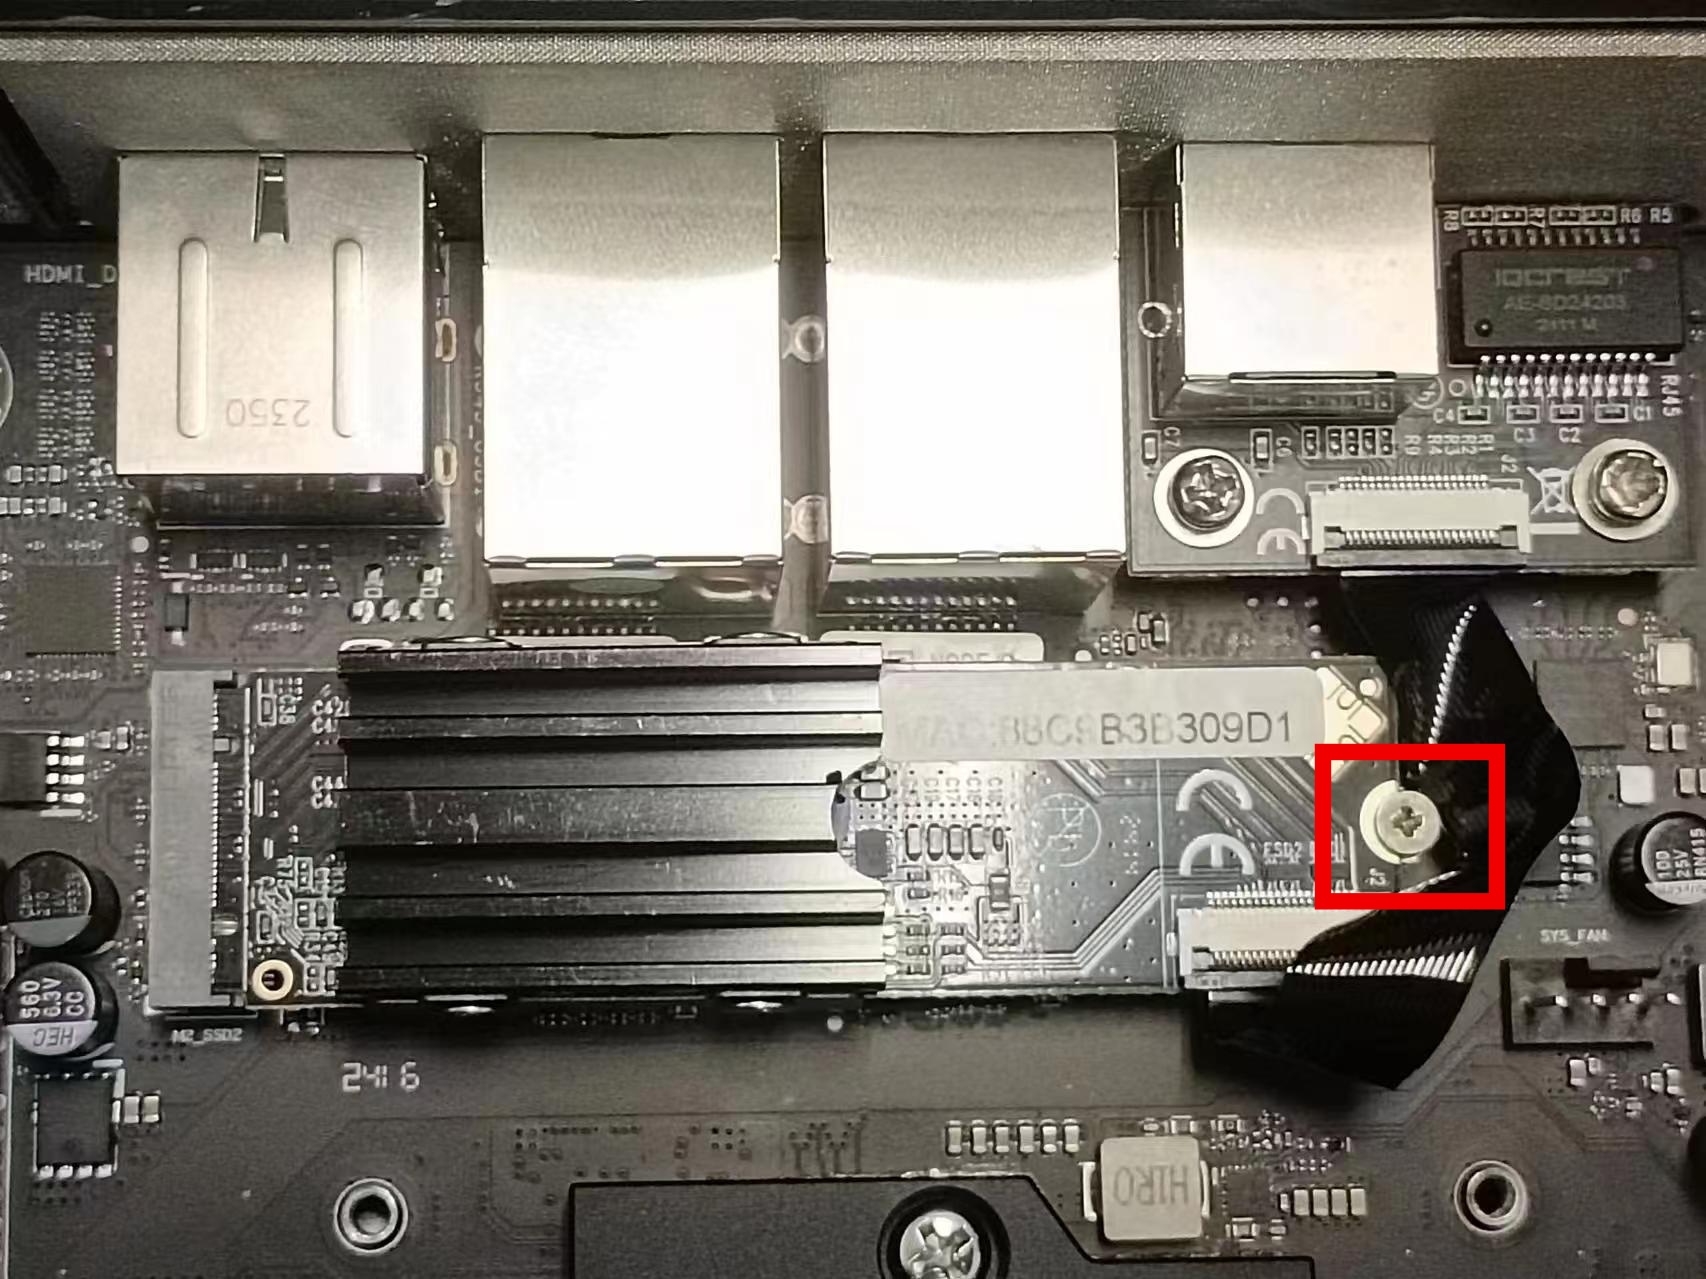
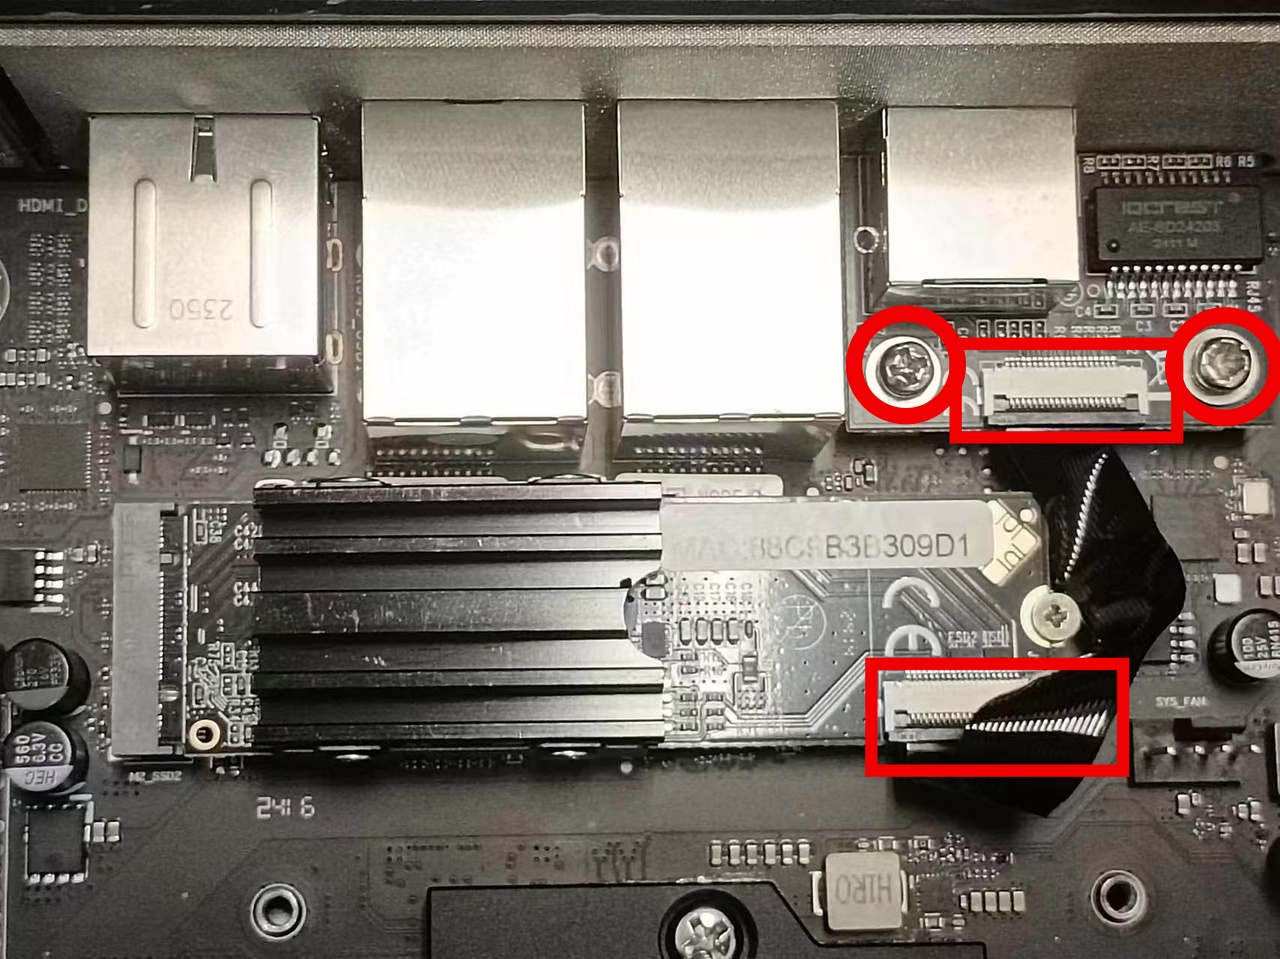
5. Disassemble the extended network card
- Front: Removing the top cover Disassembly Tutorial
- Unscrew the screws
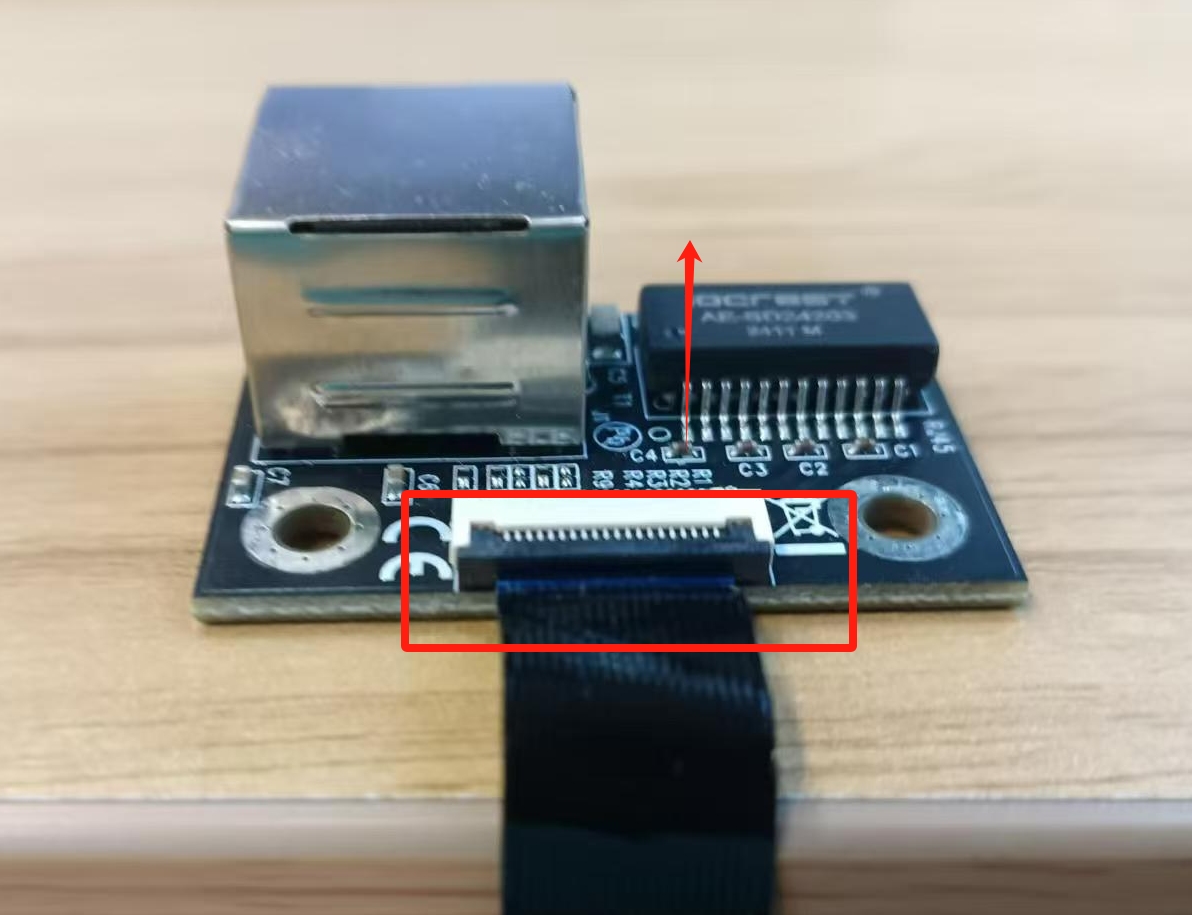
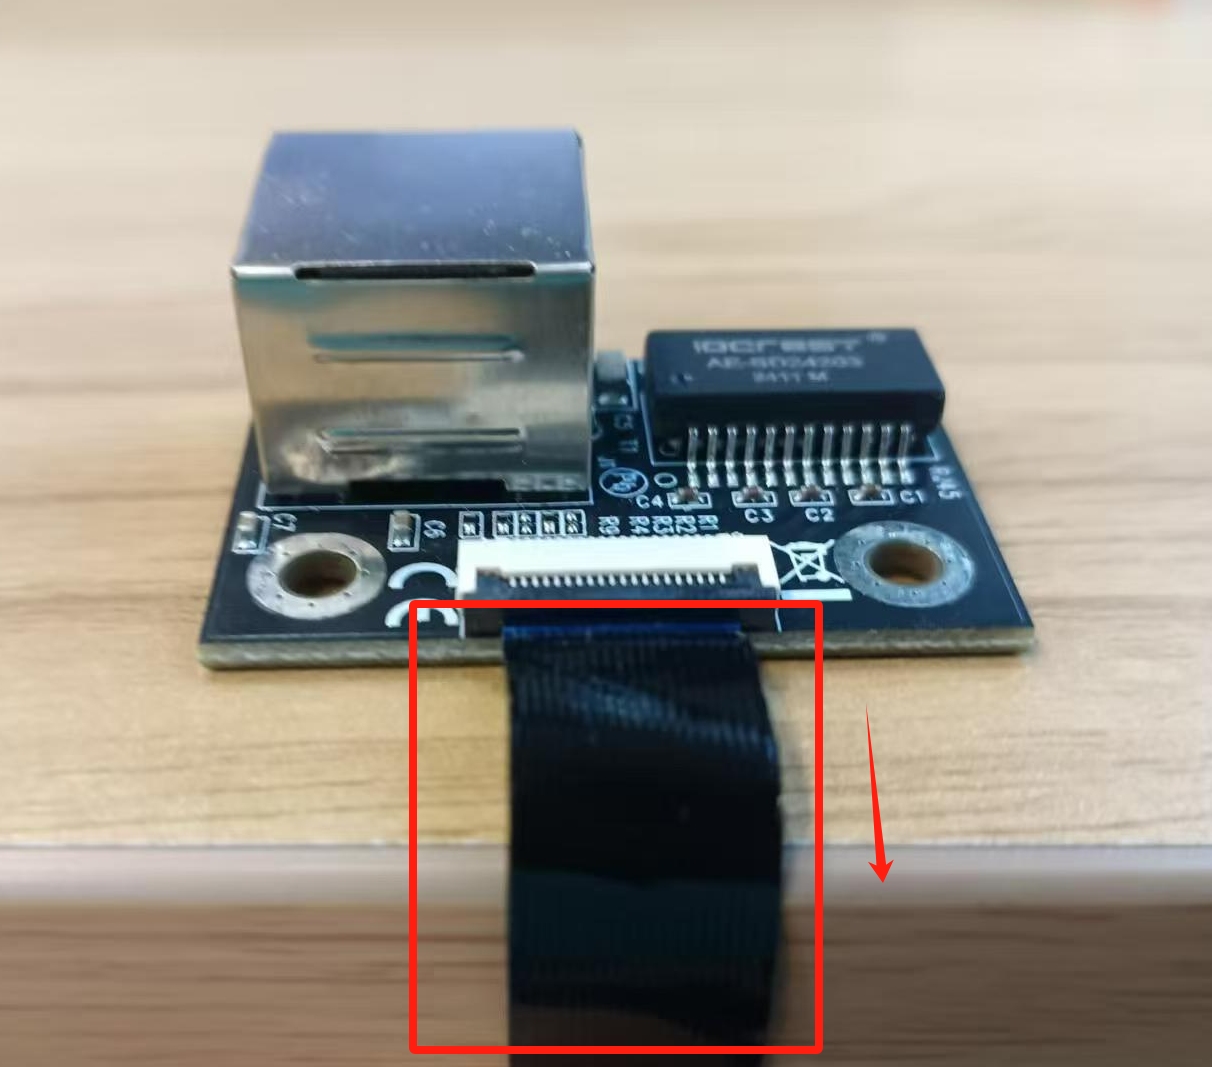
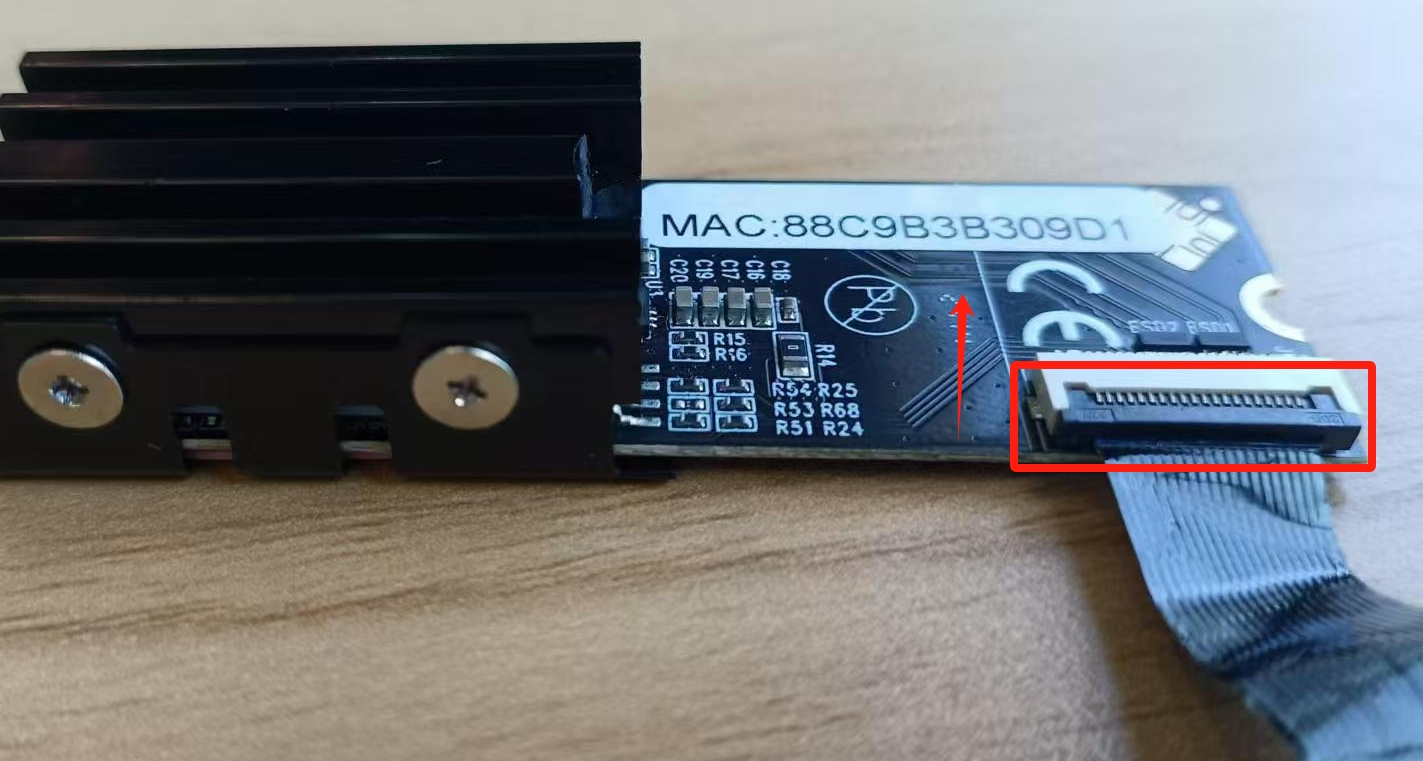
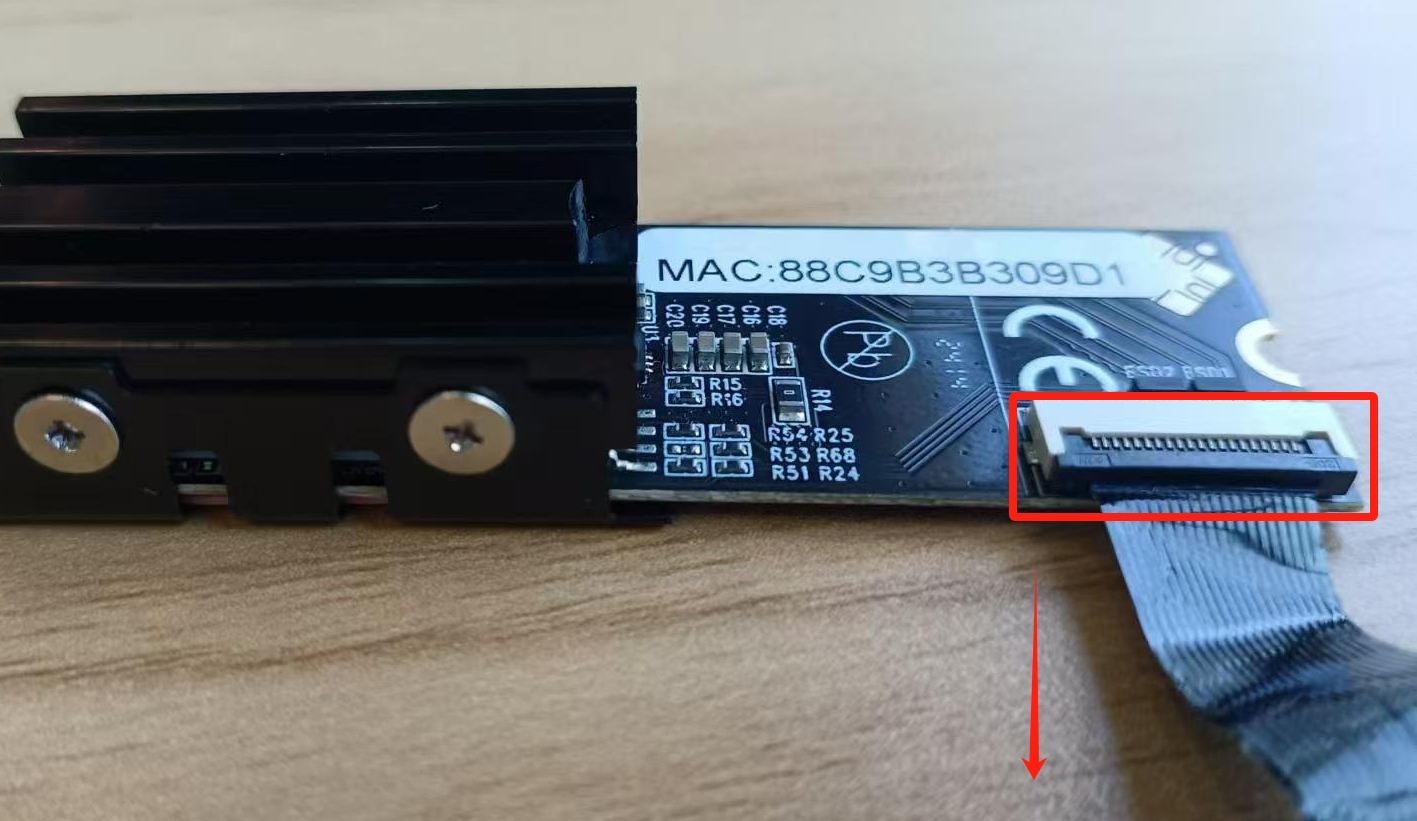
- Lift the black network card and pull it out
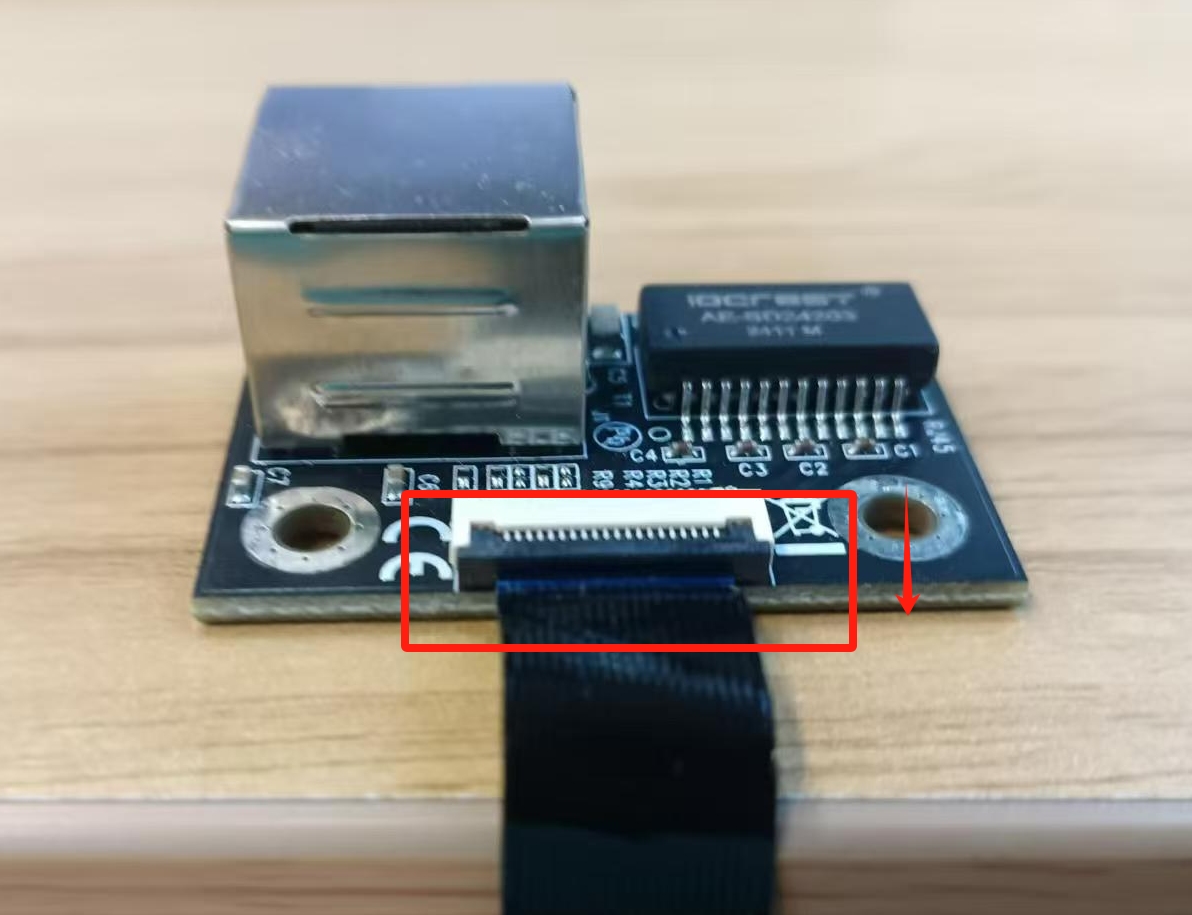
- Pull the two black buttons upwards to pull out the wires
 |
 |
|---|
 |
 |
|---|
 |
 |
|---|
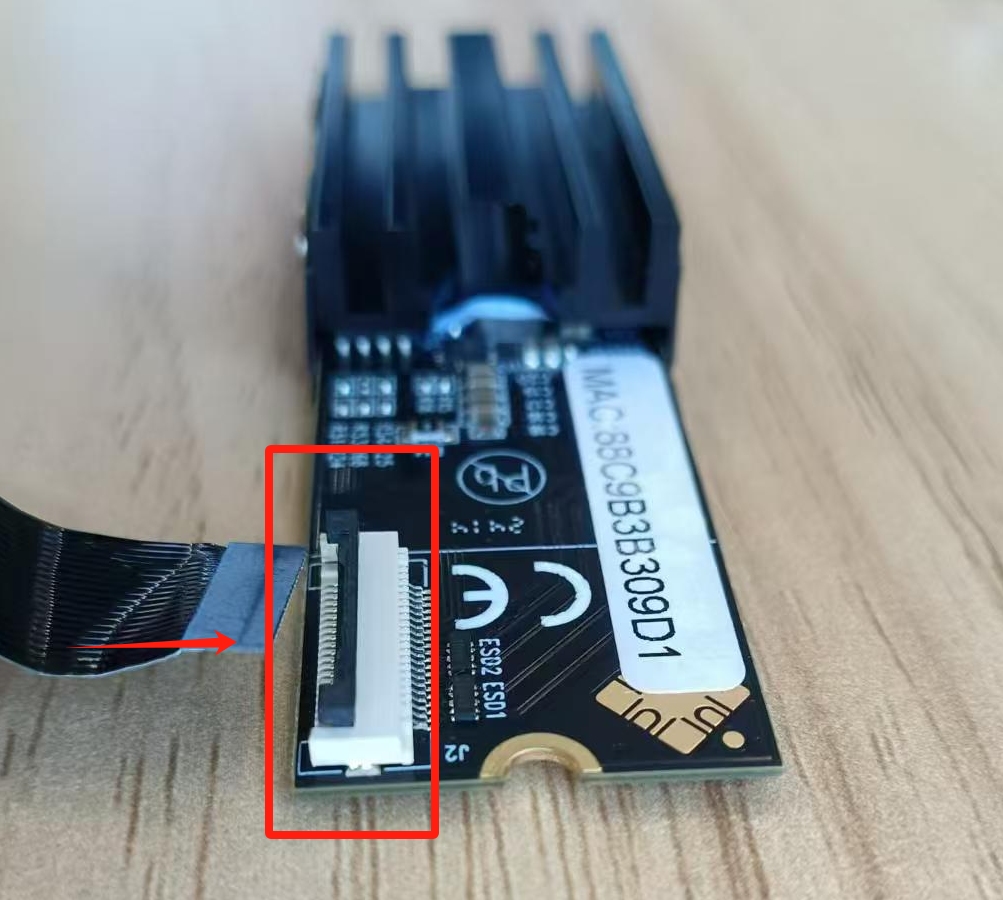
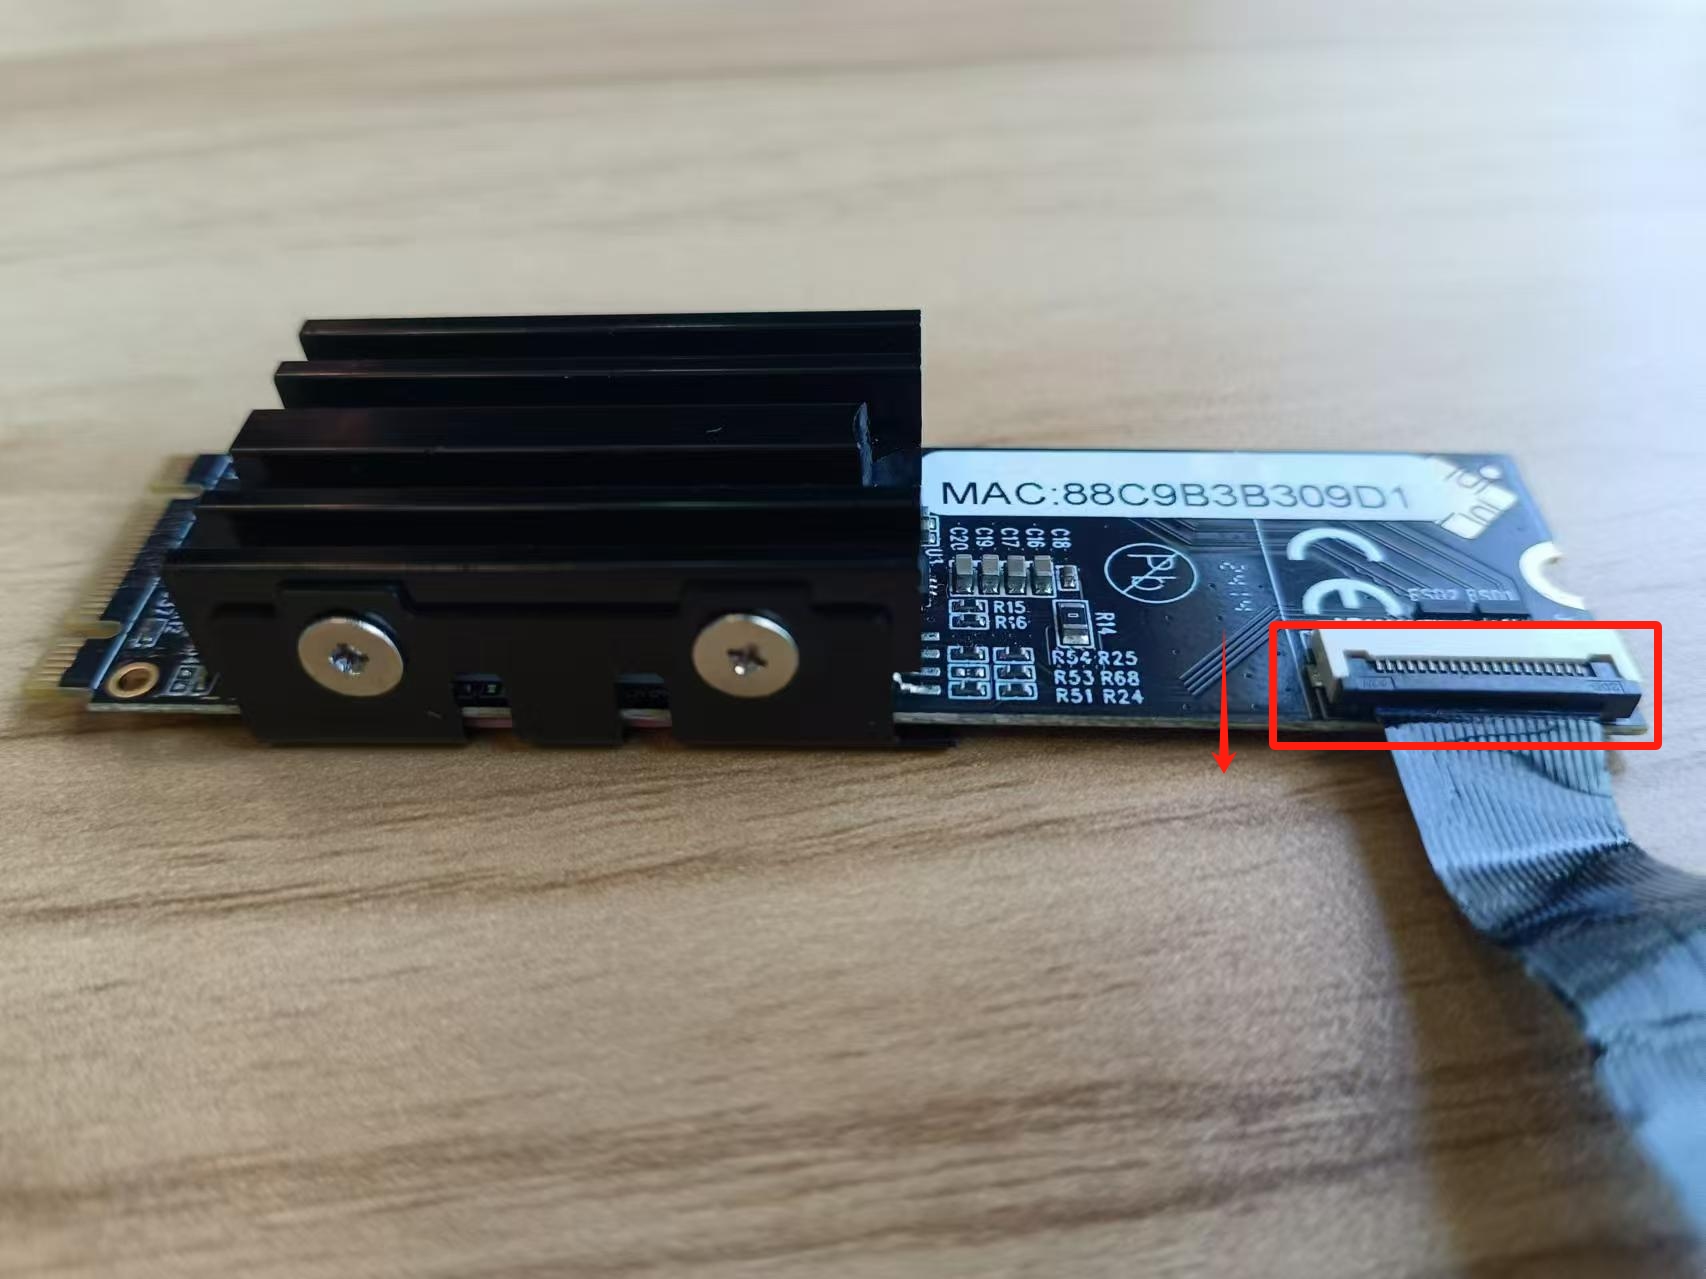
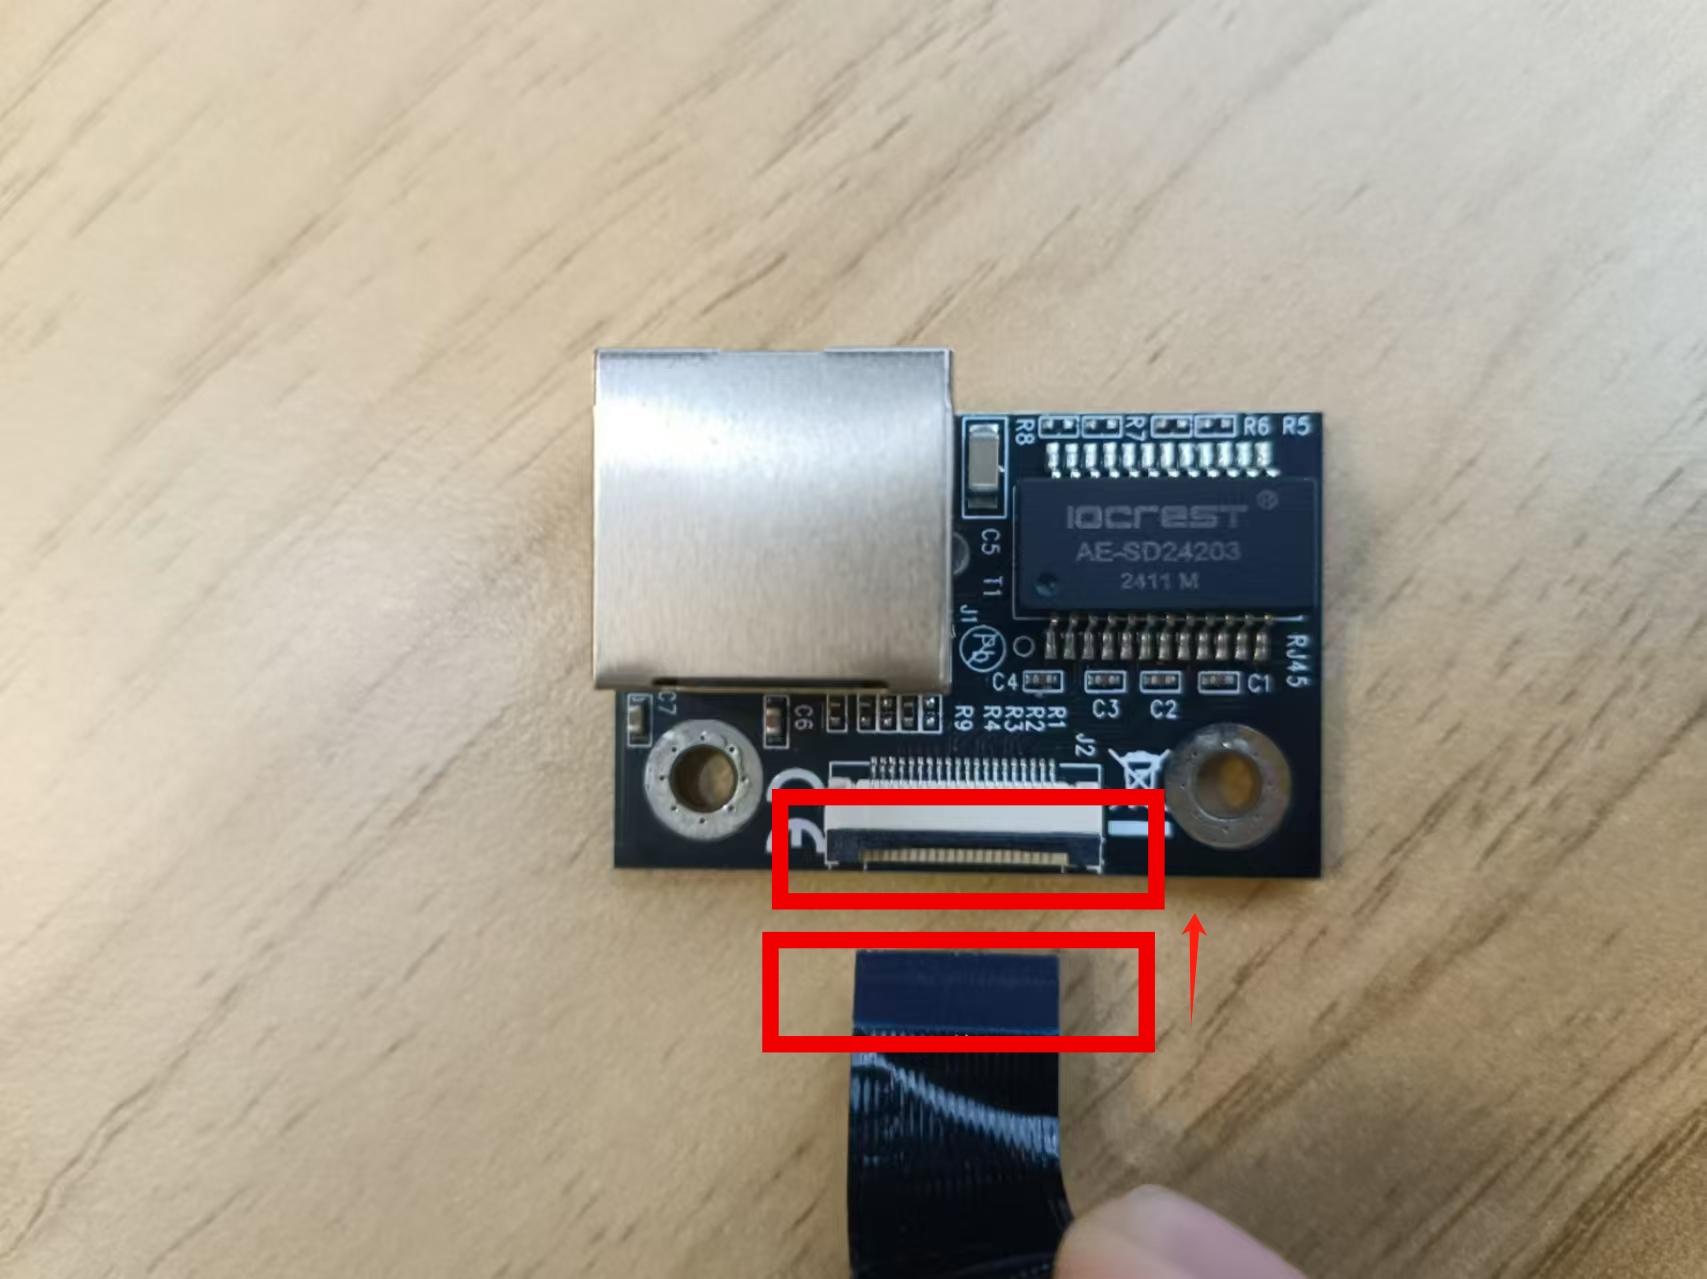
Replace the network card
Align the network card with the black slot, insert the black side of the card into the interface in the box, and then press down to lock the network port (operate the other part simultaneously)
 |
 |
|---|
 |
 |
|---|
6. Disassembly of the front interface panel
- Front: Disassembling the top cover Disassembly Tutorial
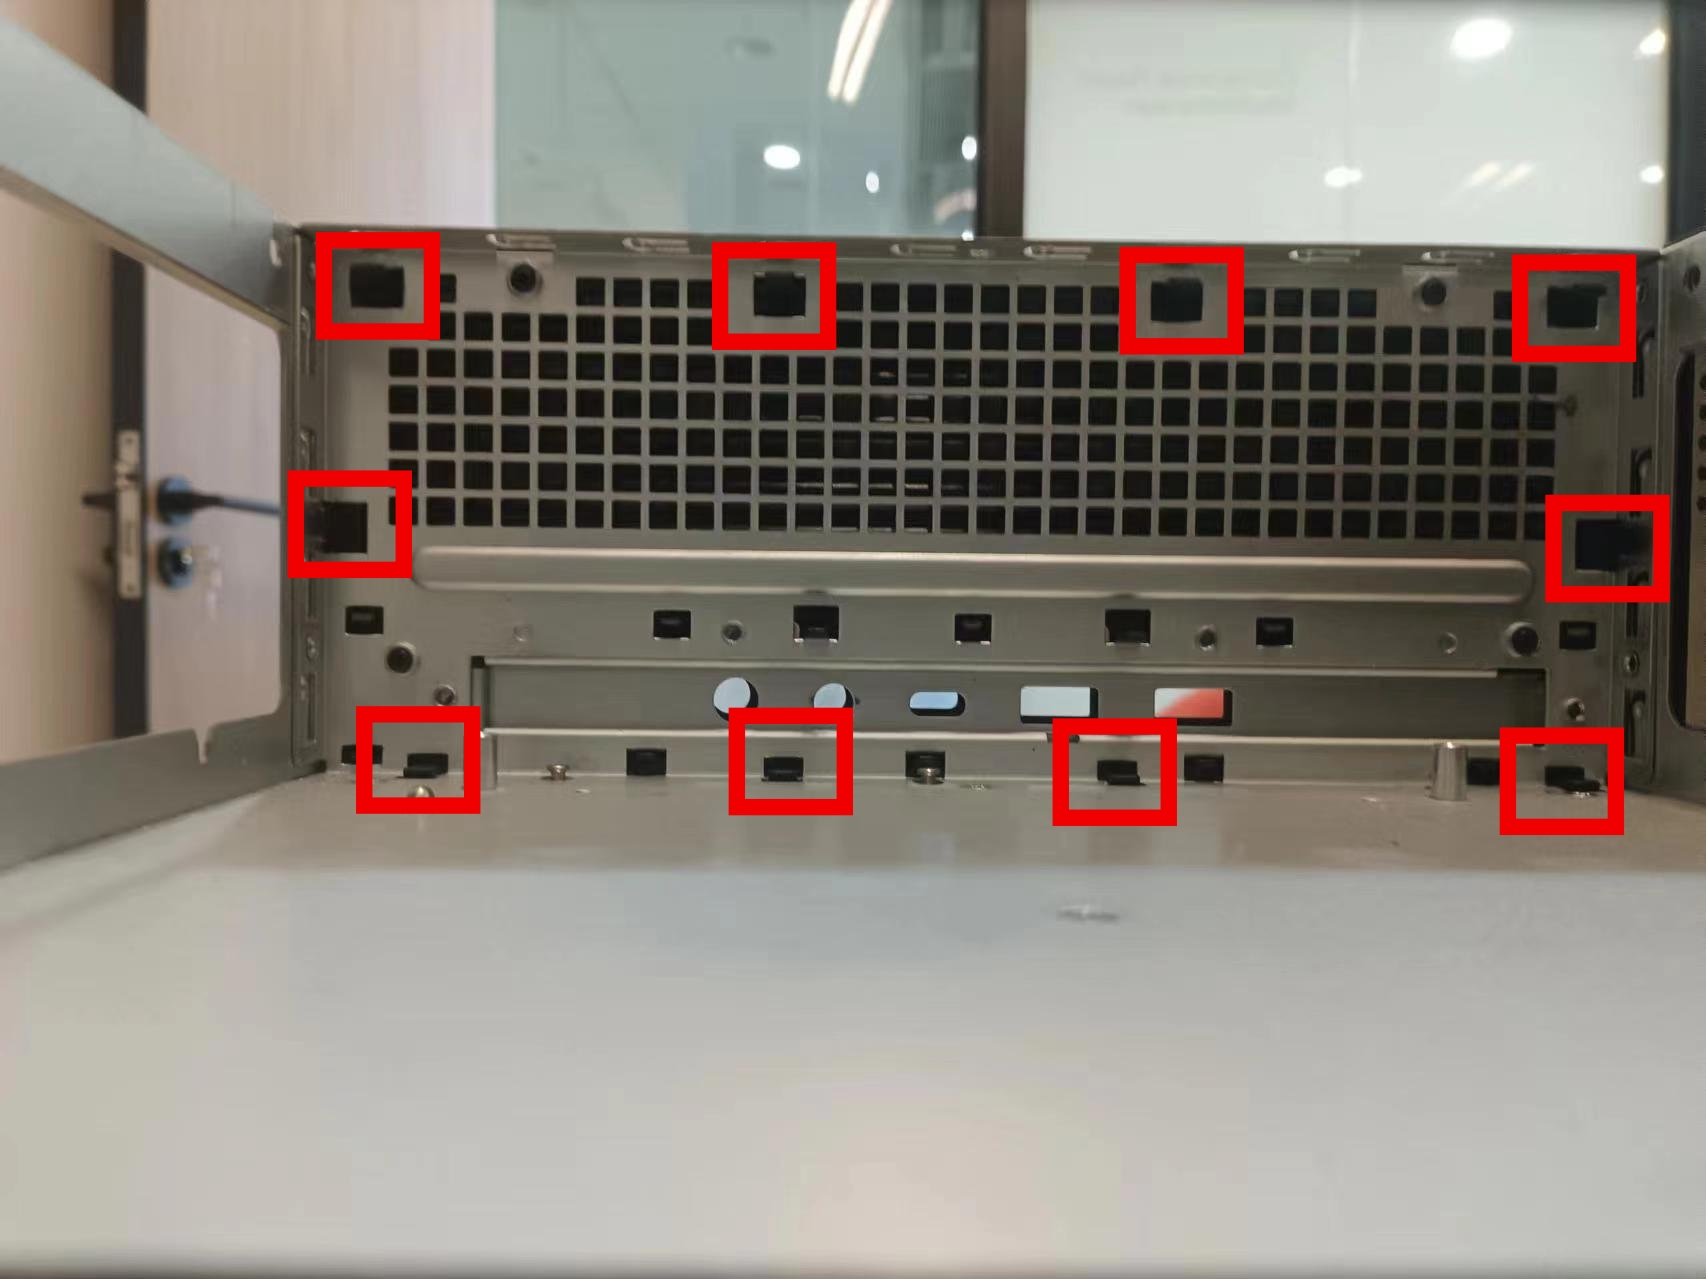
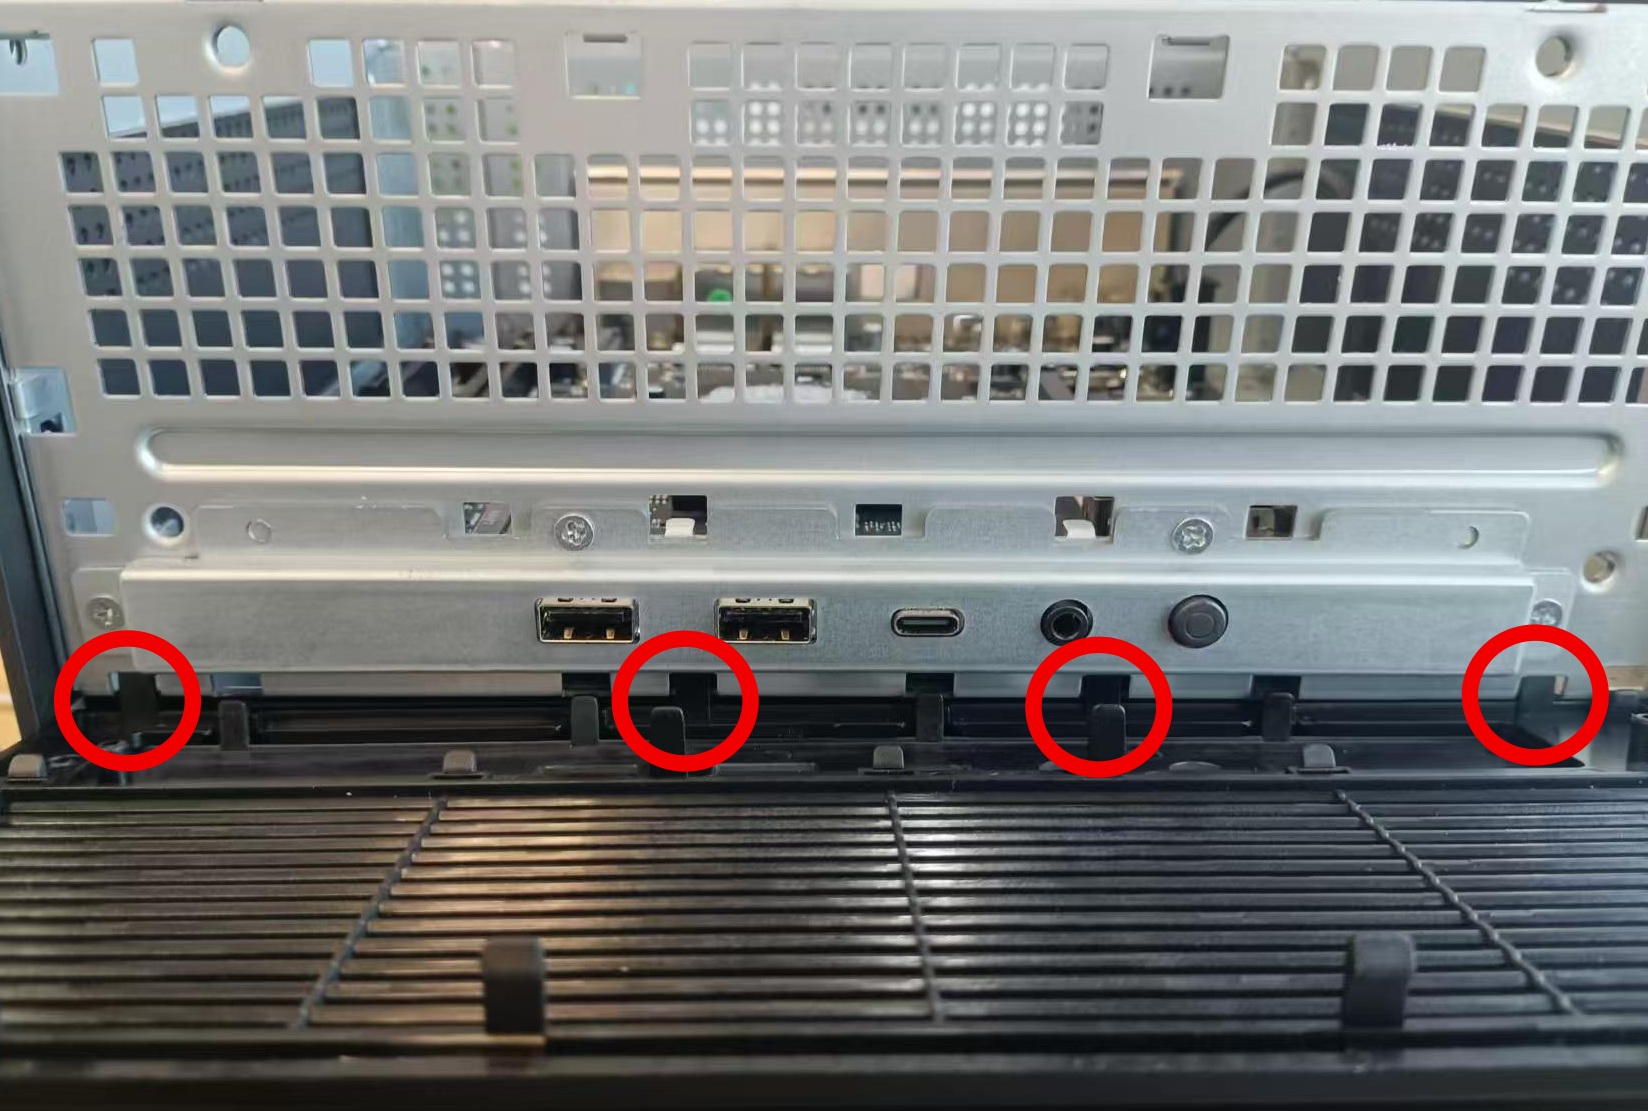
- Remove the cover of the front panel (push the ten clips in the picture inwards and remove them)
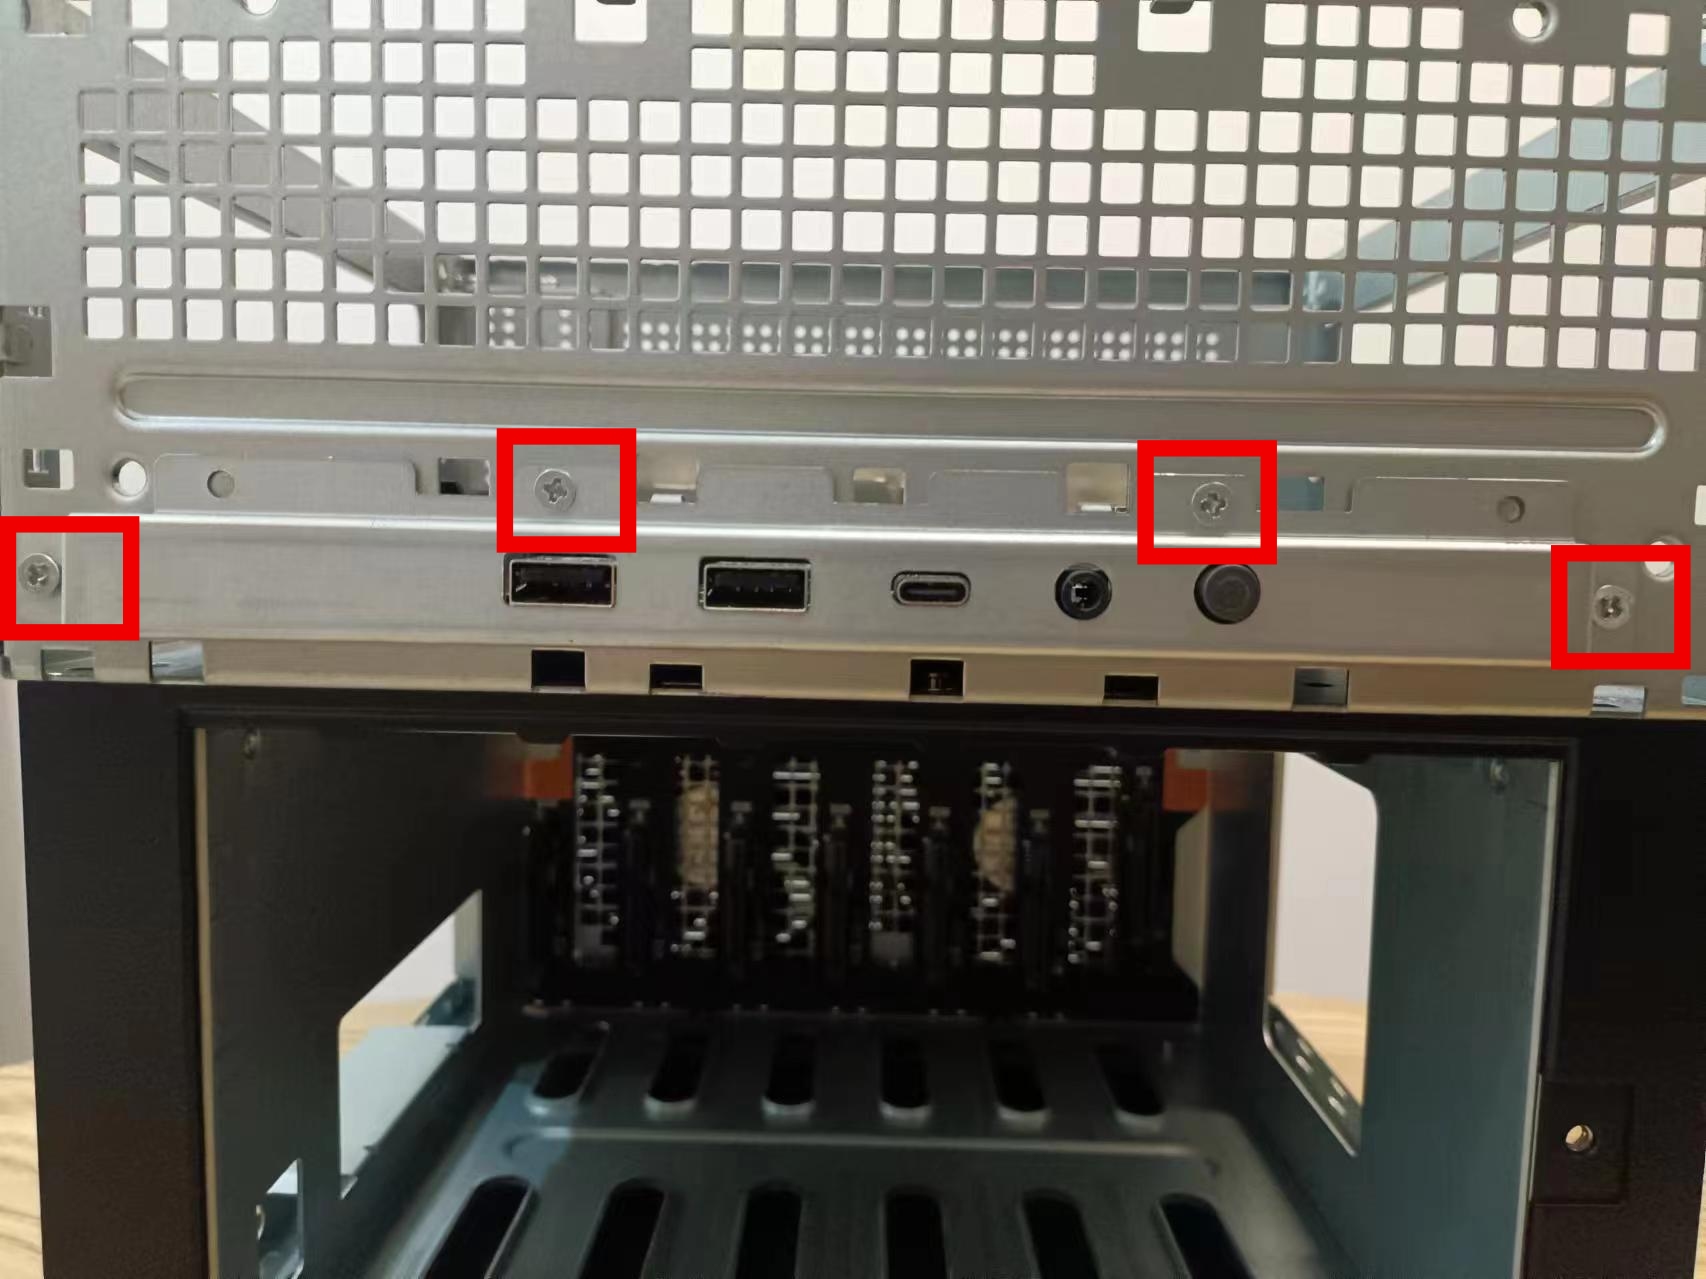
- Unscrew the four screws of the front panel
- Remove the front panel
 |
 |
|---|
Replace the front panel
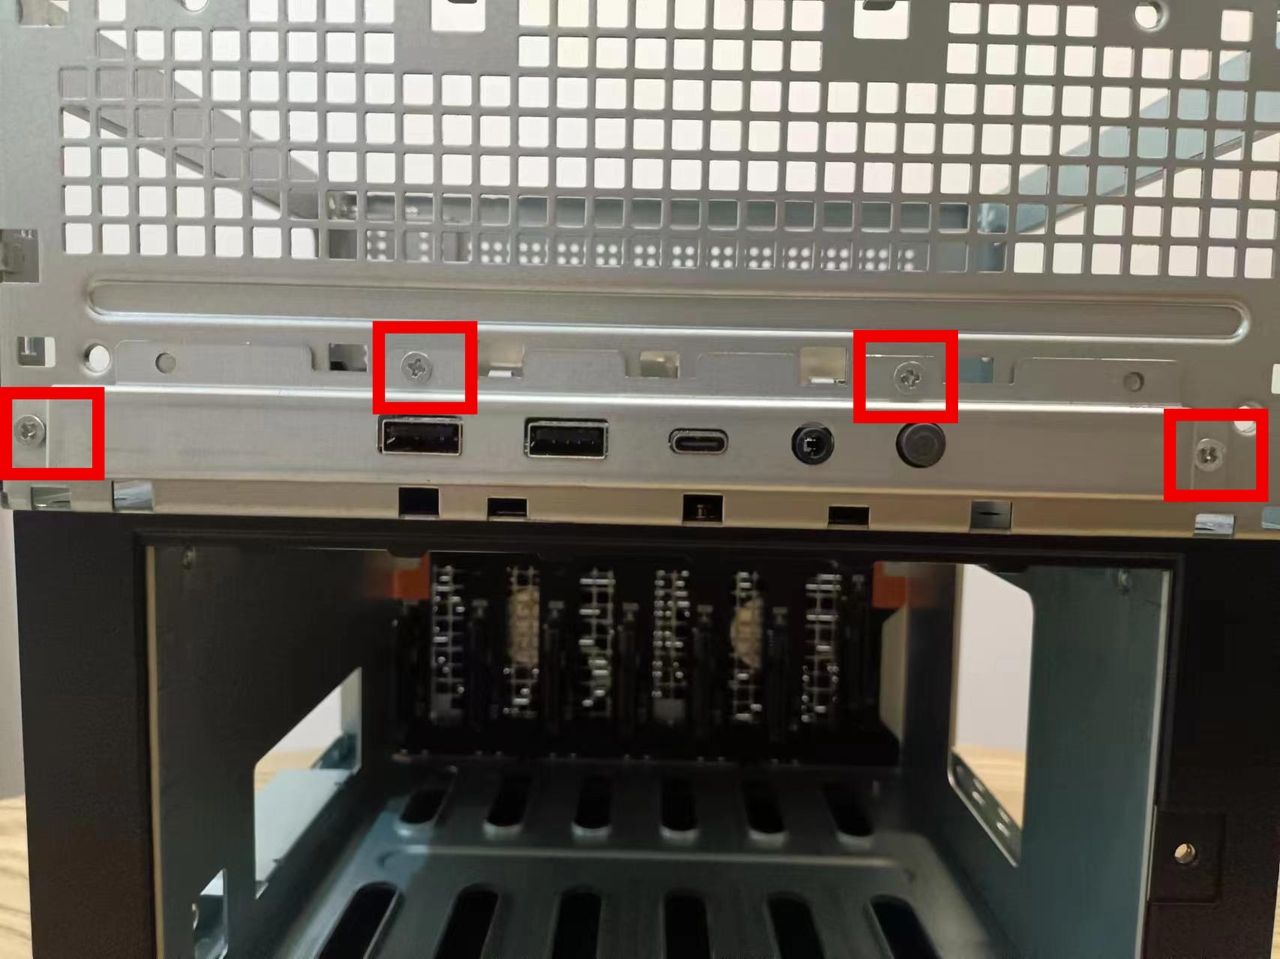
Align the four screws of the replacement front panel and tighten them
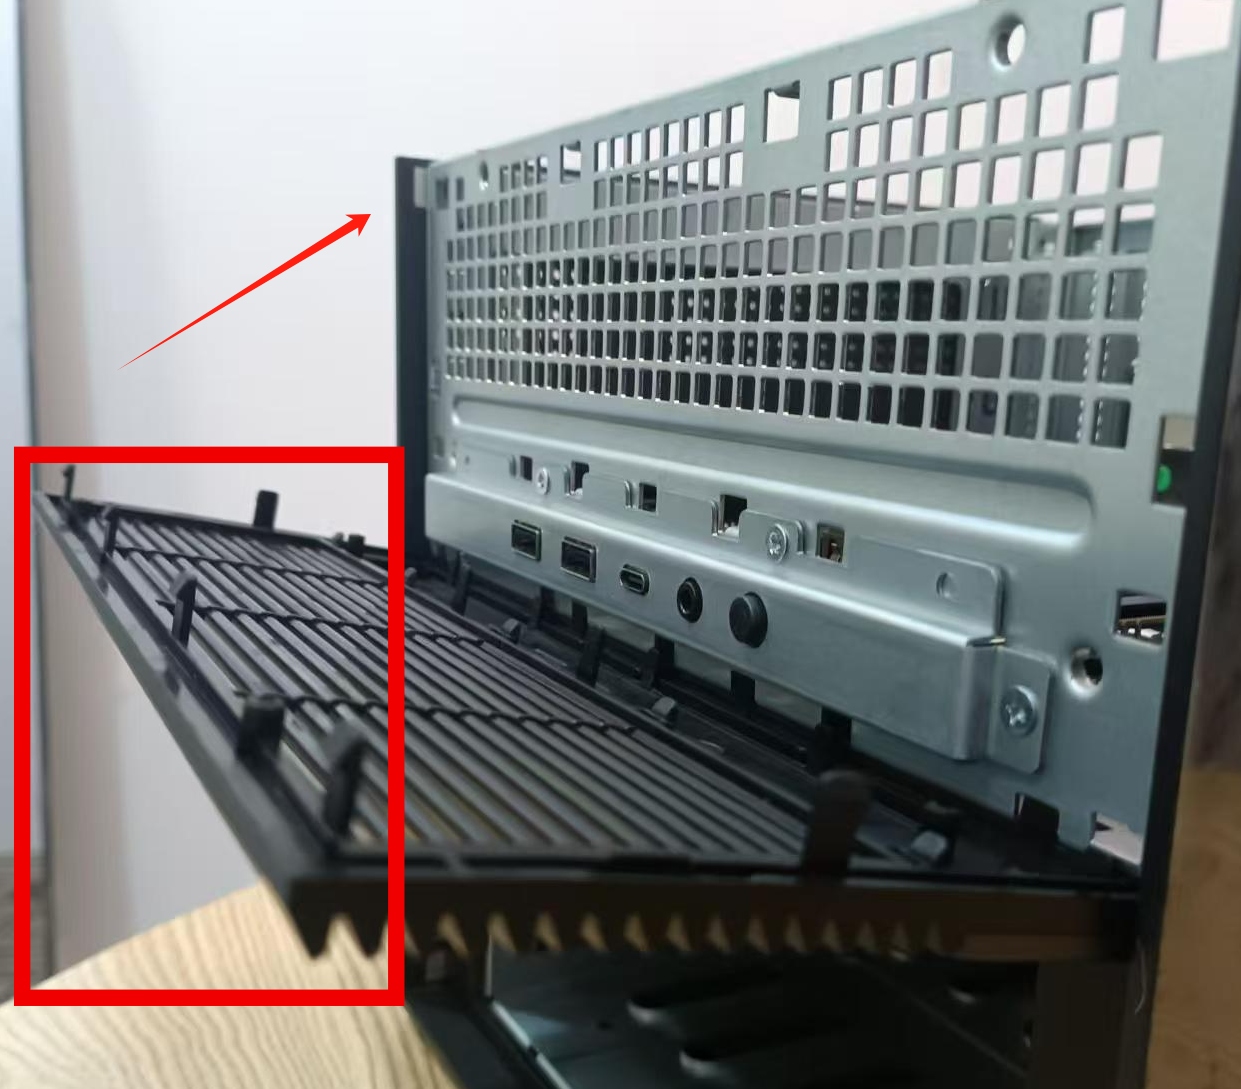
Align the four clips under the stopper to the four holes
Lift up and press until you hear a “click”
The front panel is replaced
 |
 |
 |
|---|
7. Disassembly of the motherboard
- Front: Disassembling the motherboard Disassembly Tutorial
- Front: Disassemble the front panel Disassembly Tutorial
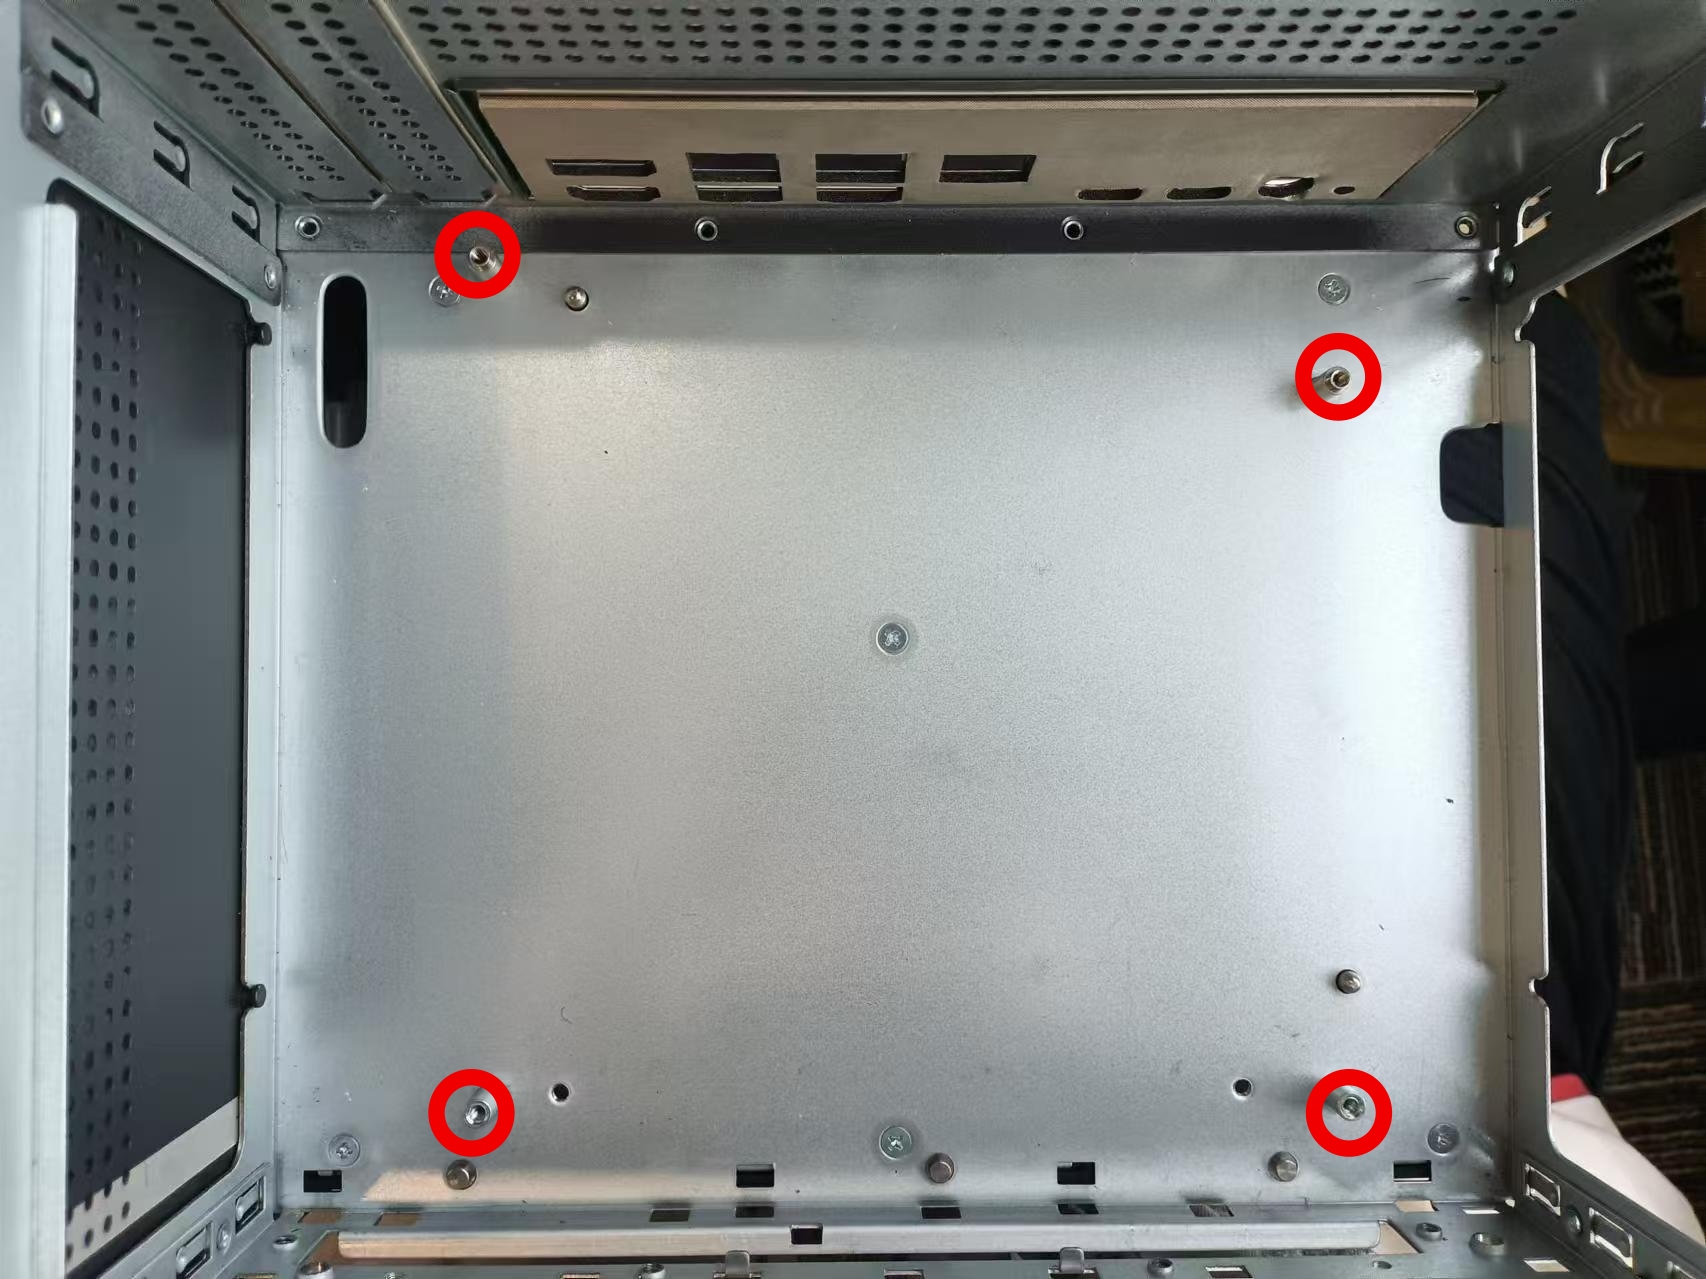
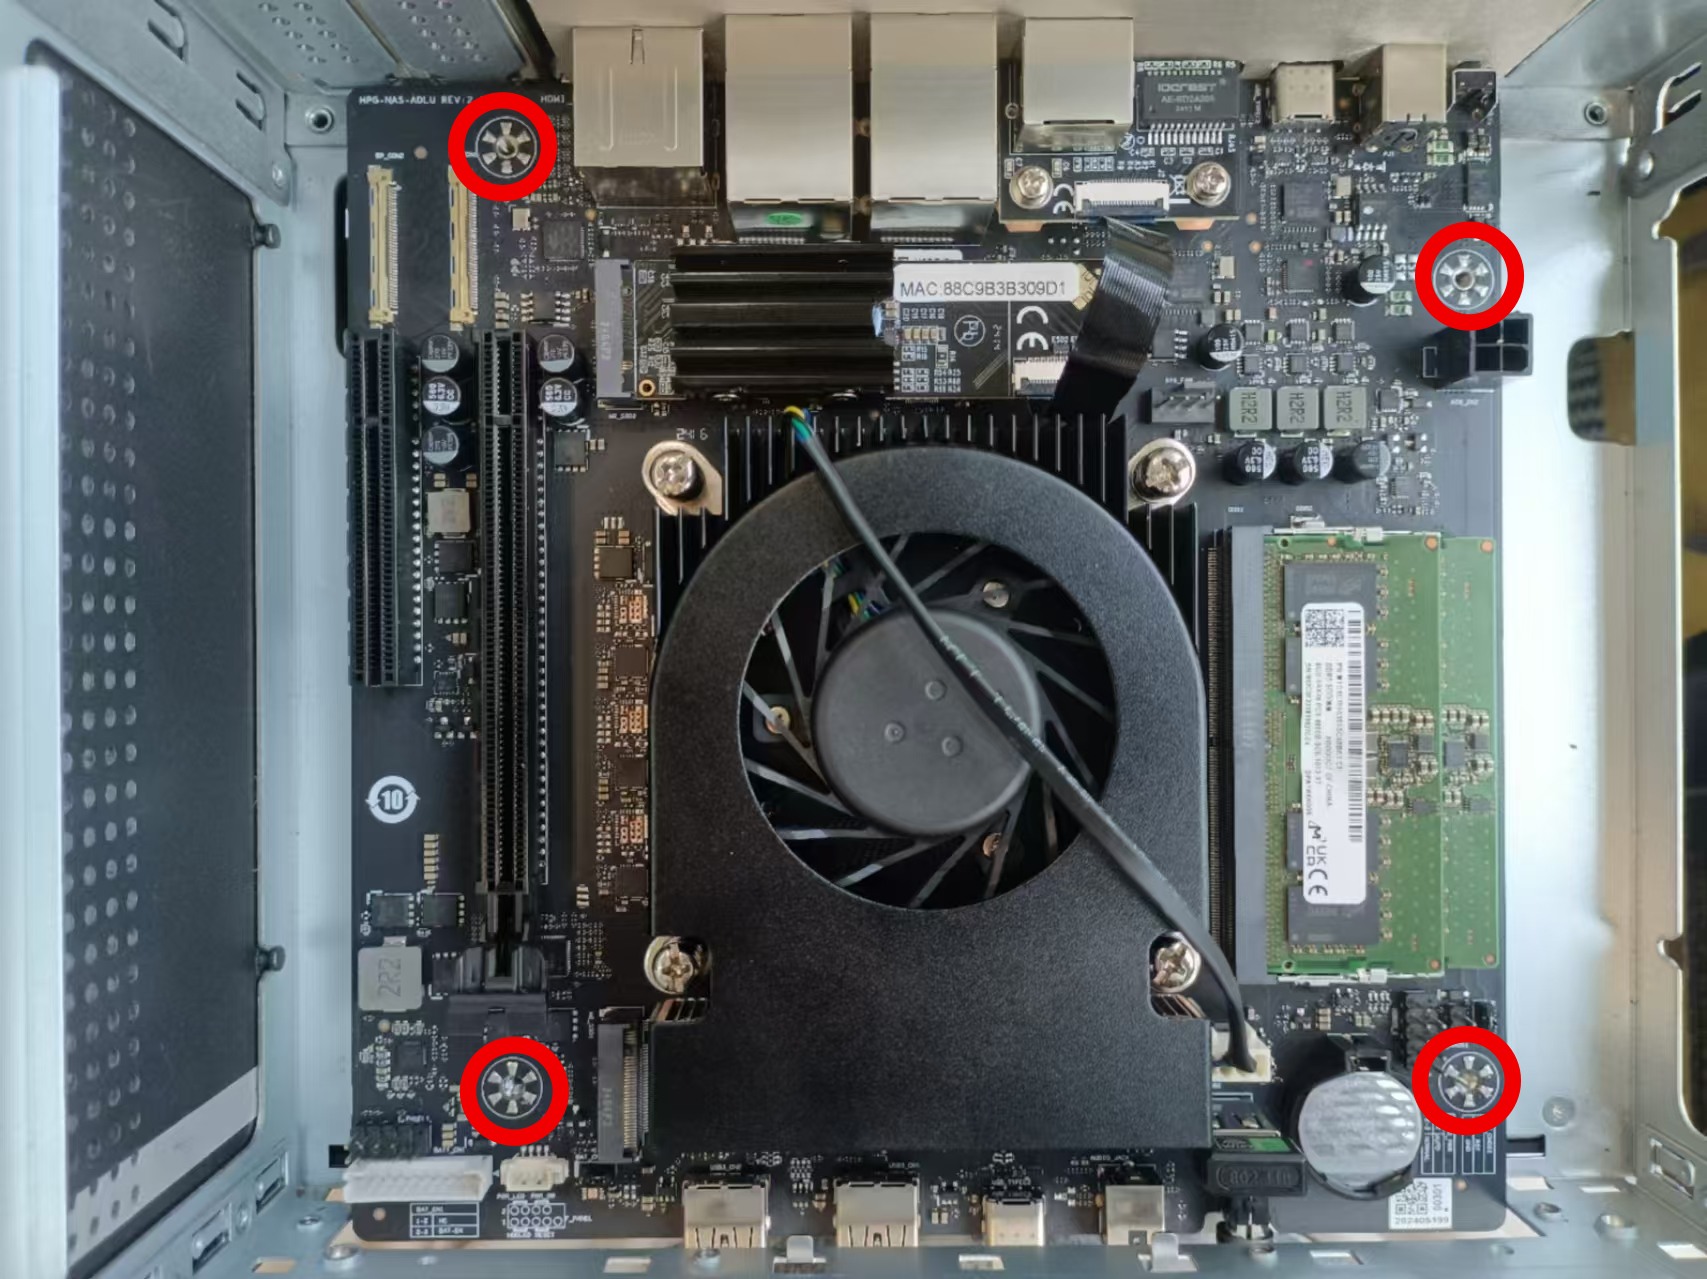
- Remove the motherboard by tightening the screws at the four corners of the chassis
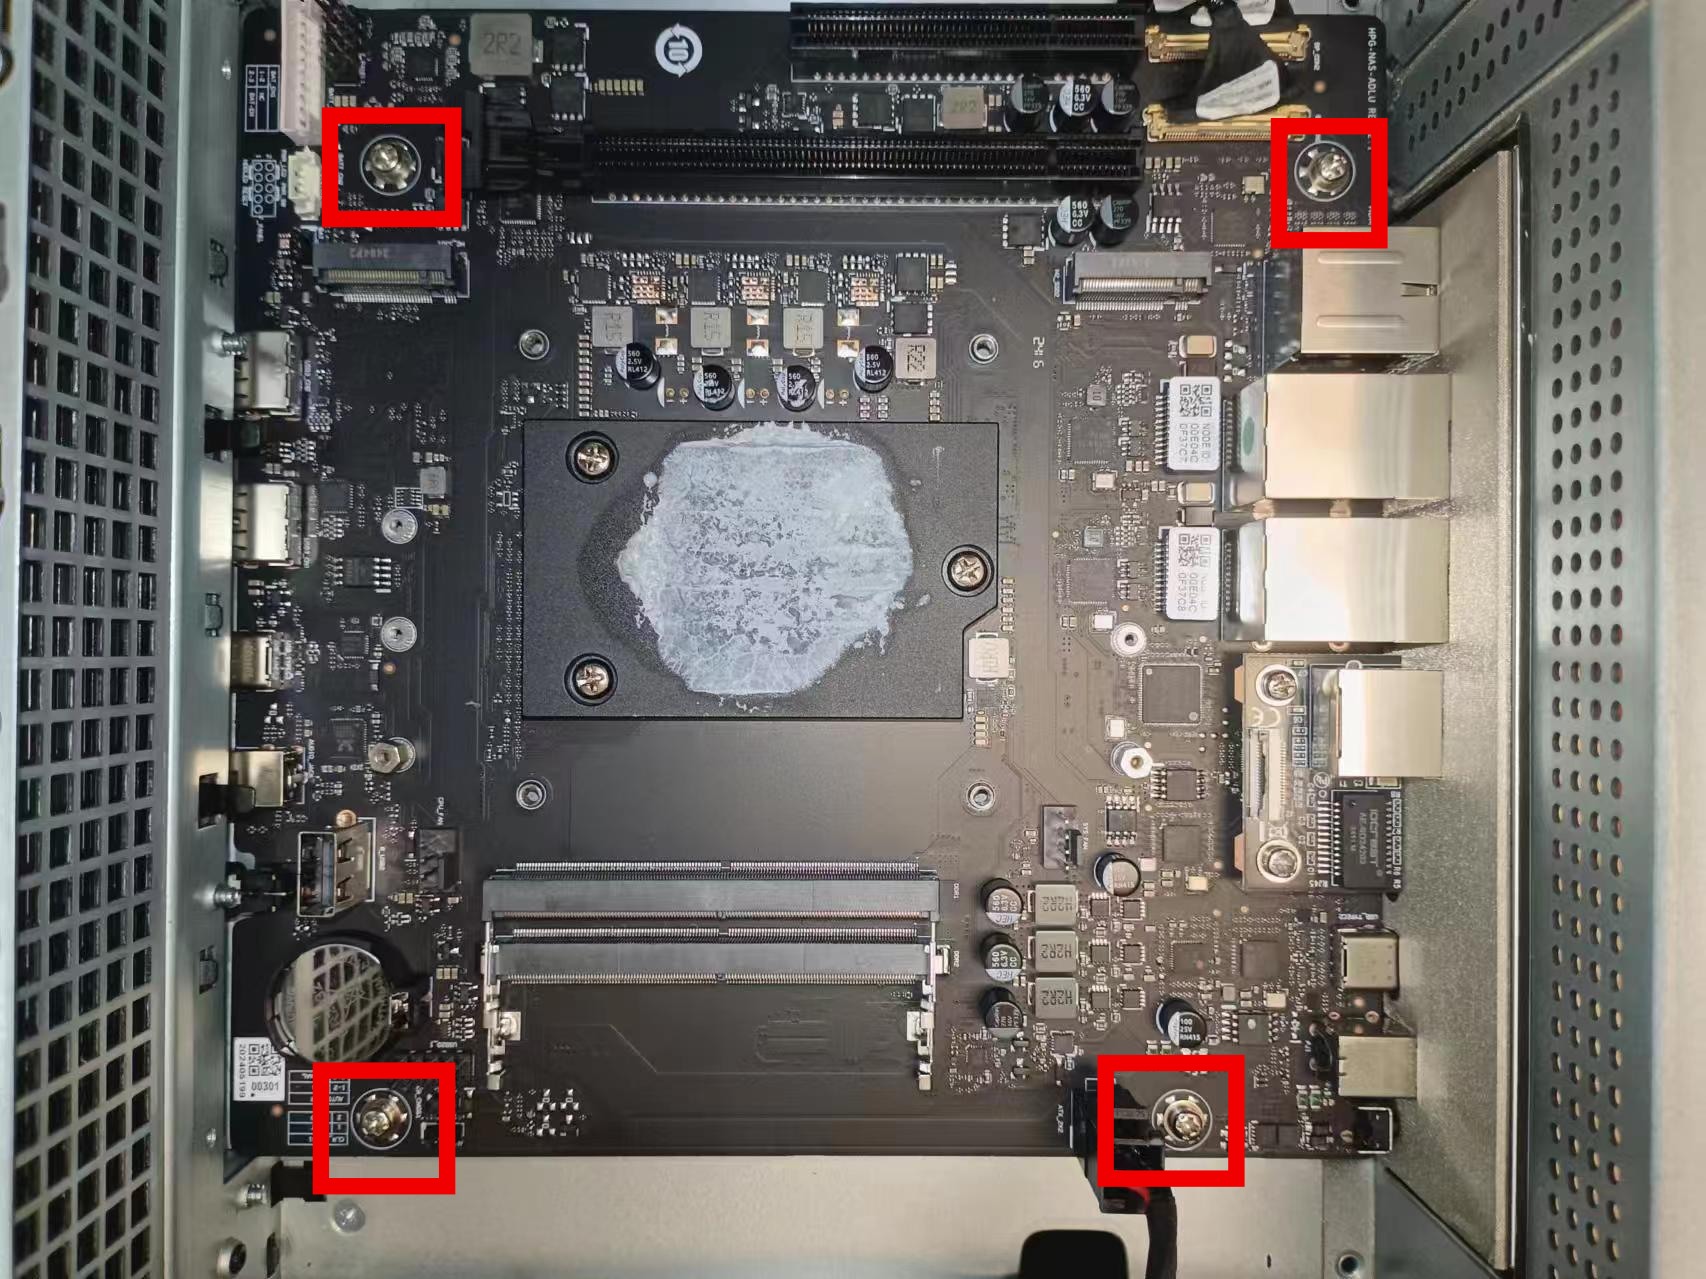
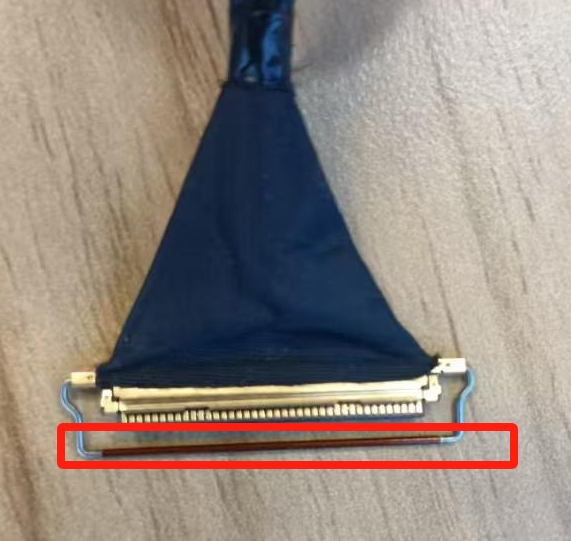
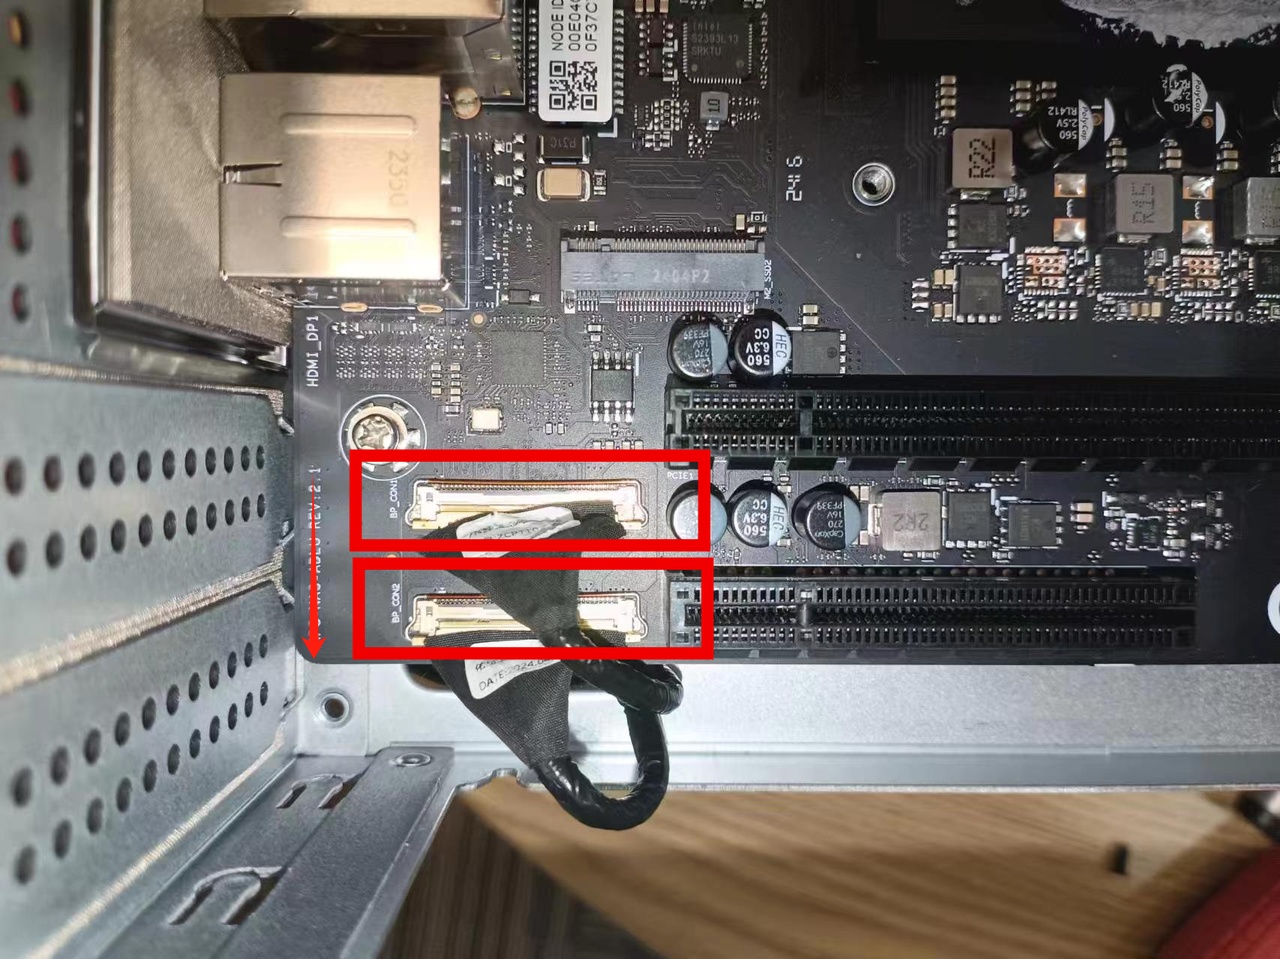
- Press and lift the lock and pull out the transmission line interface in the picture
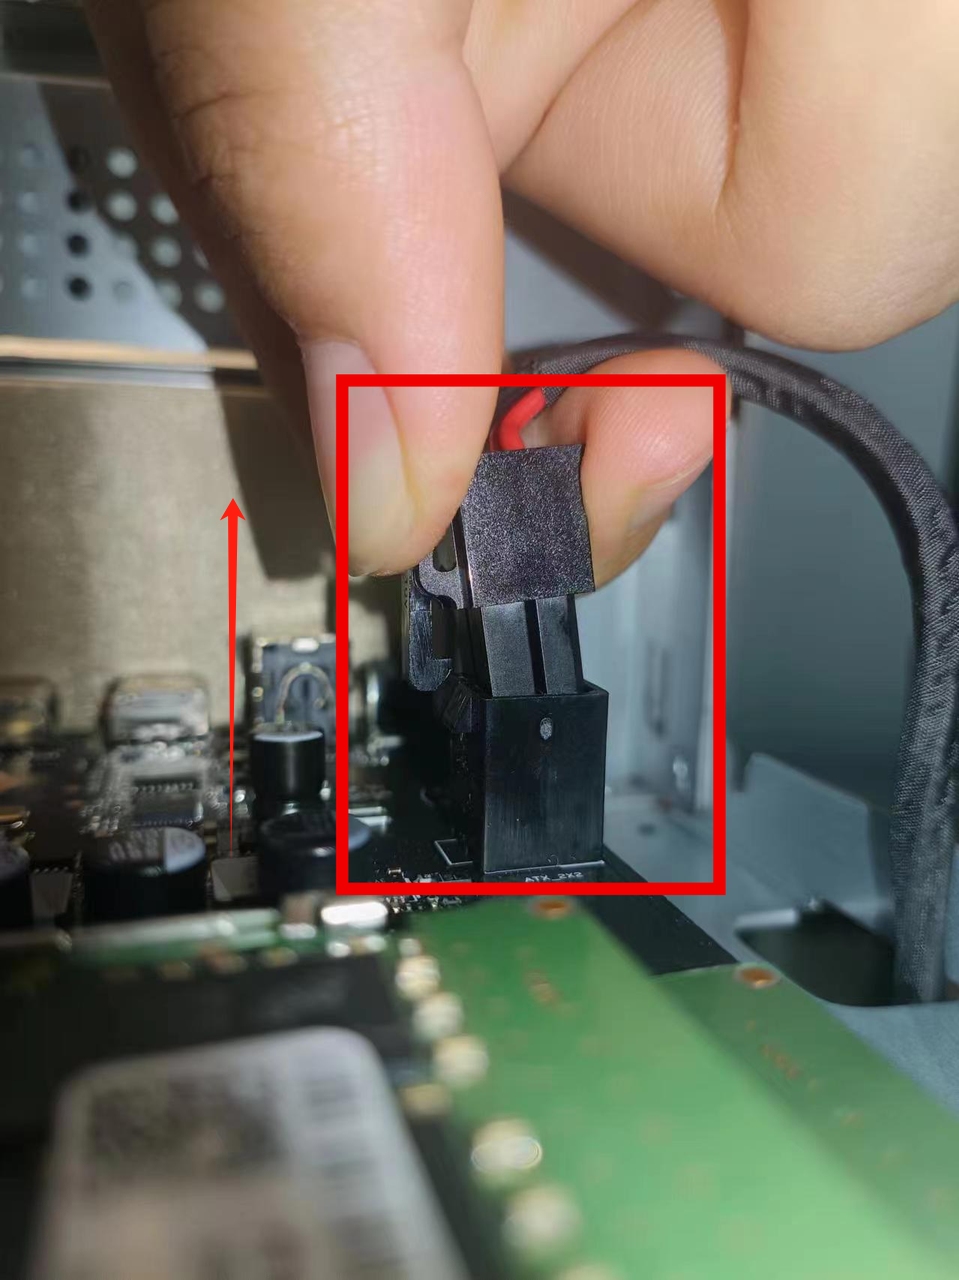
- Lift the two fixed locks in the picture (the locks are shown in the picture), then hold the black wire and pull it upwards
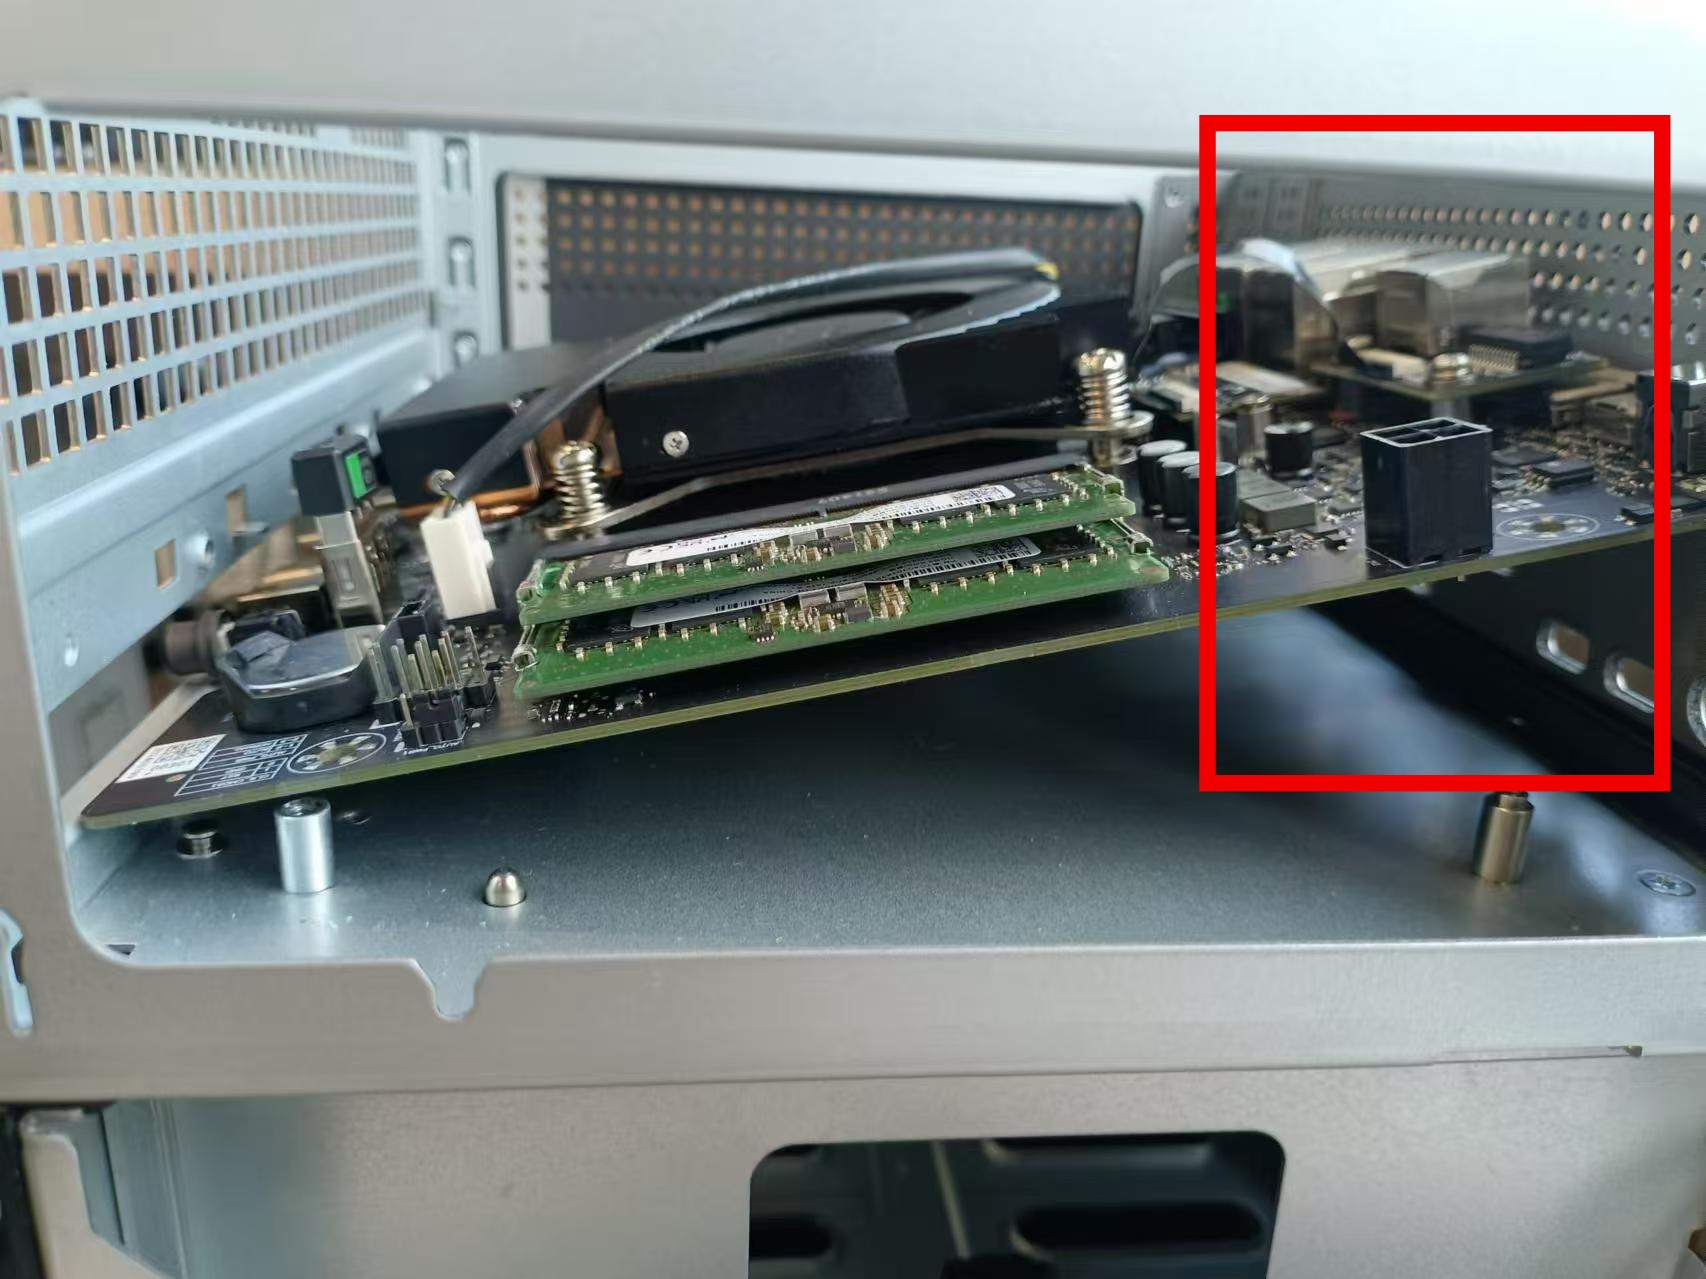
- Lift the entire motherboard diagonally at the box and then take it out upwards
Replace the motherboard
- Insert the replacement motherboard diagonally into the host through the front panel and then lay it flat (otherwise it will not fit in)
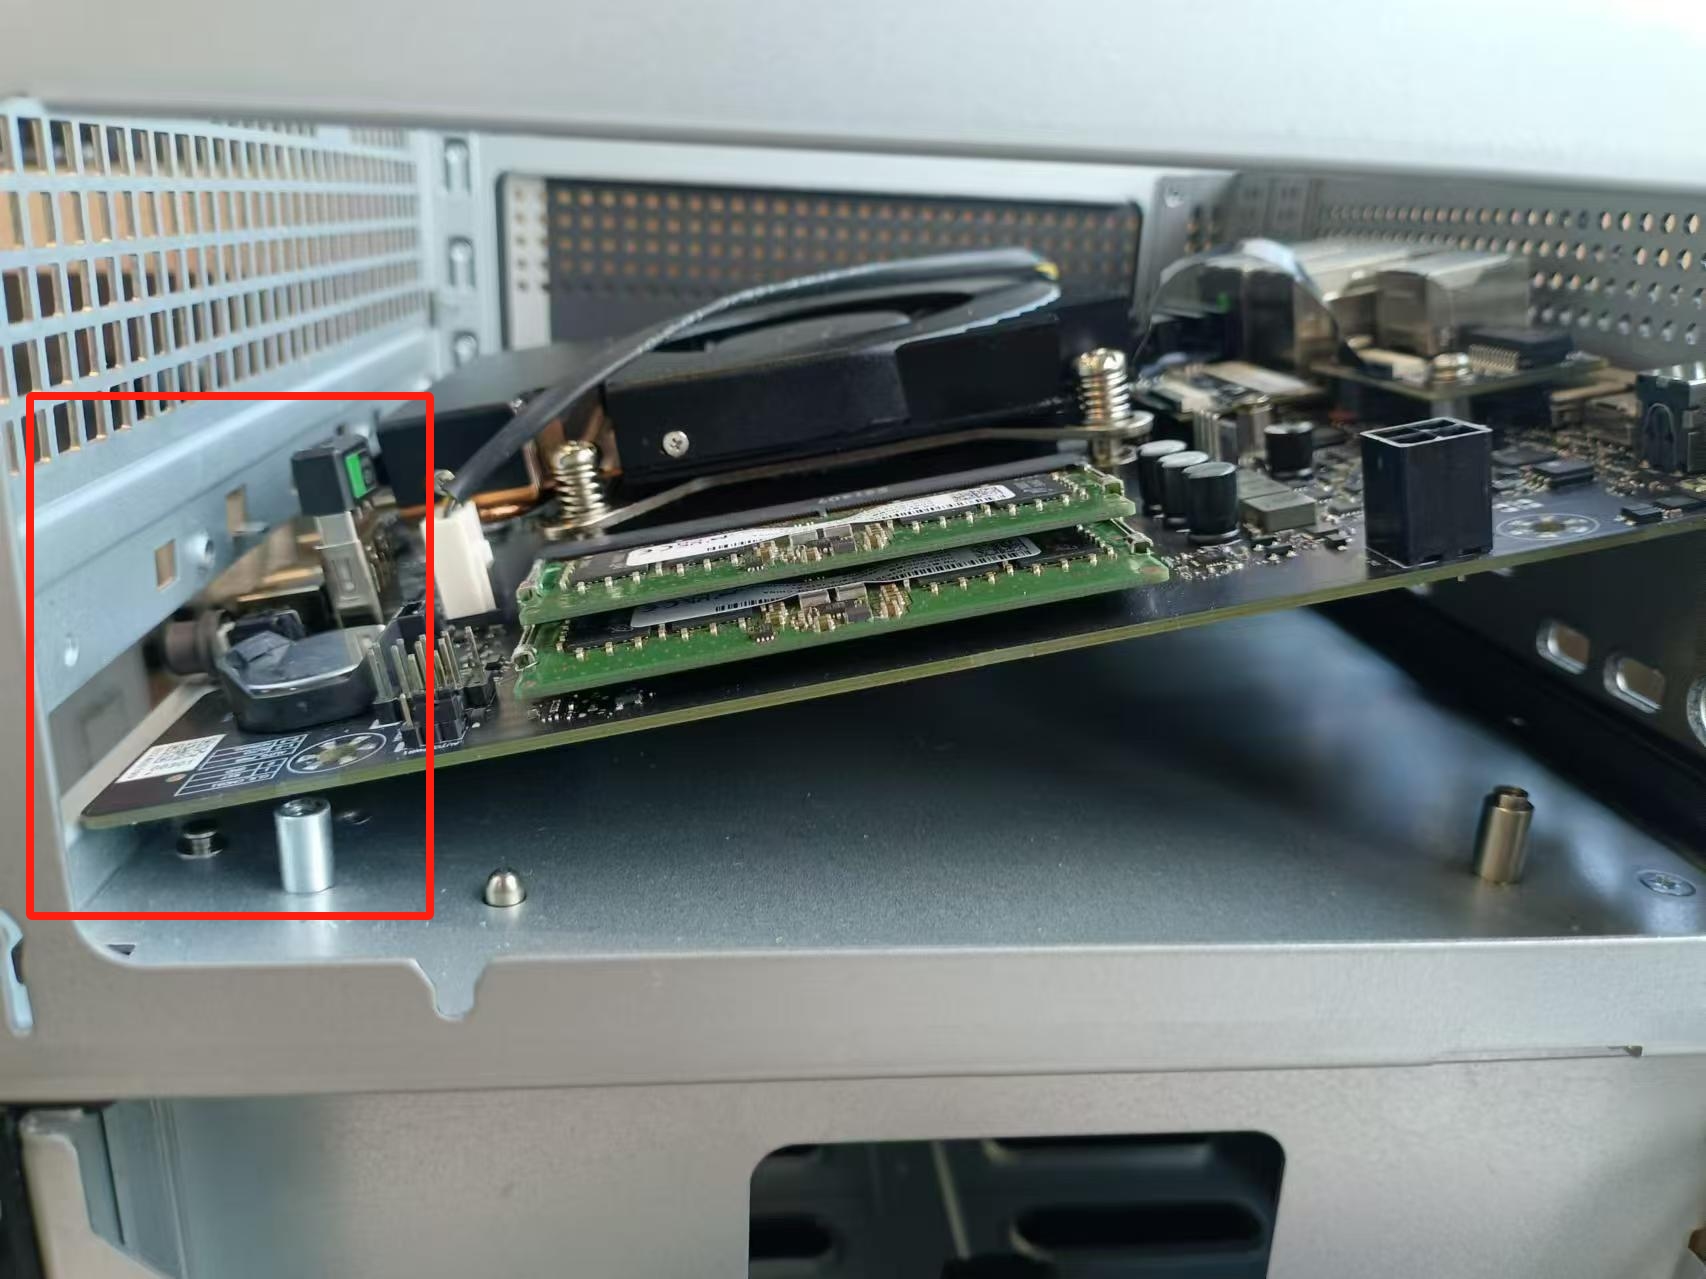
- Align the four screw holes and tighten them
- Insert the transmission line into the motherboard and press the lock to fix it
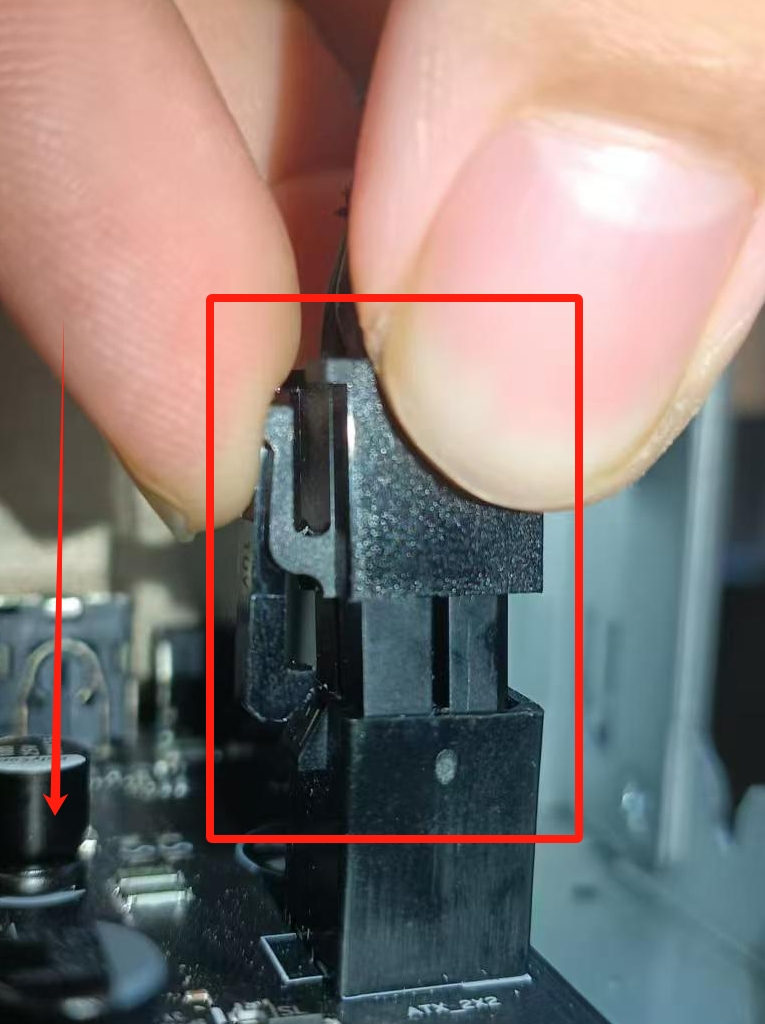
- Press the power line interface on the upper part downwards
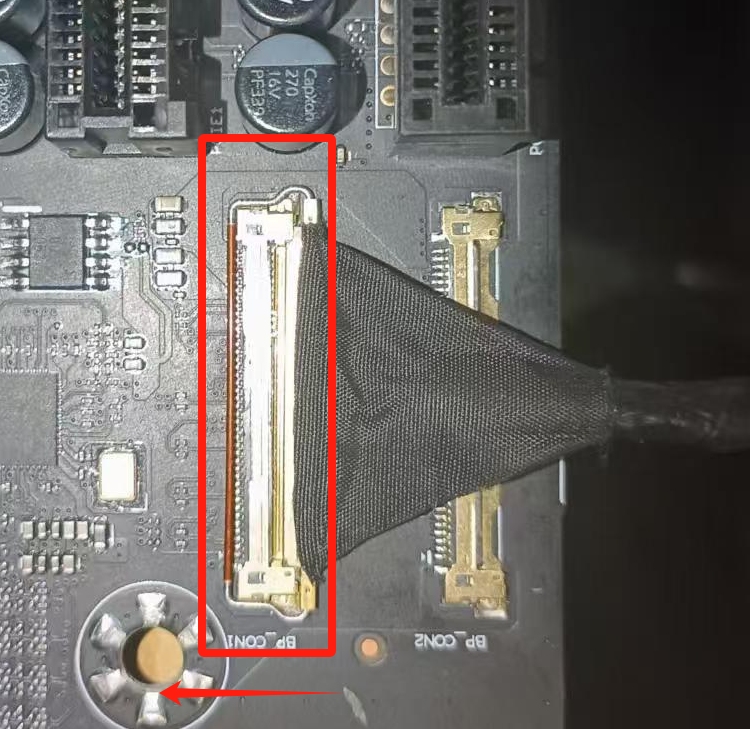
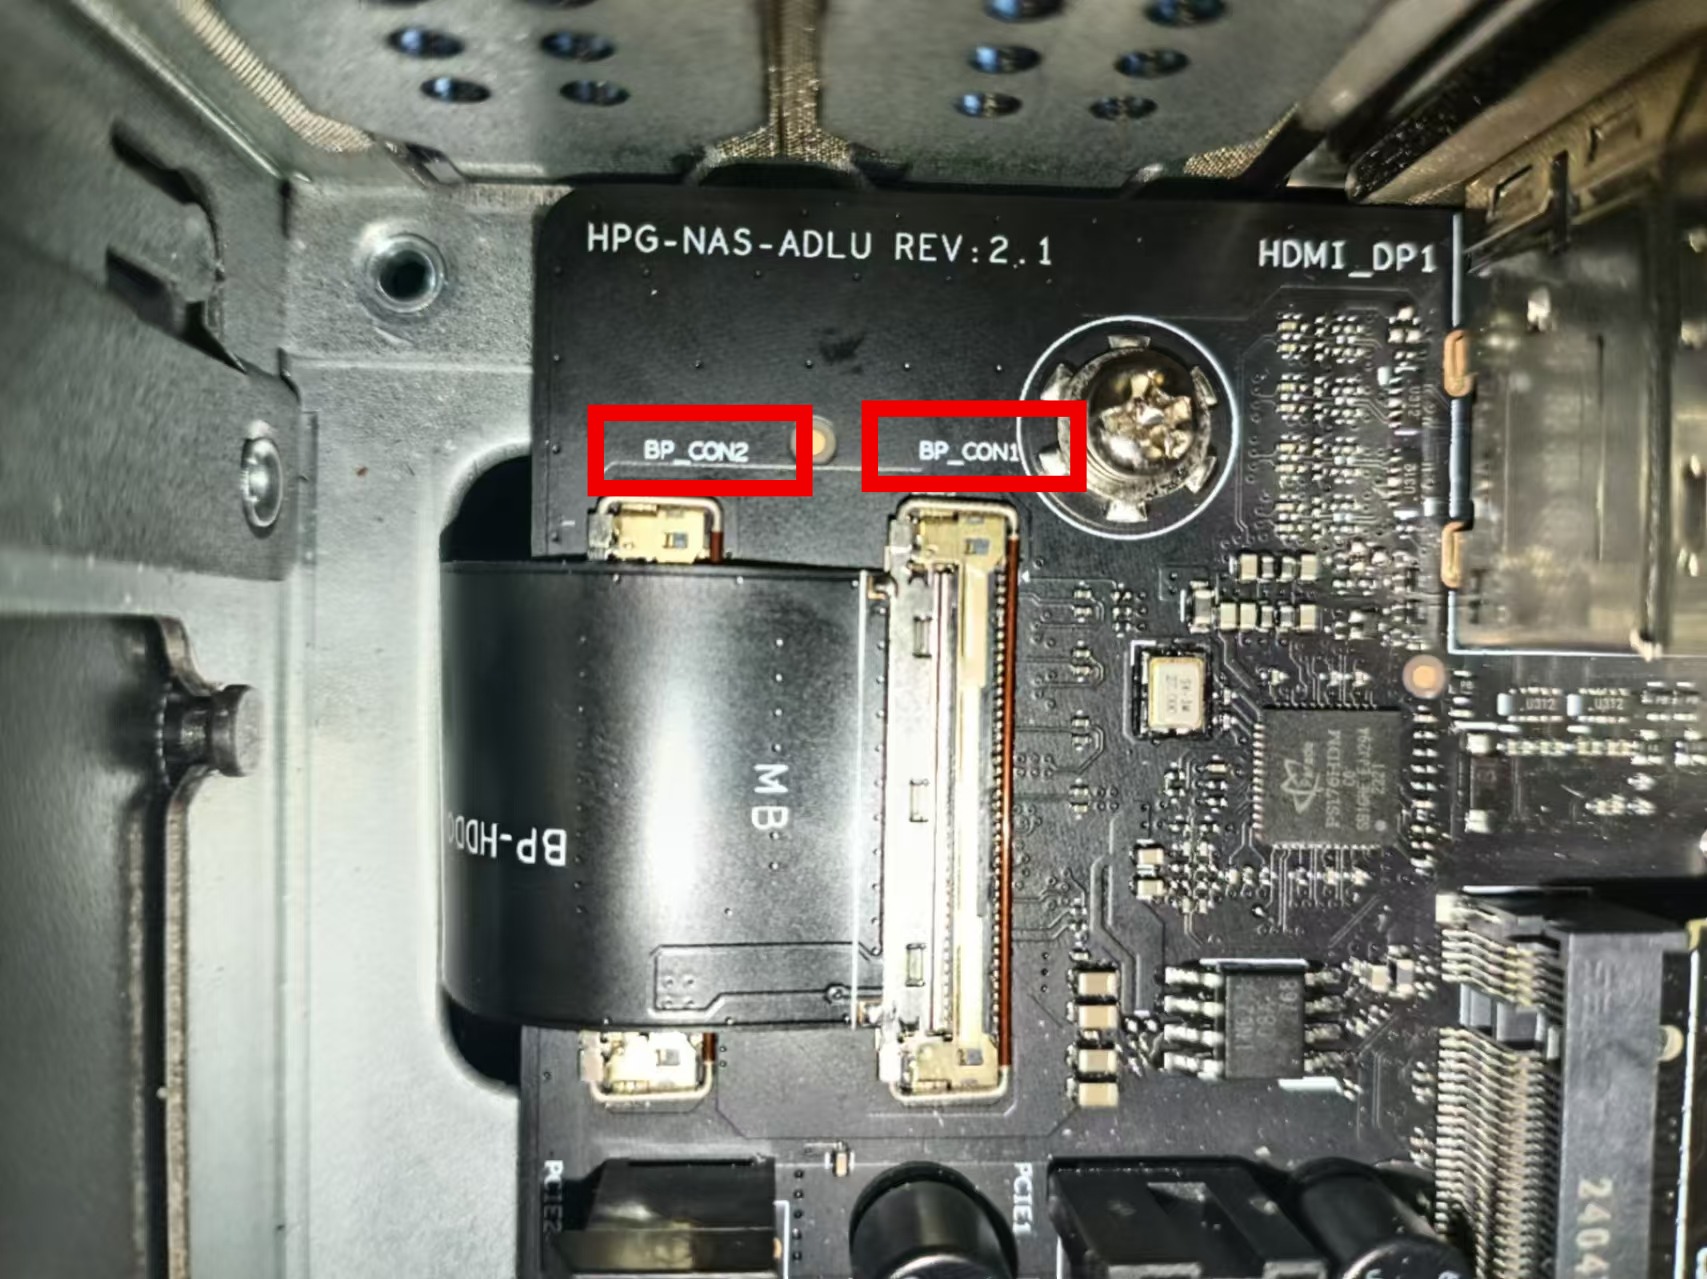
Note: When installing the transmission line, there are BP-CON1 and BP-CON2 (identified by the white silk-screen characters next to the interface), and you need to pay attention to the corresponding when connecting the lower half
8. Rear panel removal
Prerequisites: Motherboard removal Disassembly Tutorial
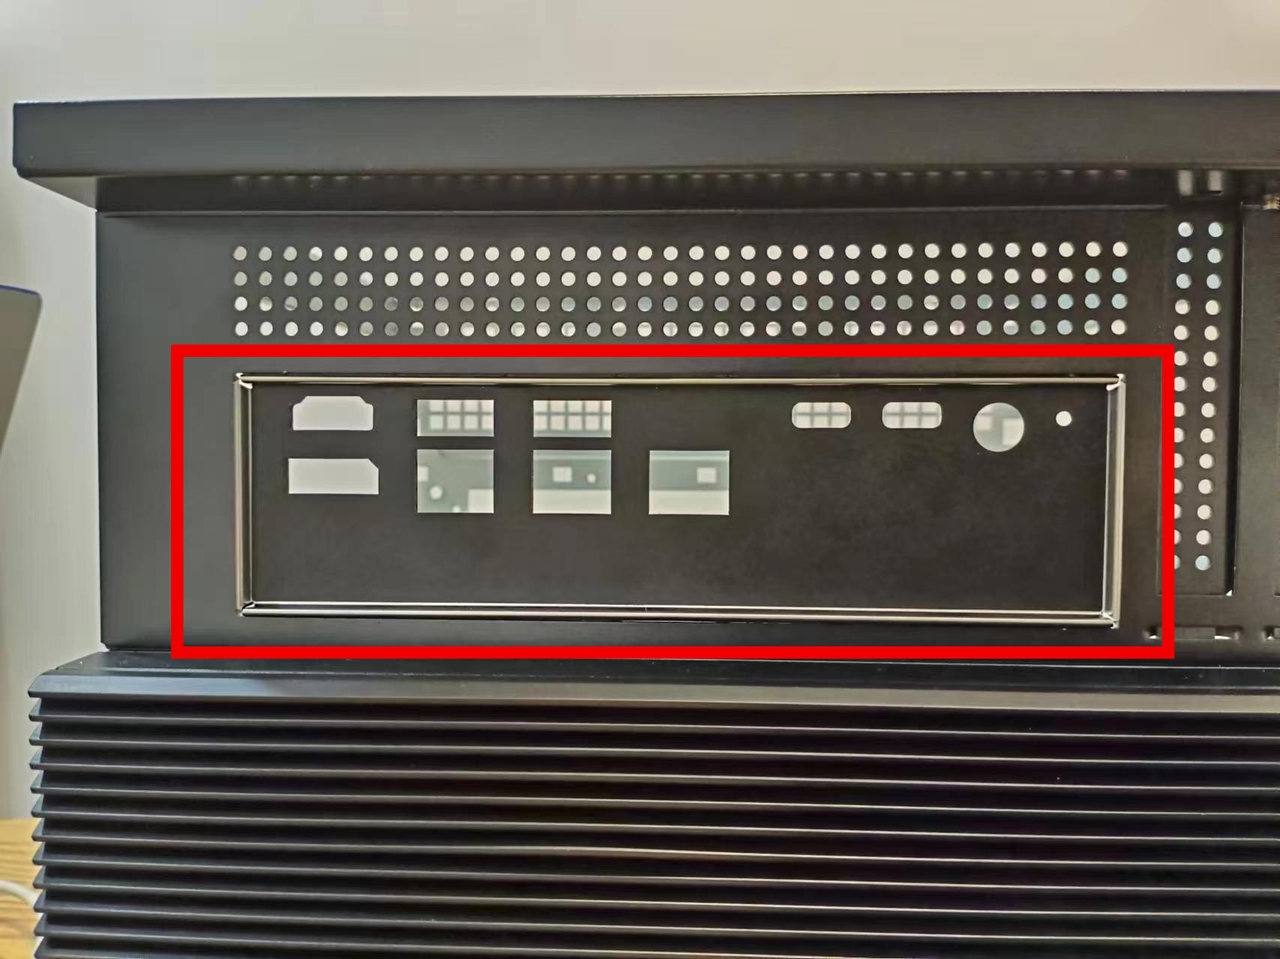
Push the edge of the rear panel inward to remove it
Replace the rear panel
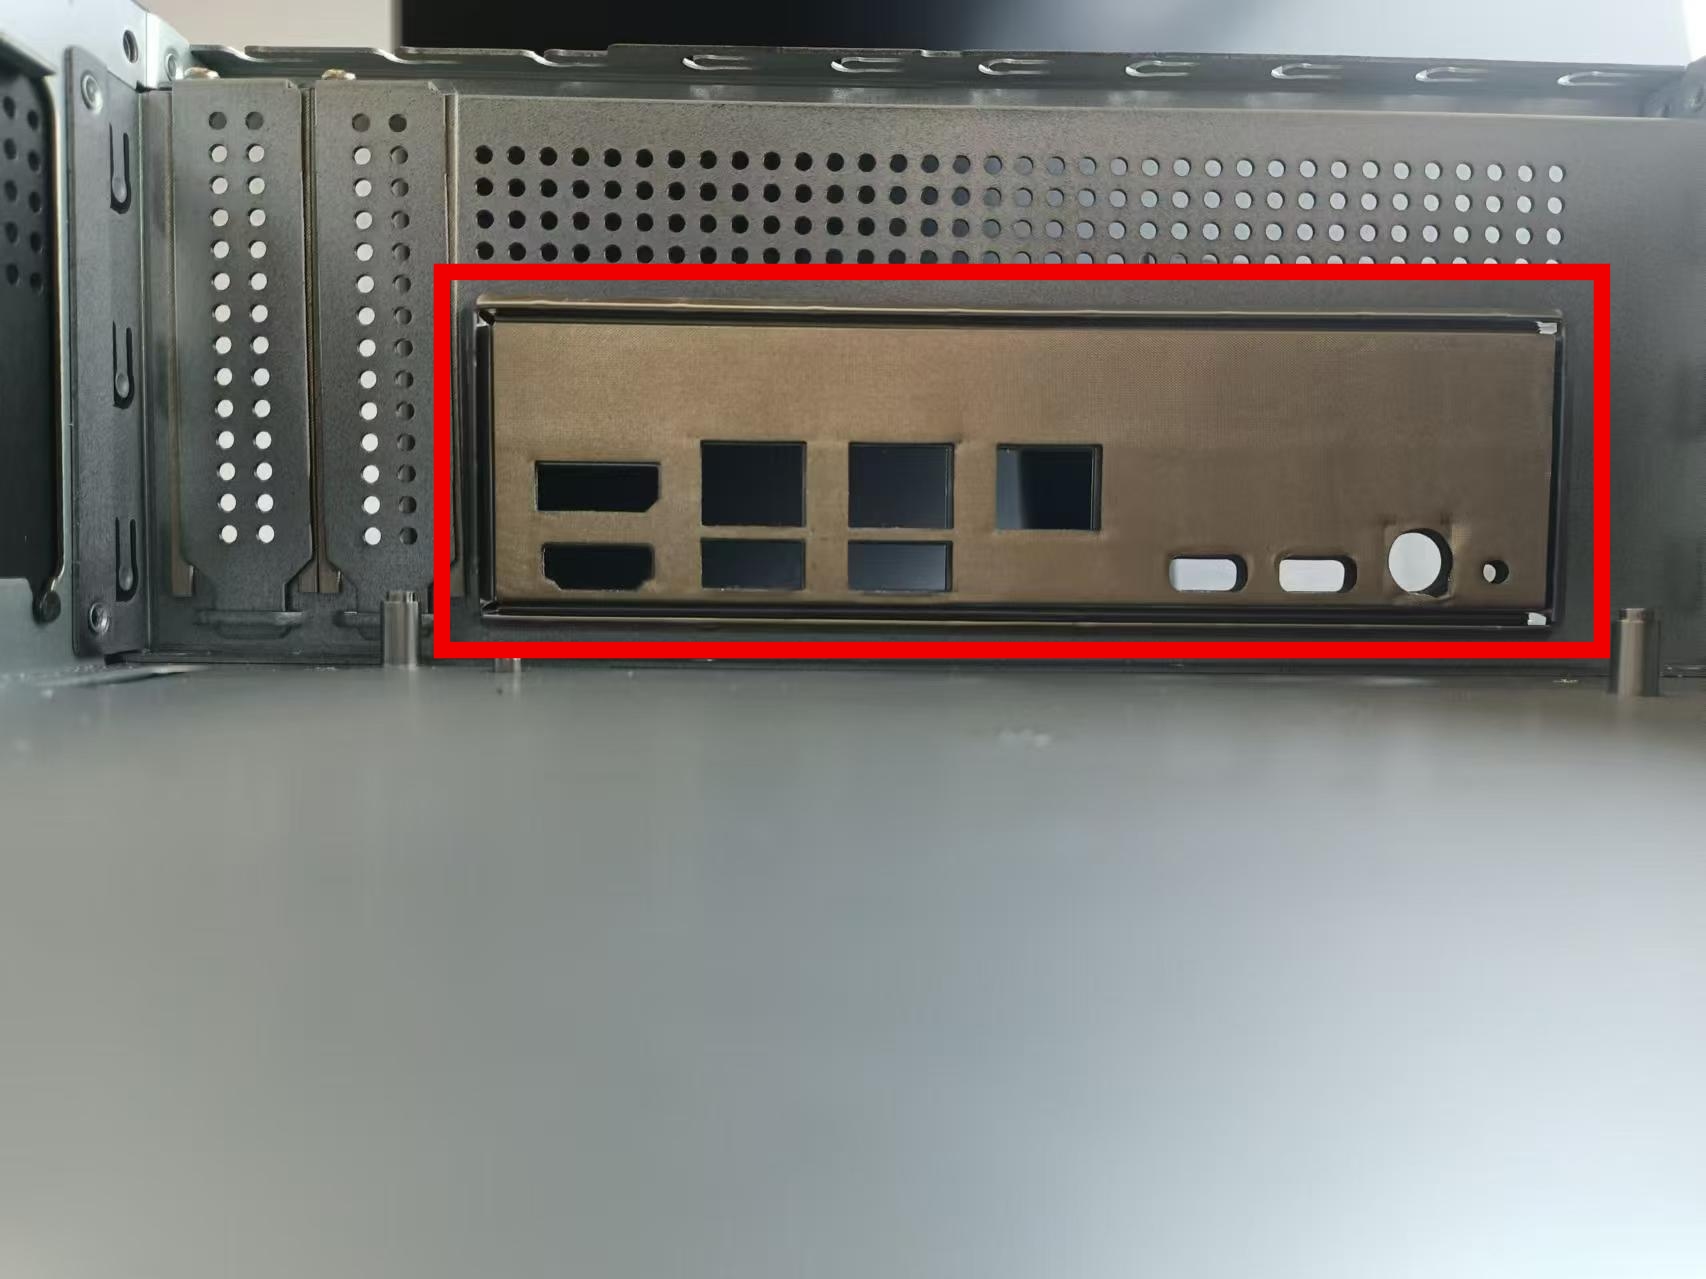
Install the interface panel from the inside of the chassis
Install the replacement panel from the inside to the outside, and press hard along the edge
Lower half of the body
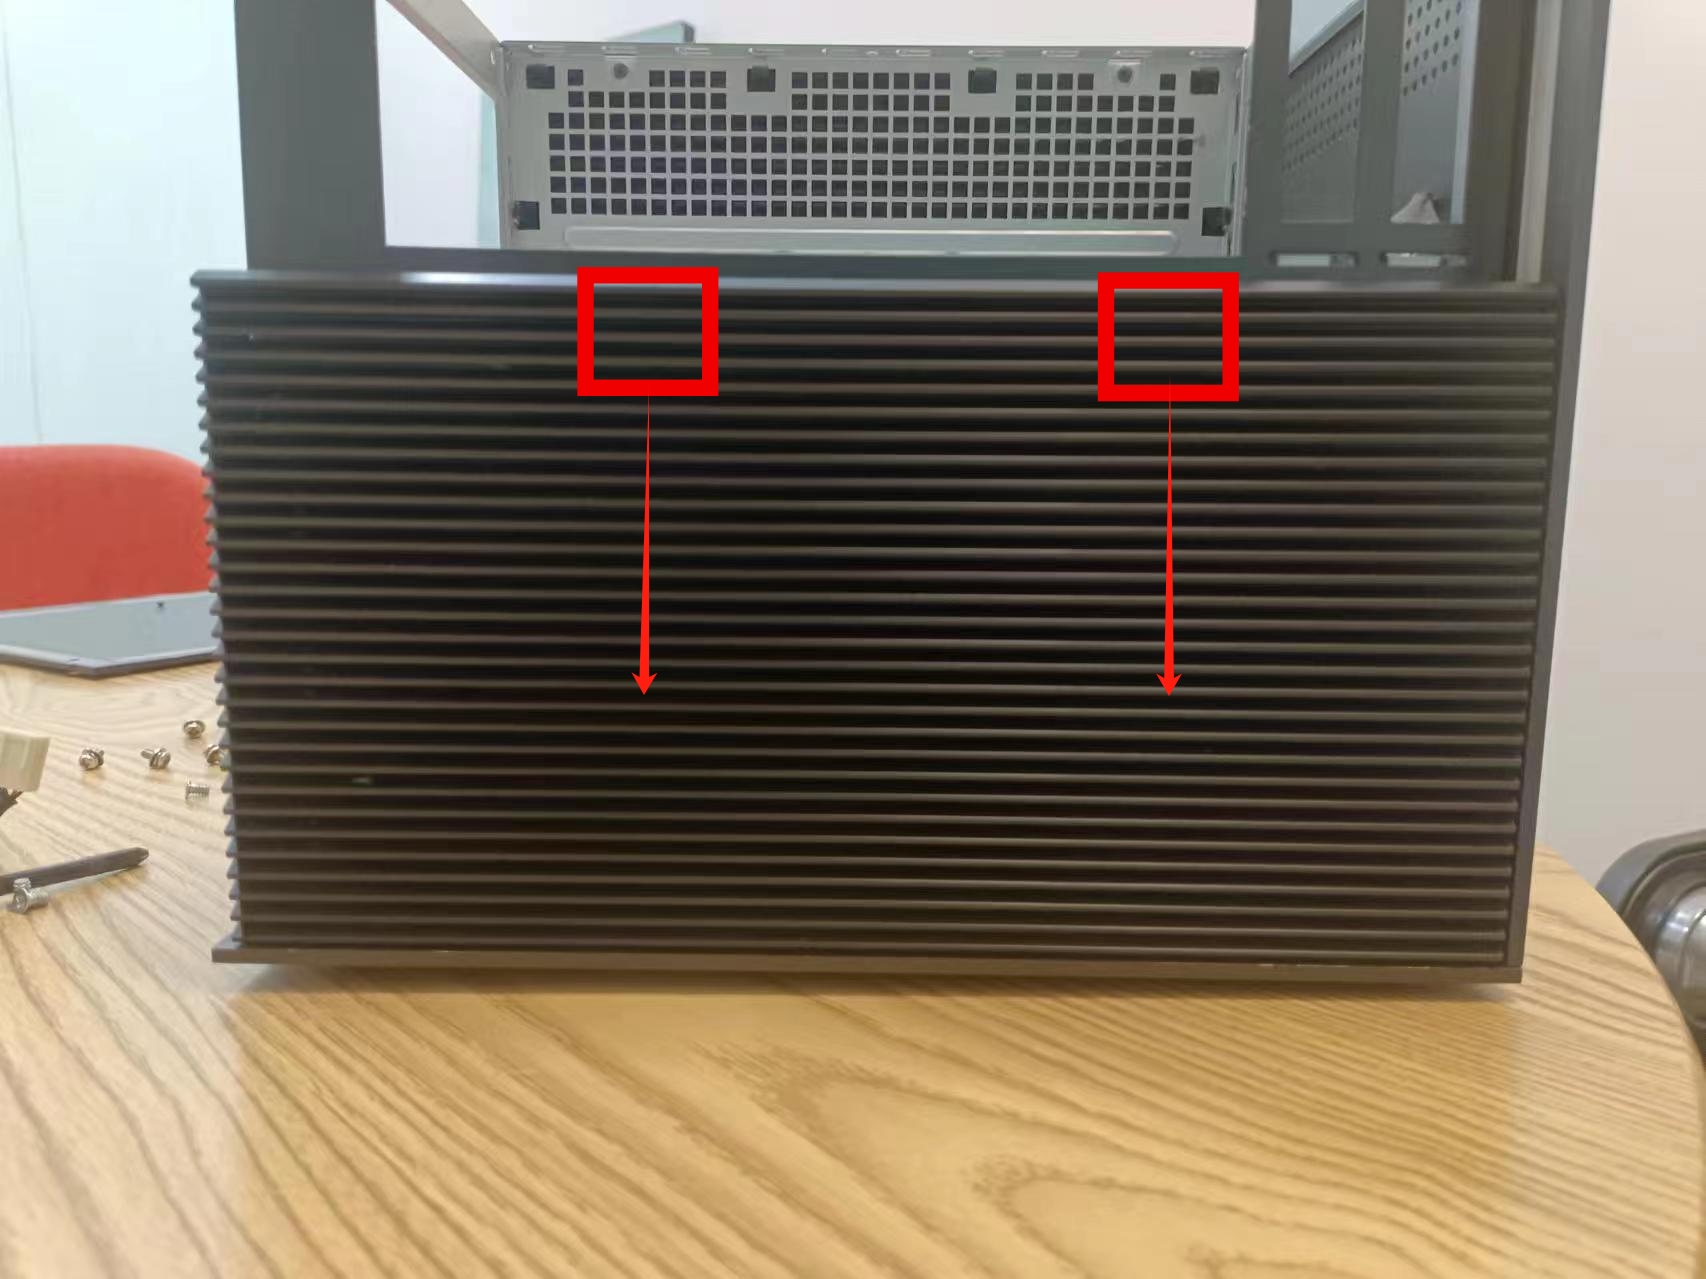
Press down the box and pull back to open the fan cover
Then remove the entire cover
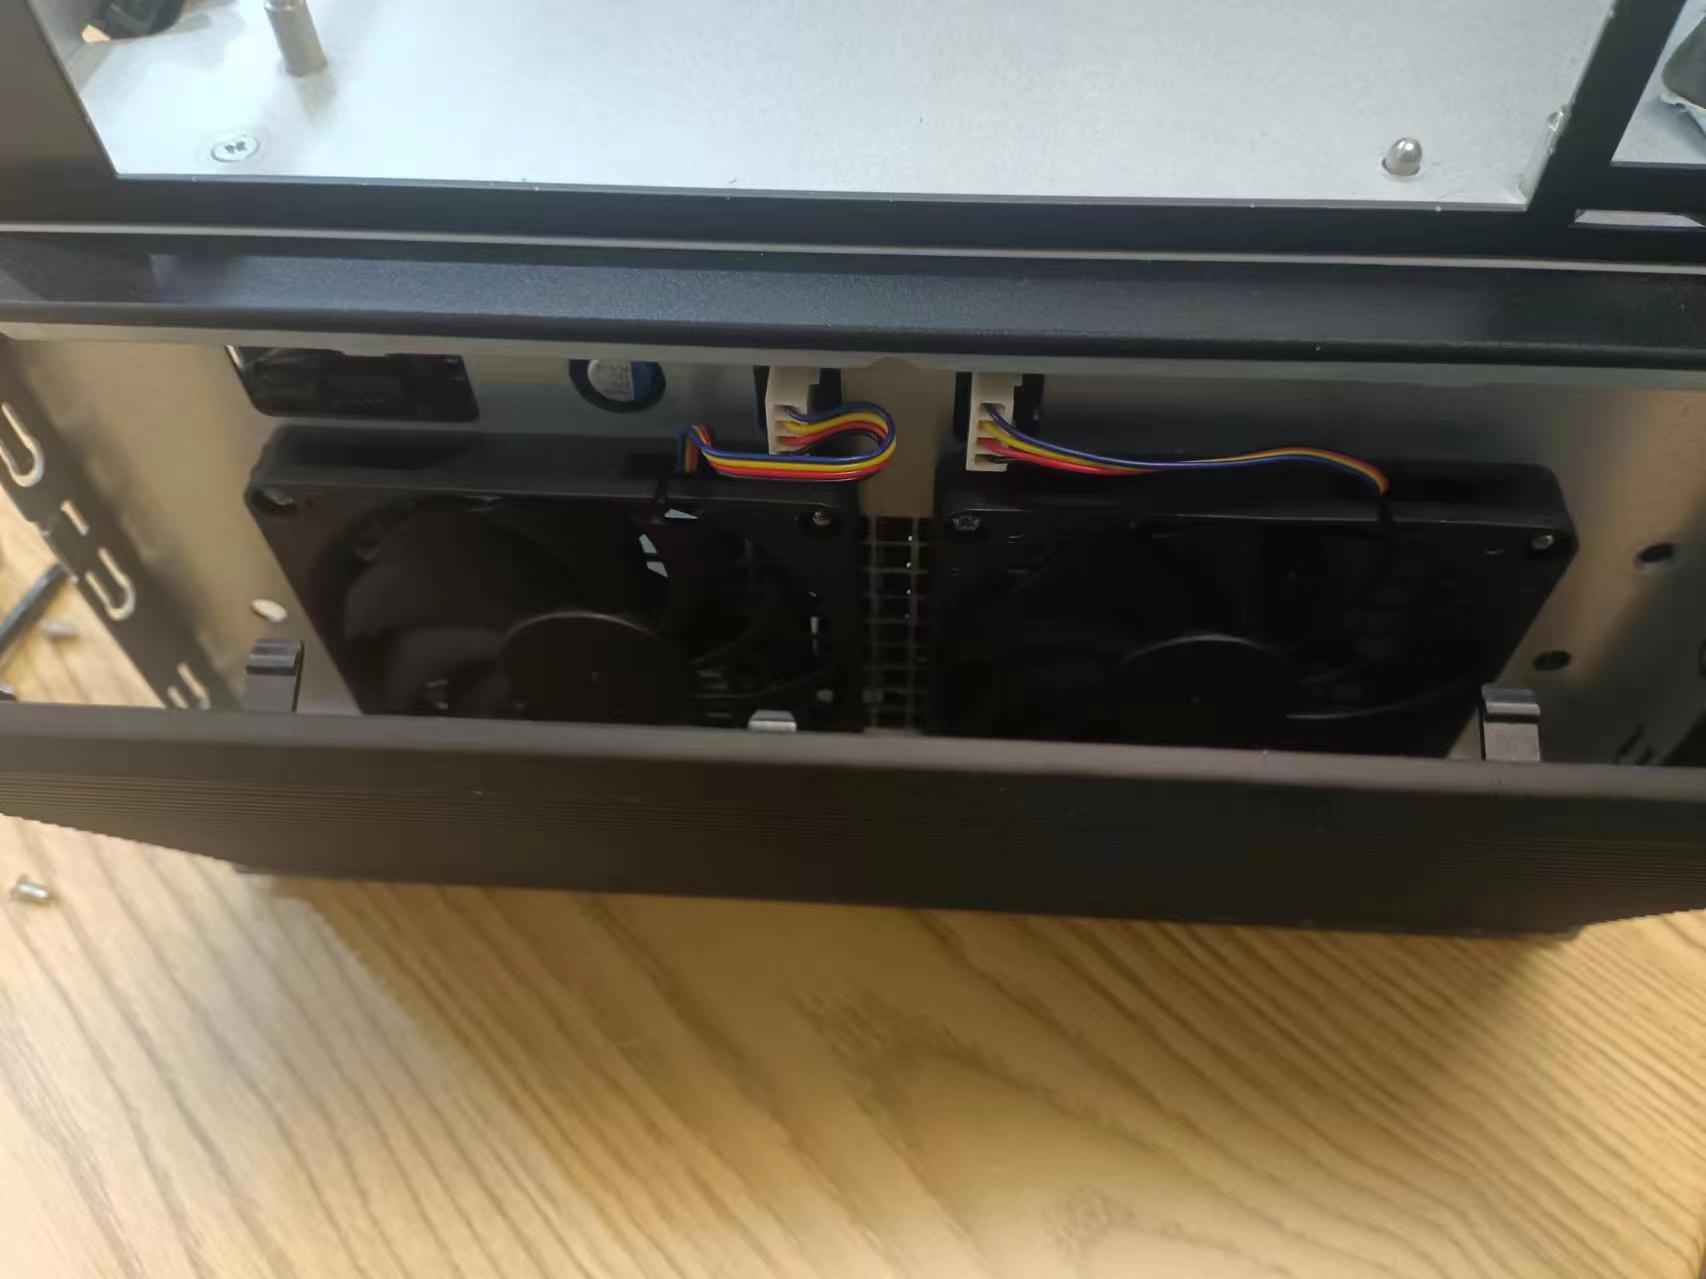
9. HDD cooling fan removal
- Front: Remove the cover Disassembly Tutorial
- Loosen the fan screws
- Align and unplug the fan power cord
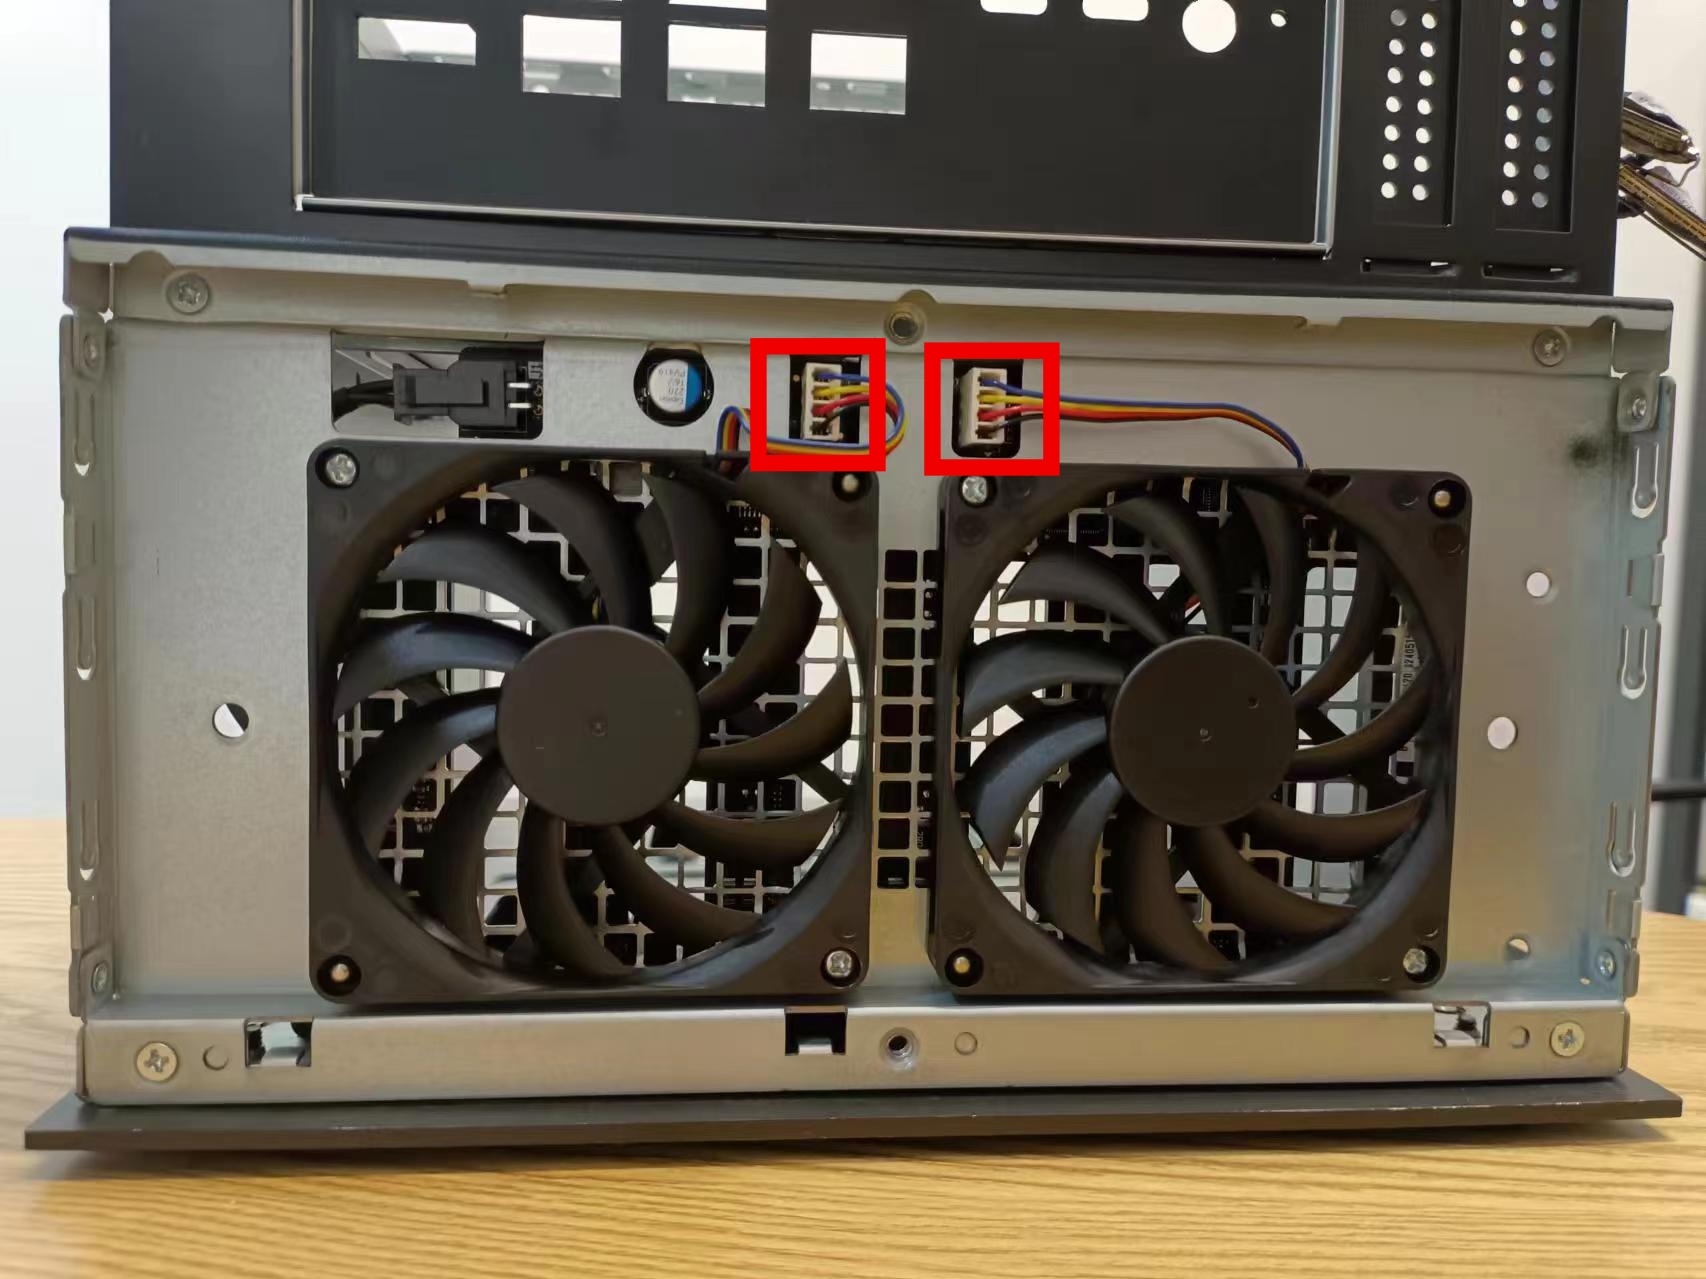
- Remove the fan
Fan replacement - Unplug the power supply
- Unscrew the screws in the four red circles
- Place the replacement fan on top and screw it on
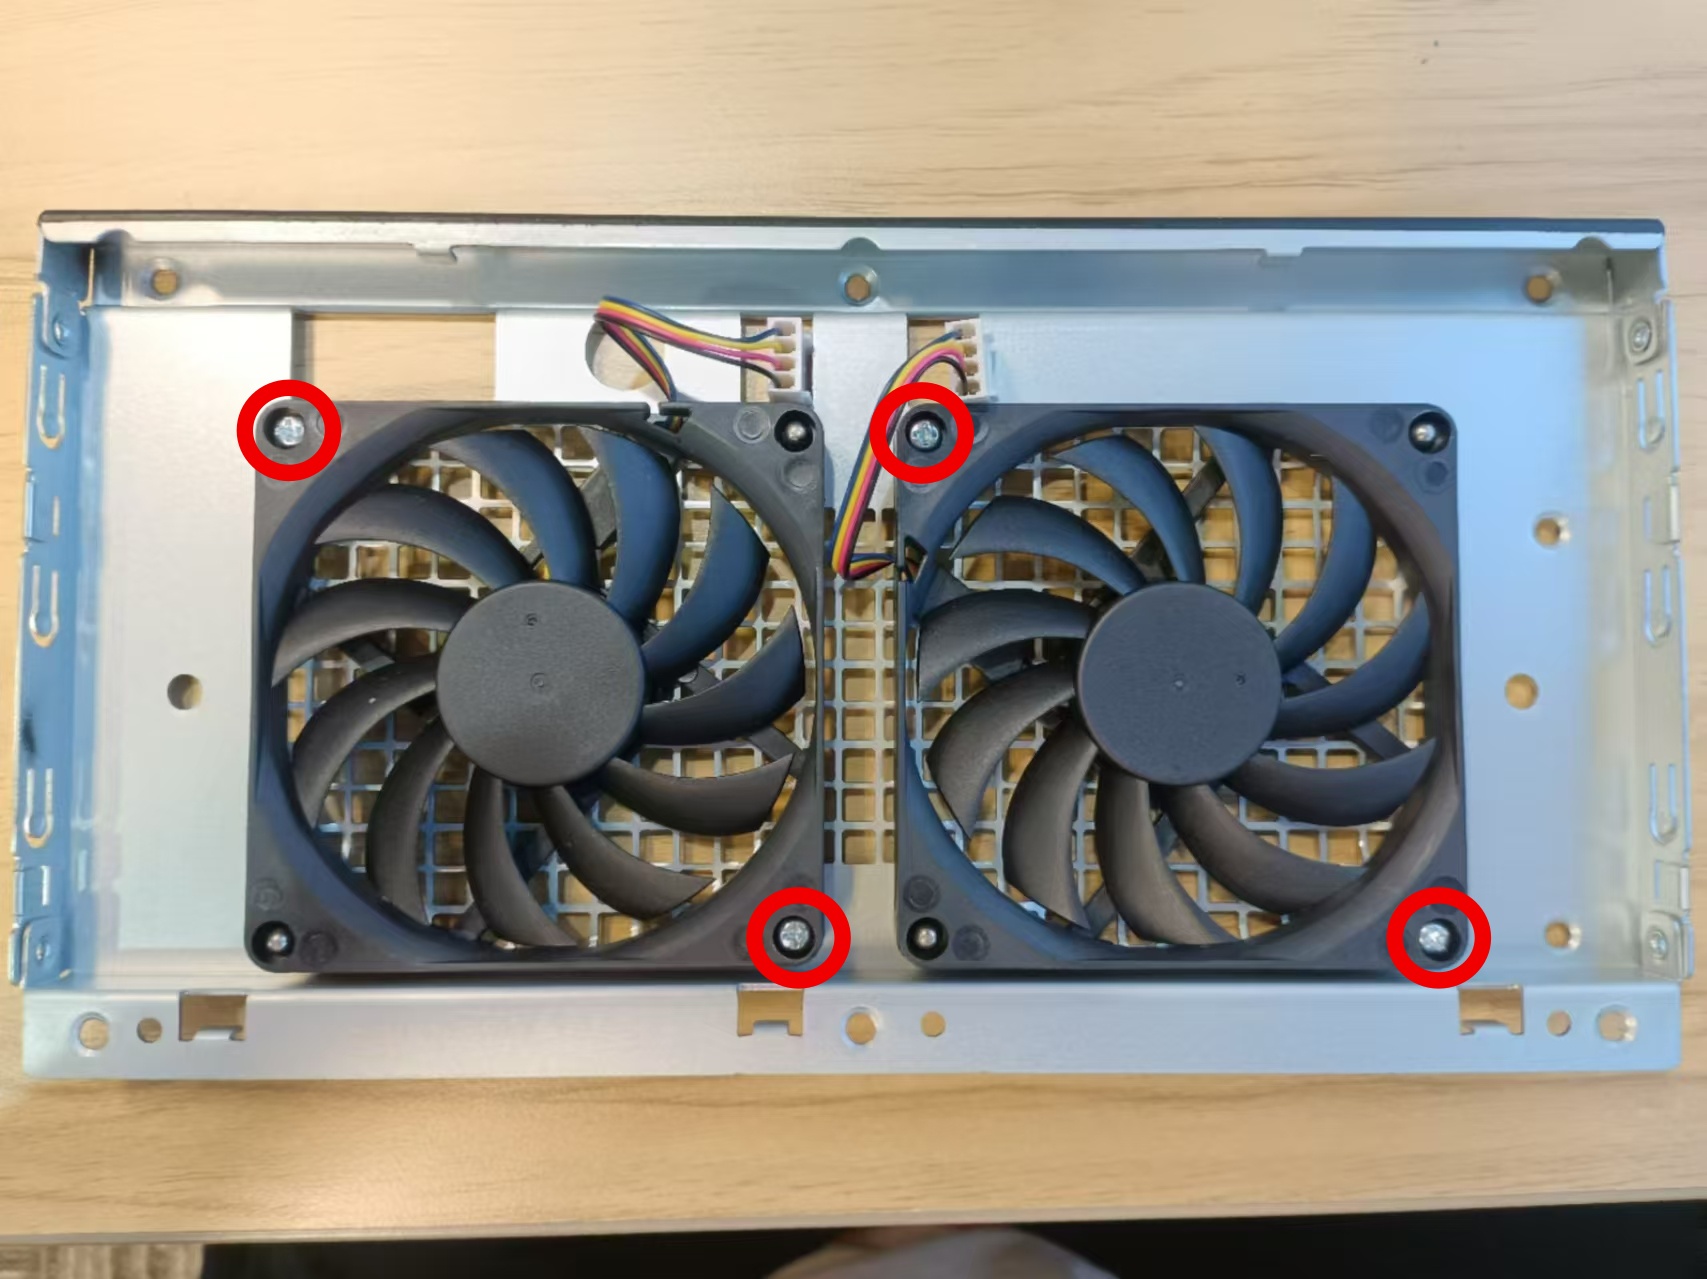
10. SATA expansion board removal
- Front: Remove the cover Disassembly Tutorial
- Unscrew the fixing screws of the fan board
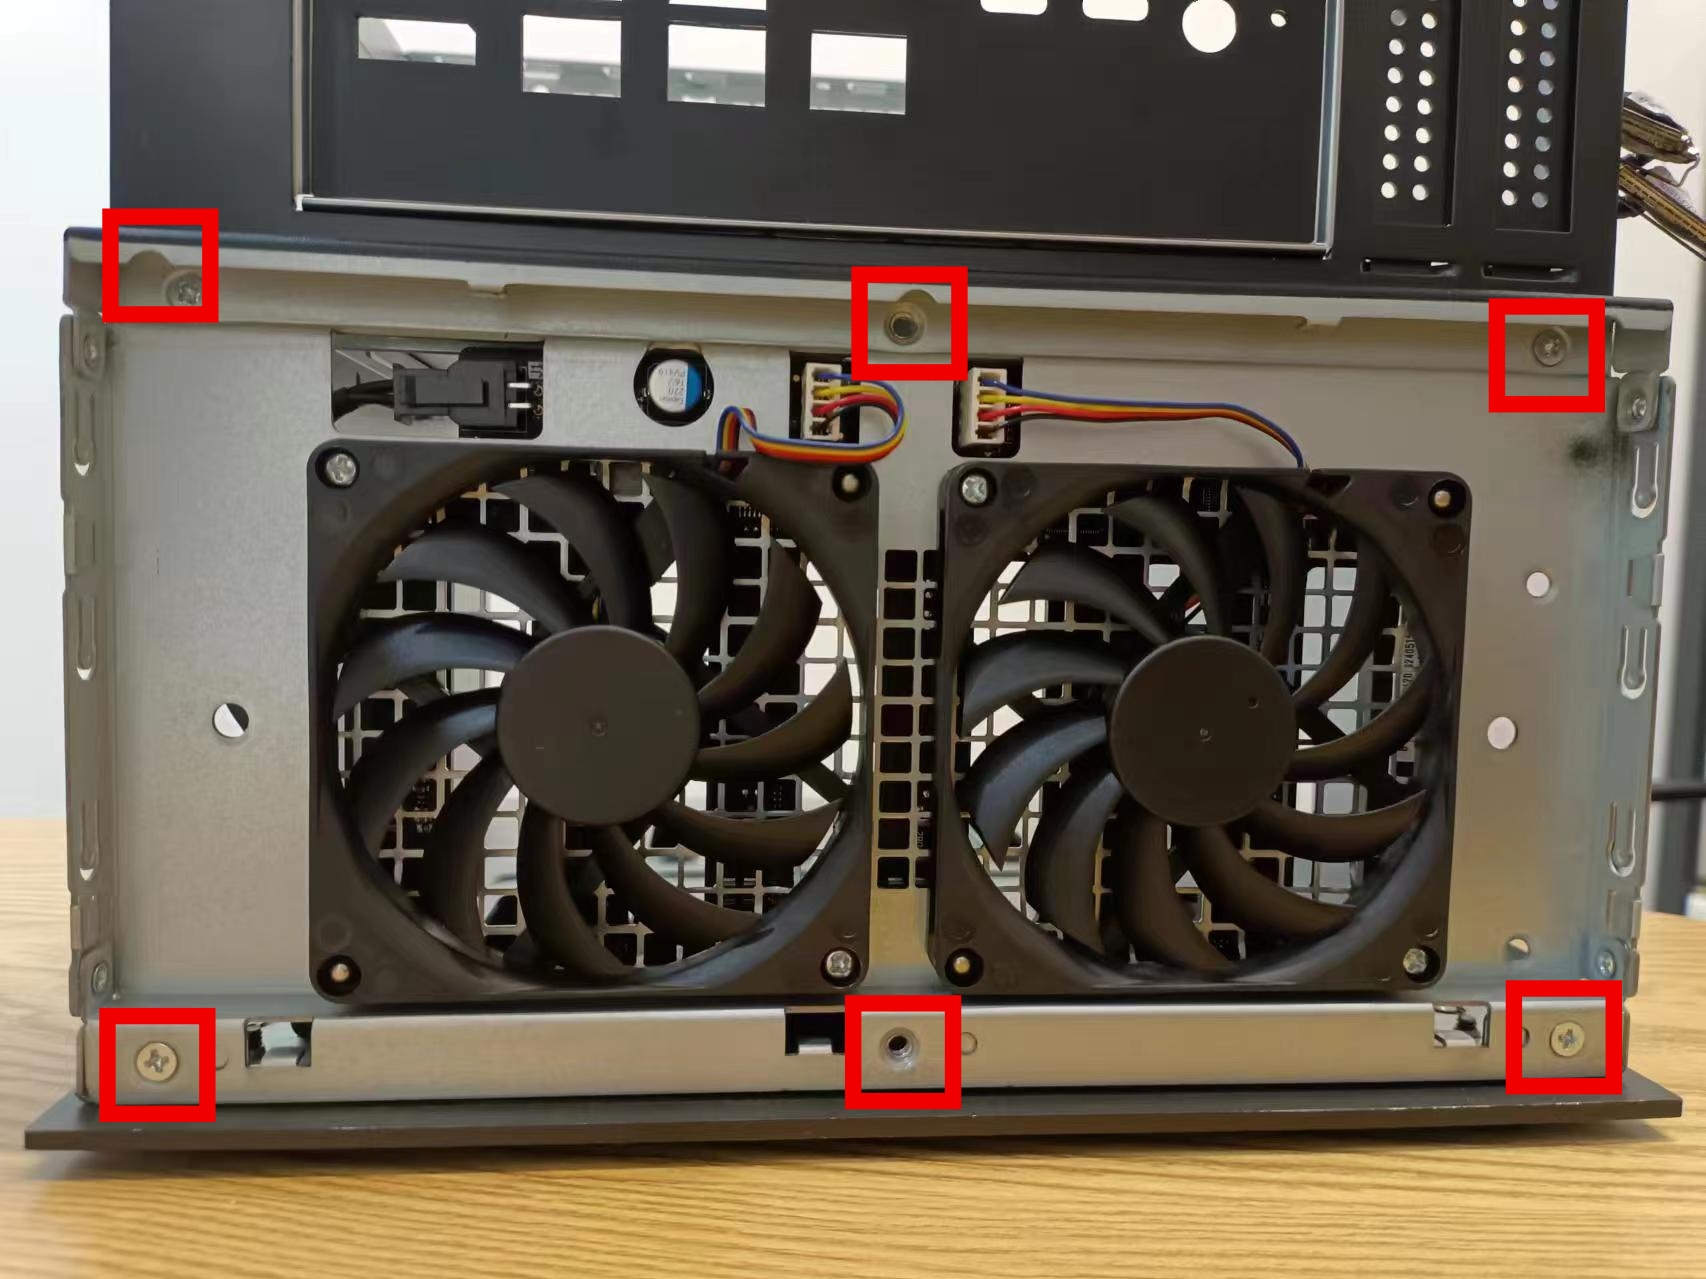
- Unplug the left interface
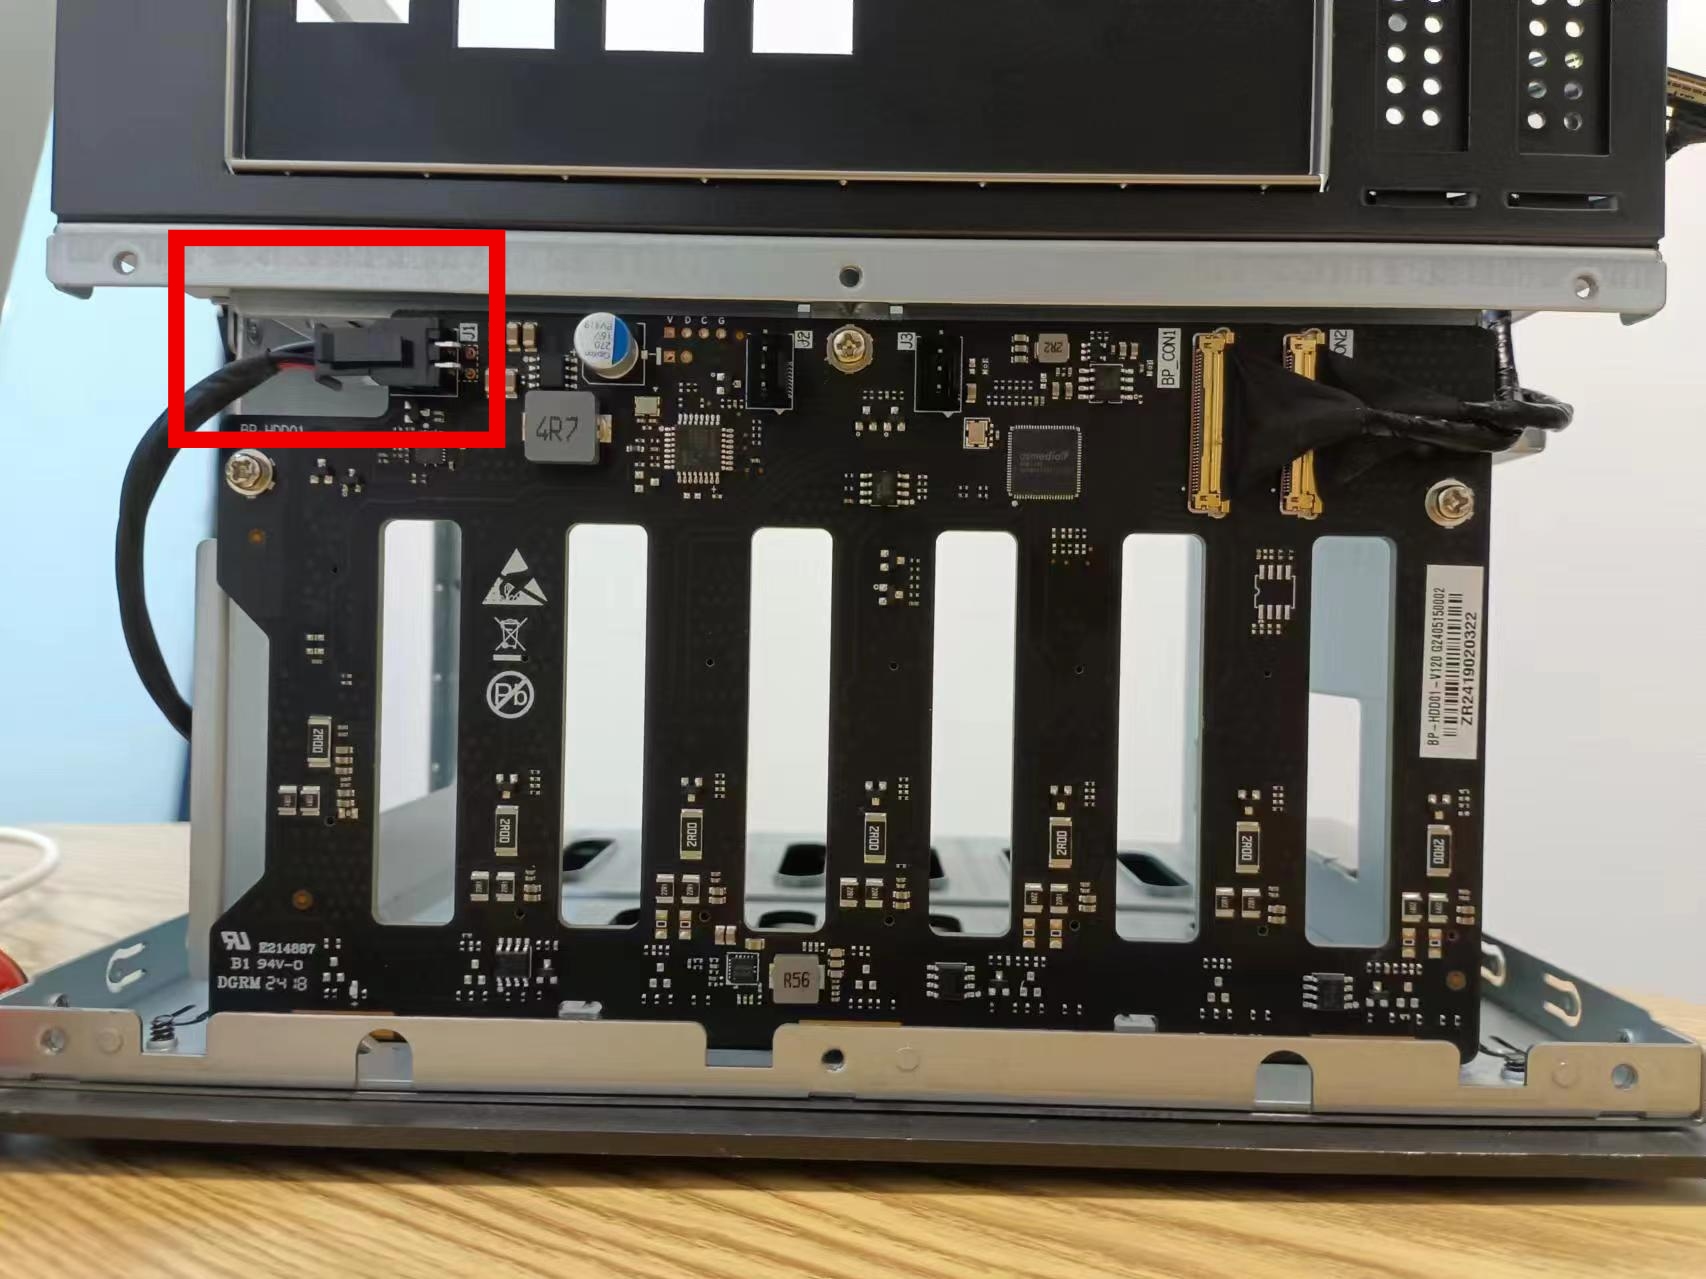
- Lift the lock buckle fixed on the right and pull it out
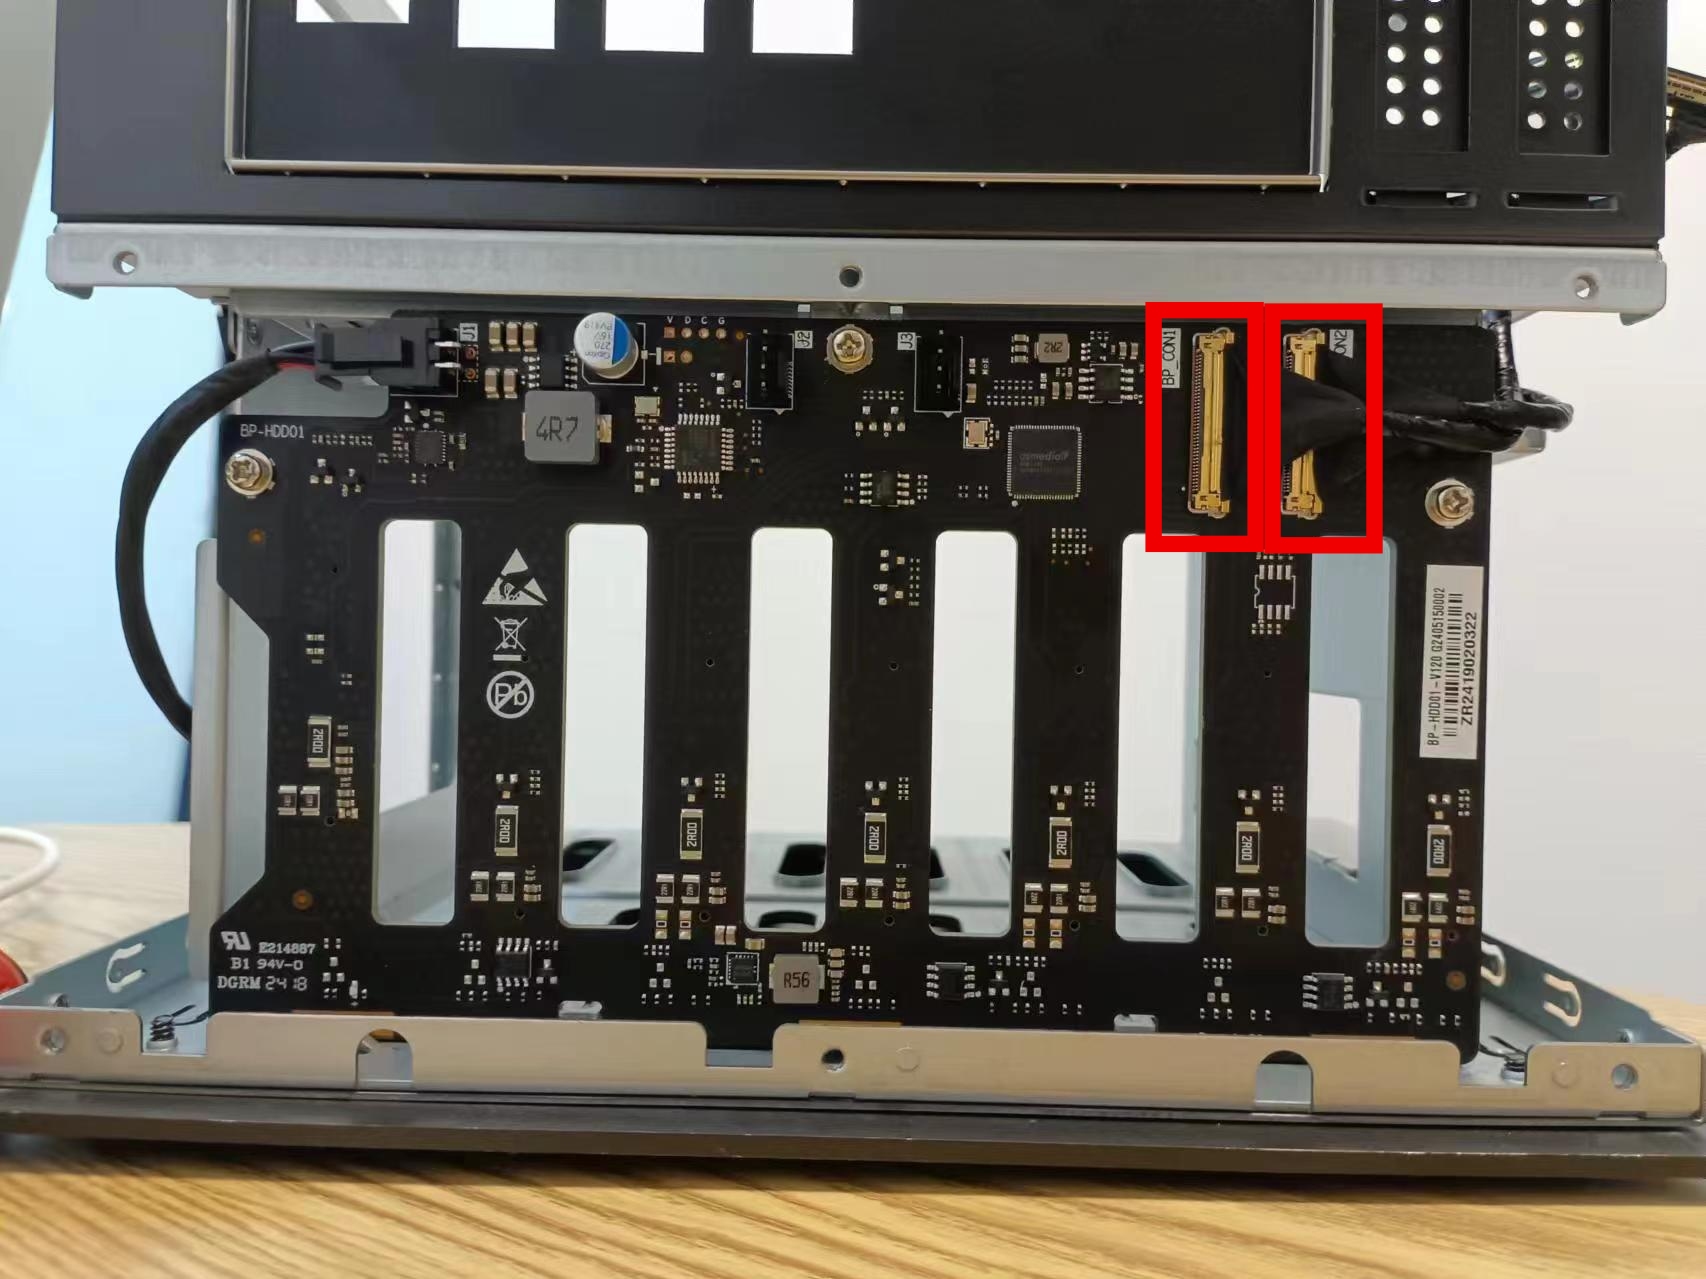
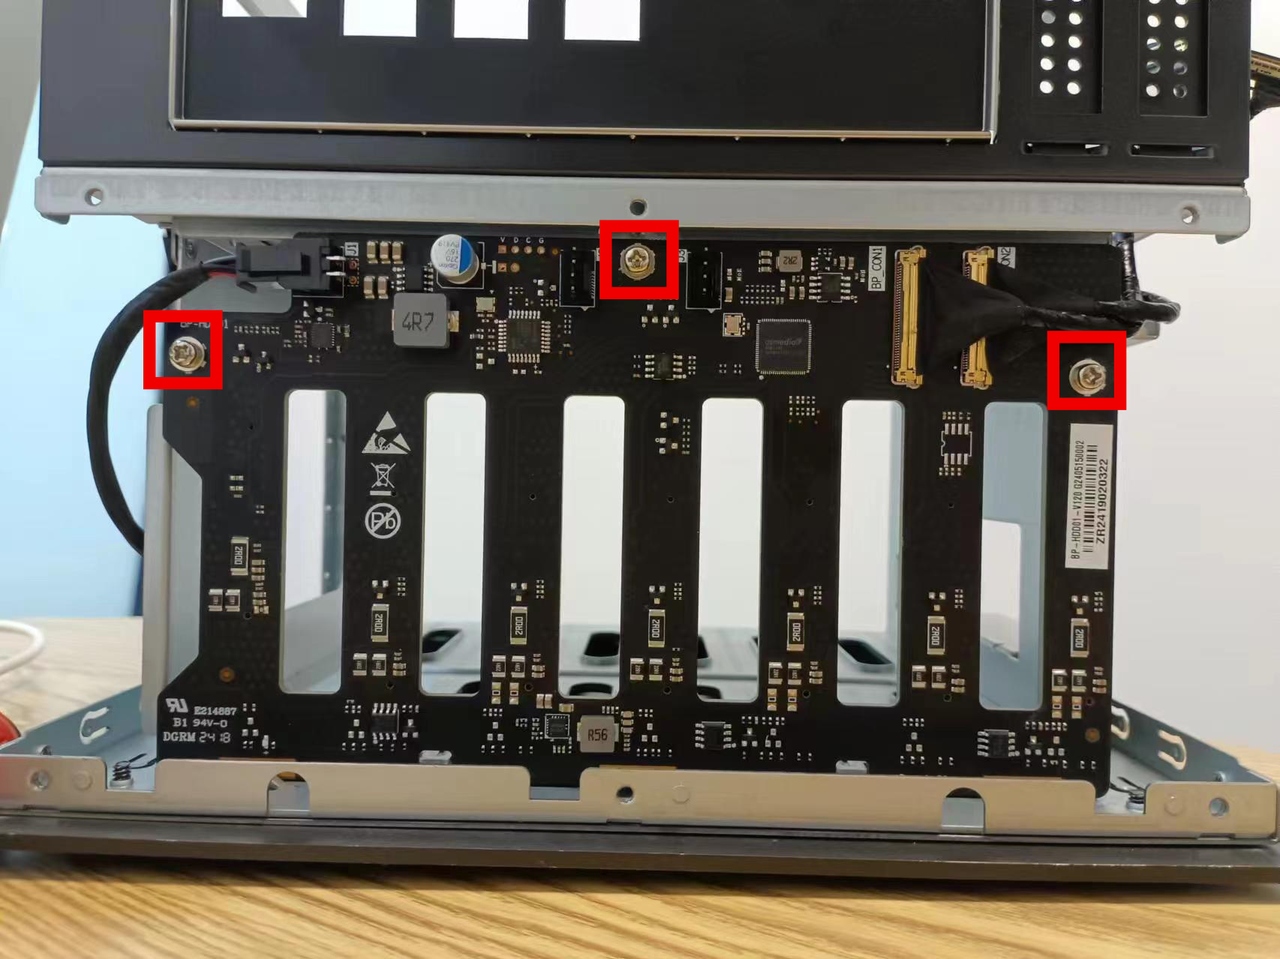
- Loosen the three screws on the SATA board
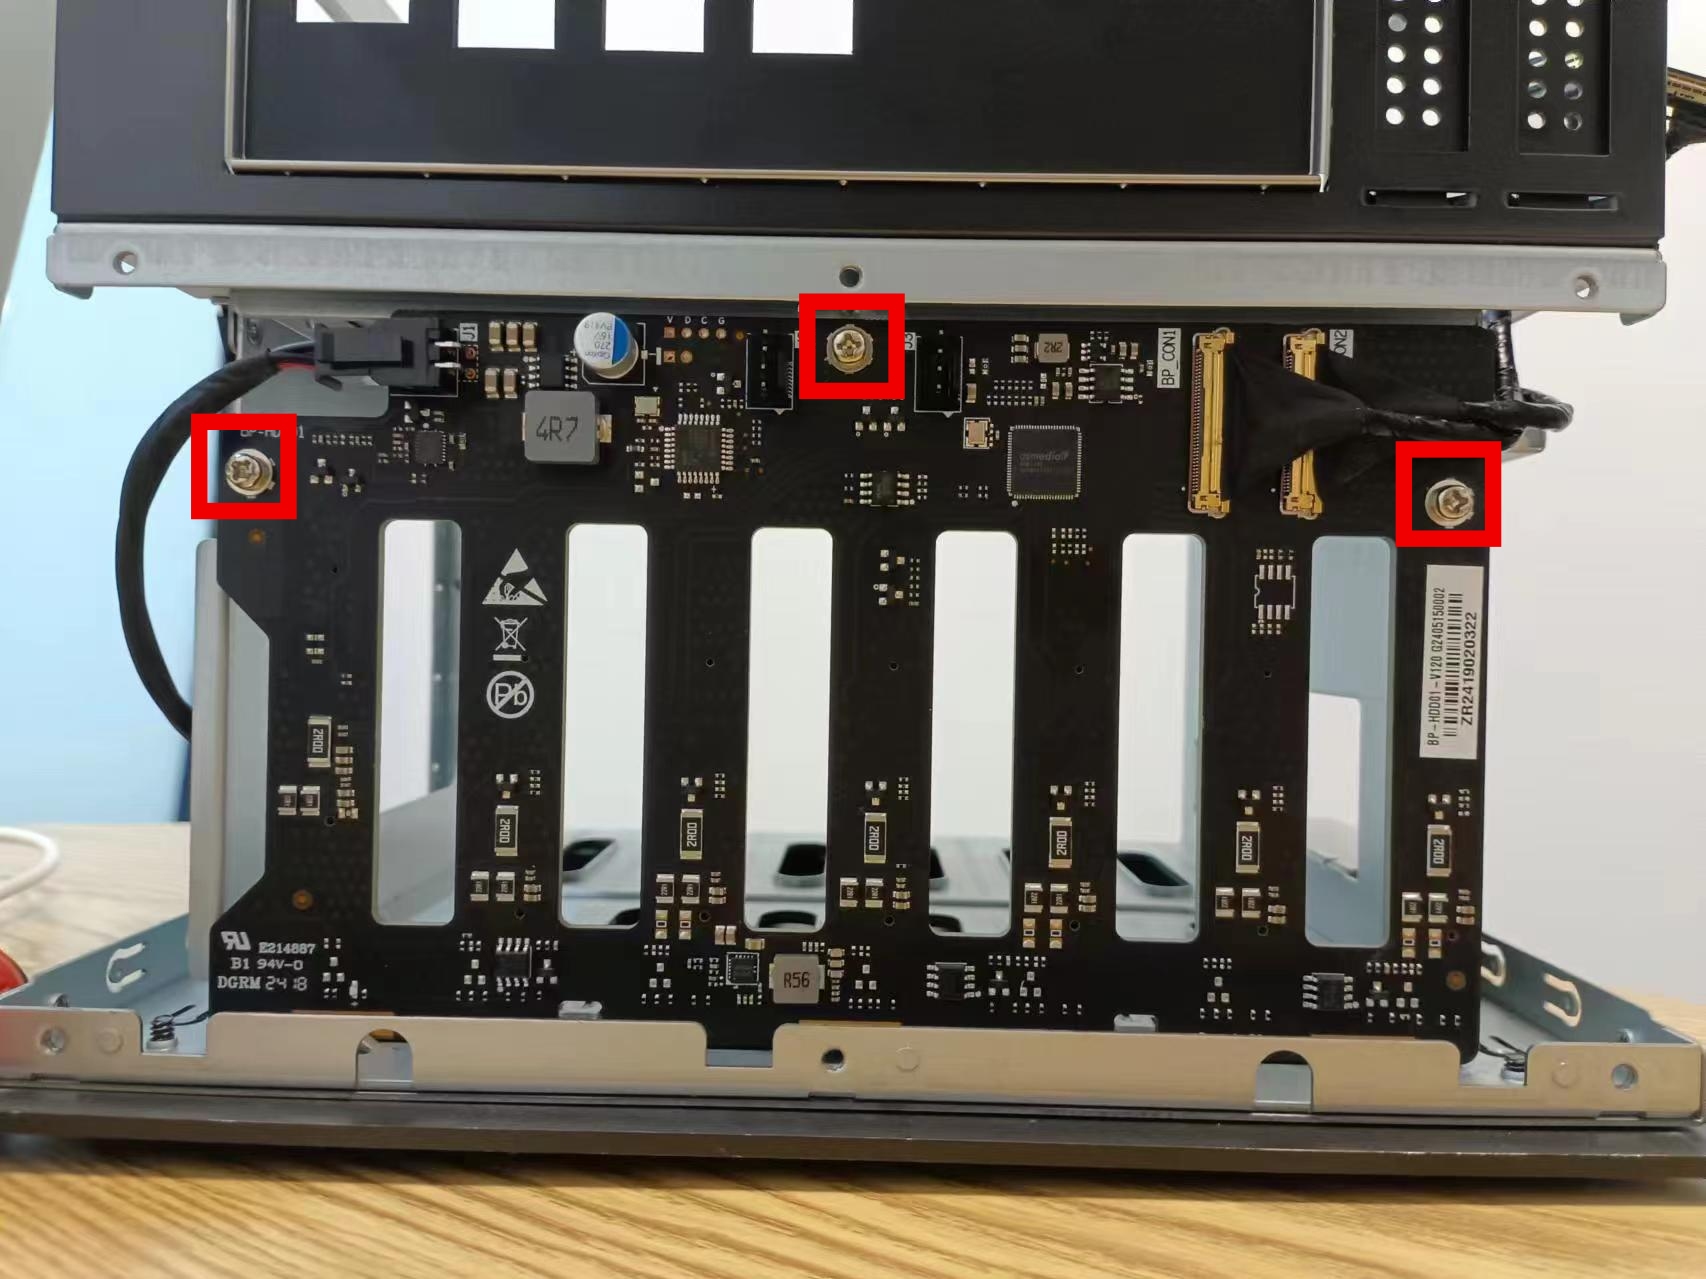
Replace the SATA expansion board
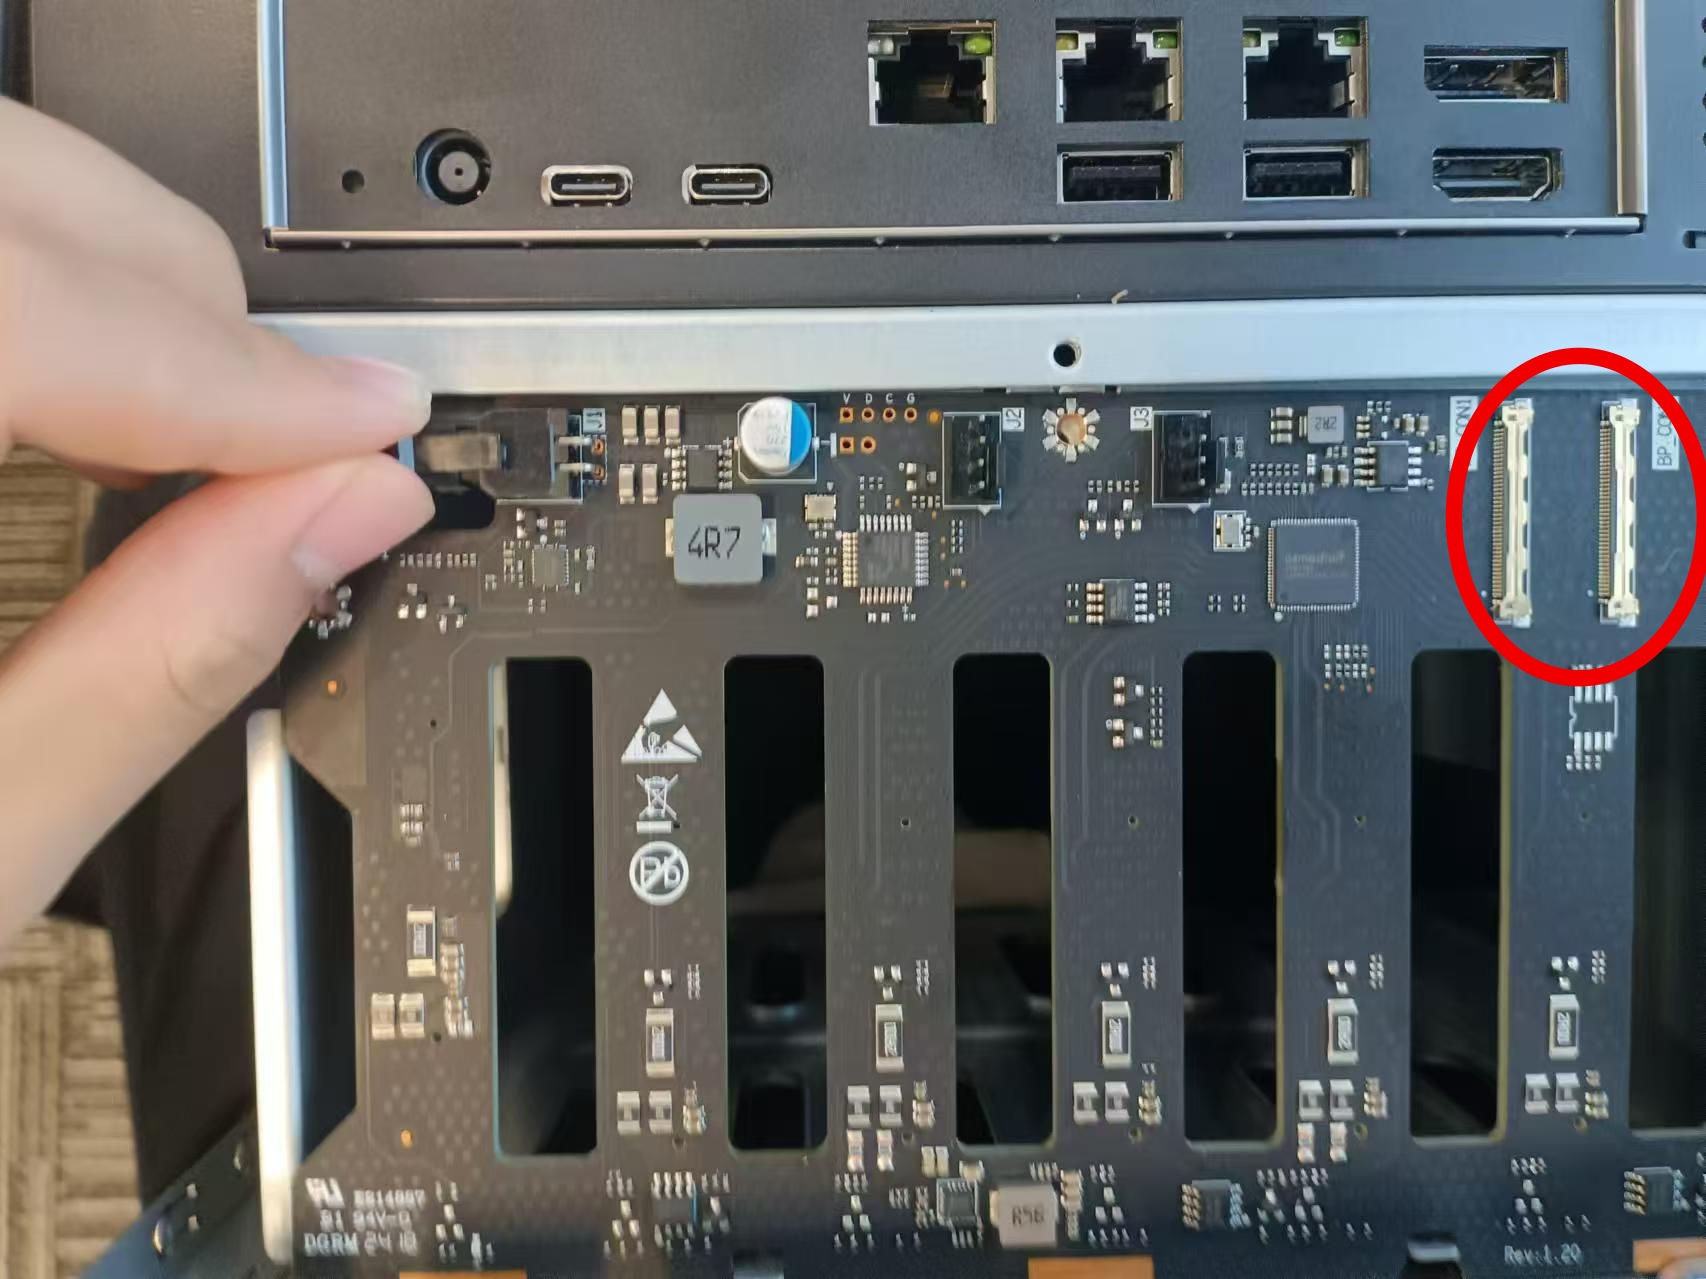
- Connect the power cable of the lower board
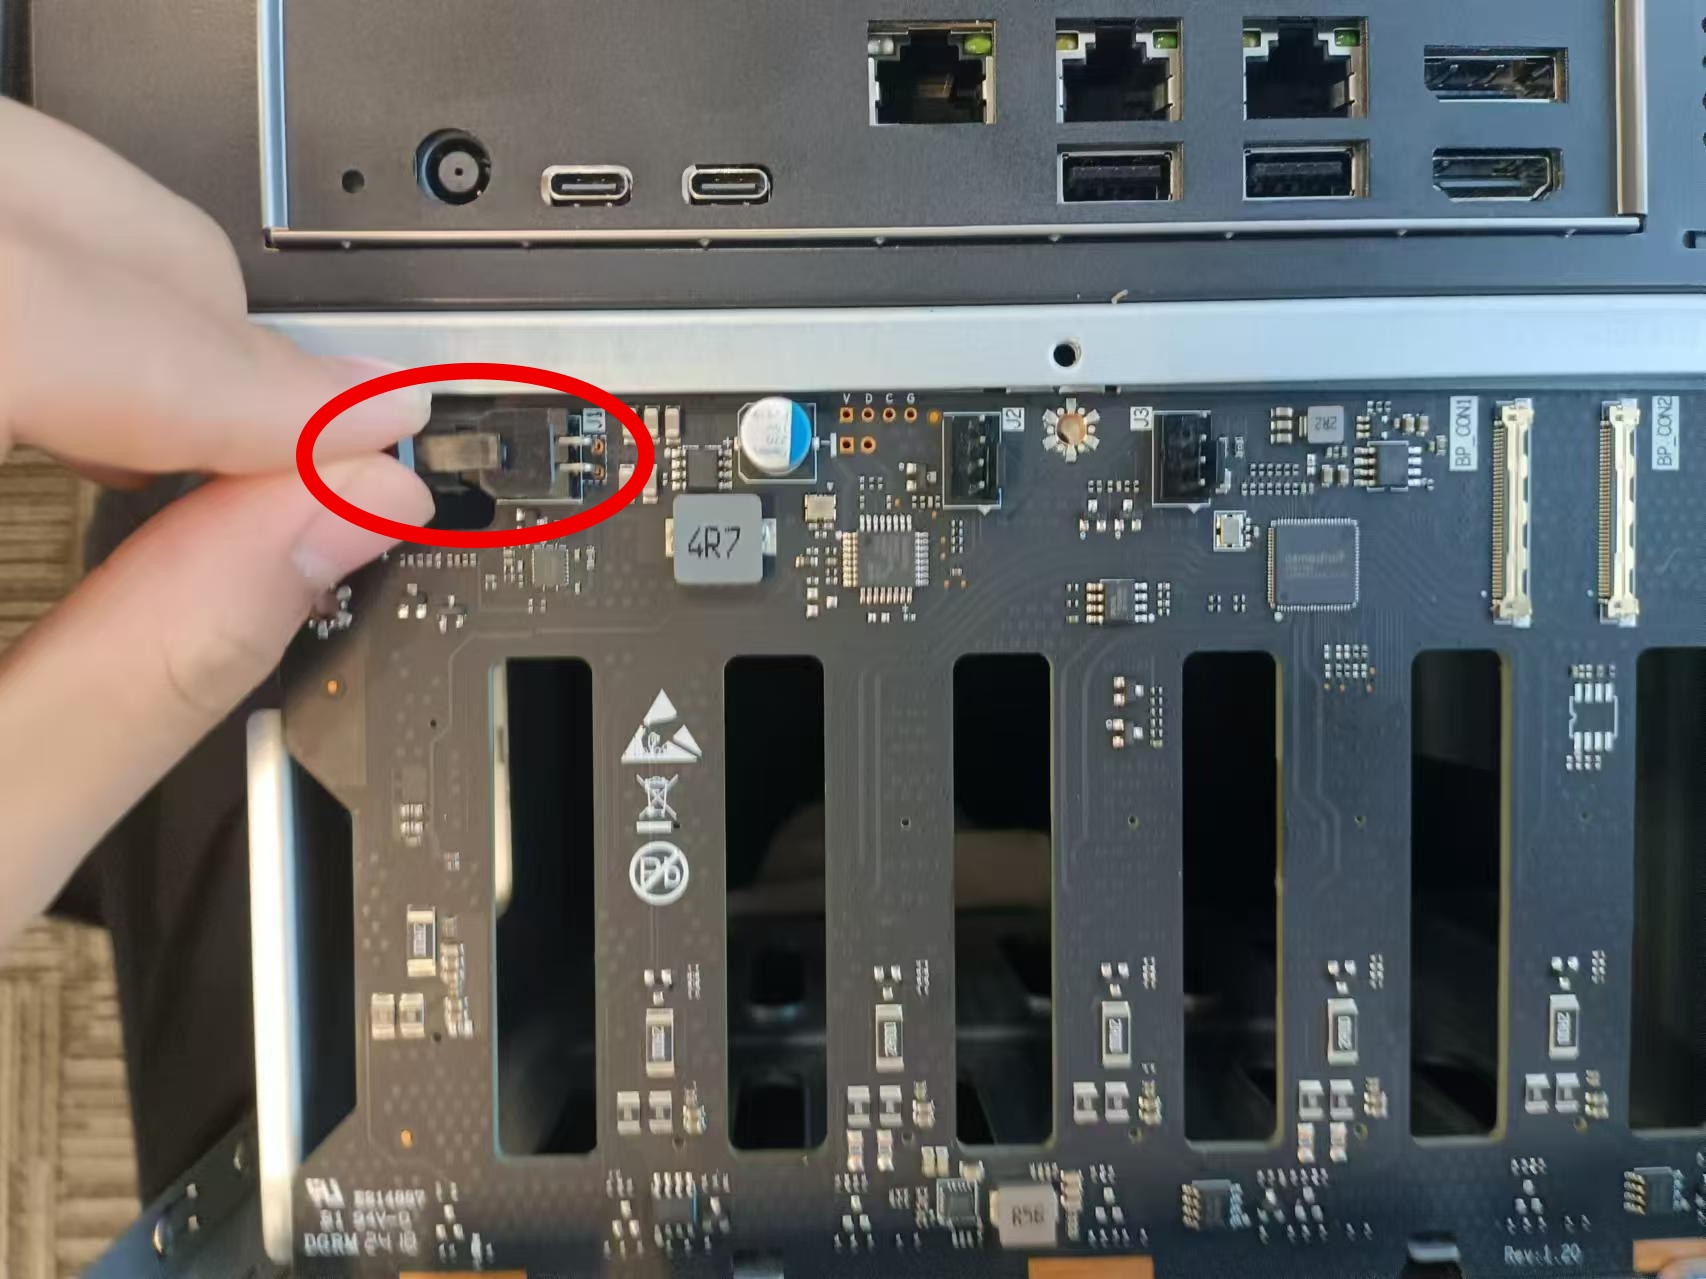
- Connect the transmission cable of the lower board
- Note: When installing the transmission cable, there are BP-CON1 and BP-CON2 (the picture below is identified by the white silk-screen characters next to the interface), and you need to pay attention to the correspondence when connecting with the upper half

- Fix three screws
11. Disassembly of the bottom plate
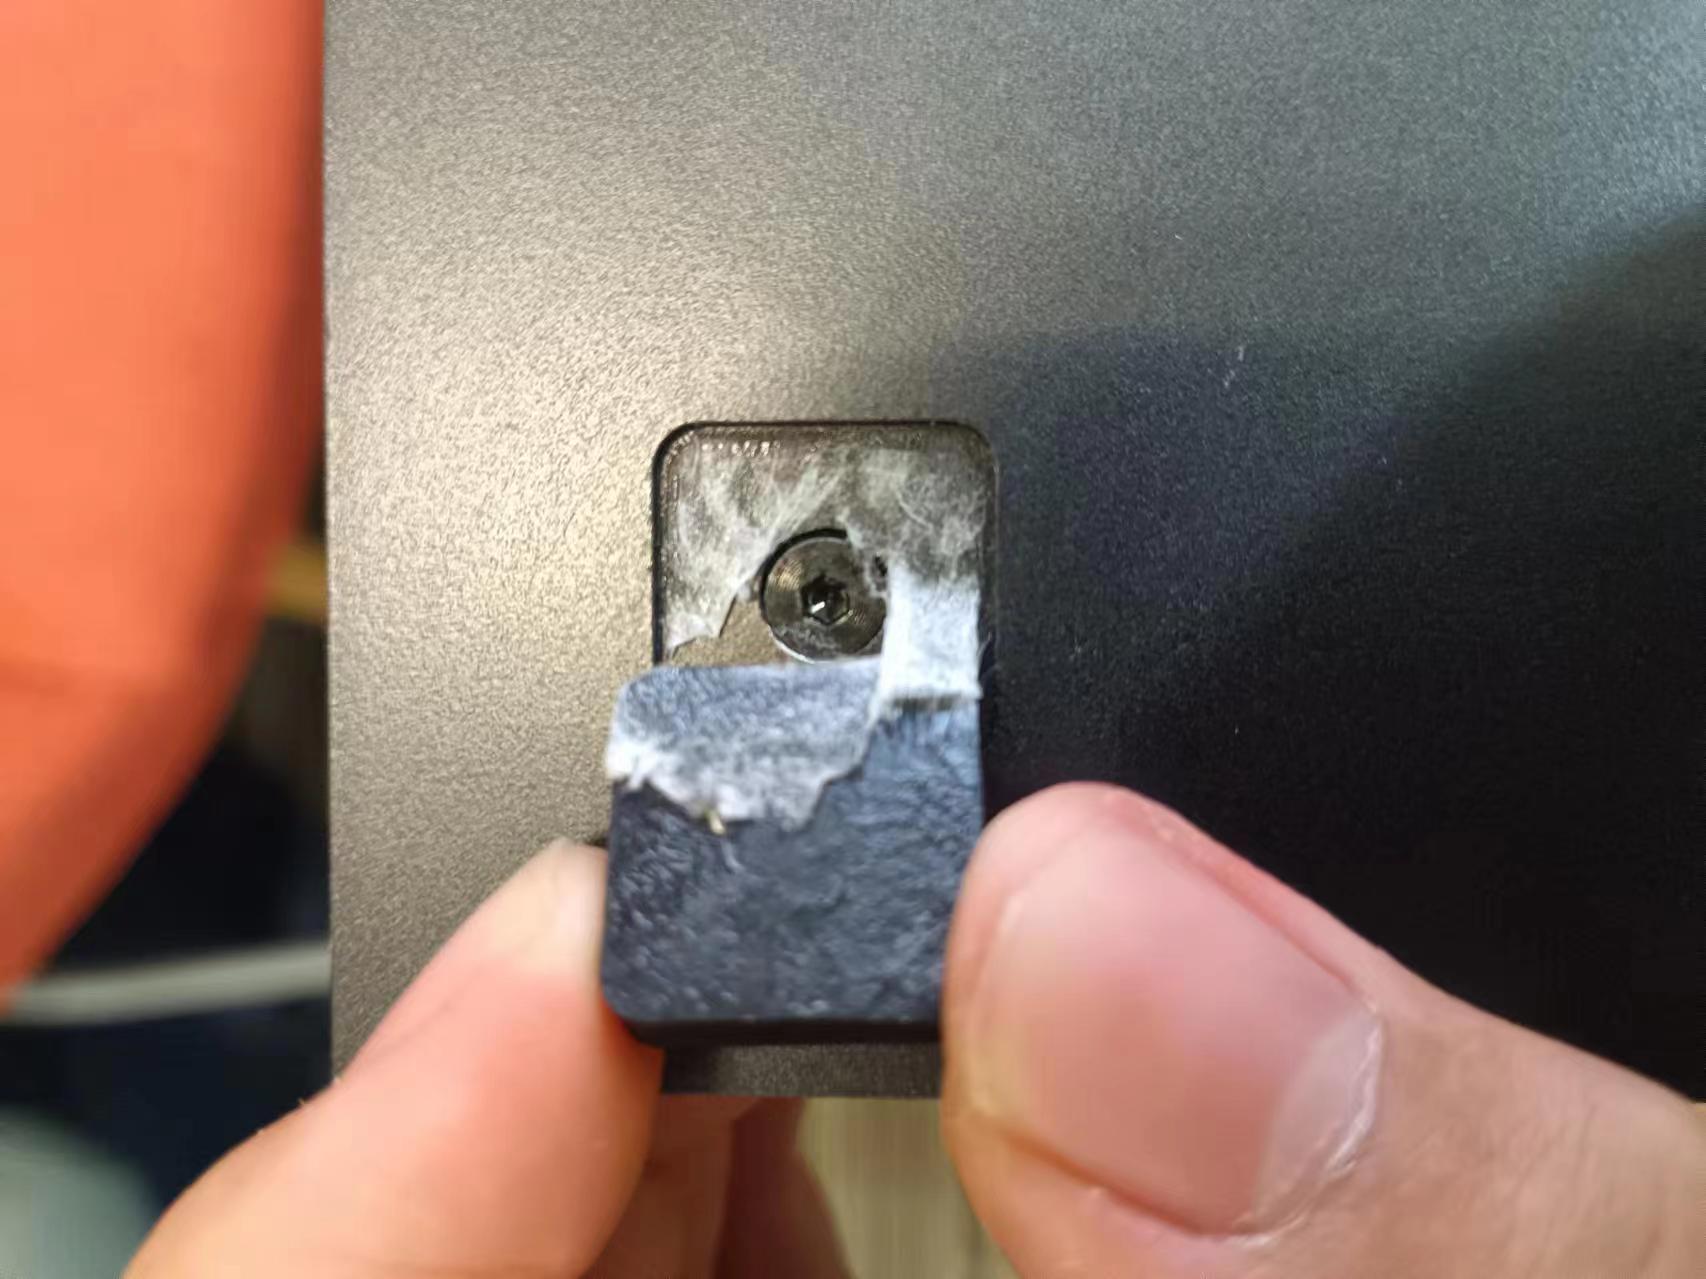
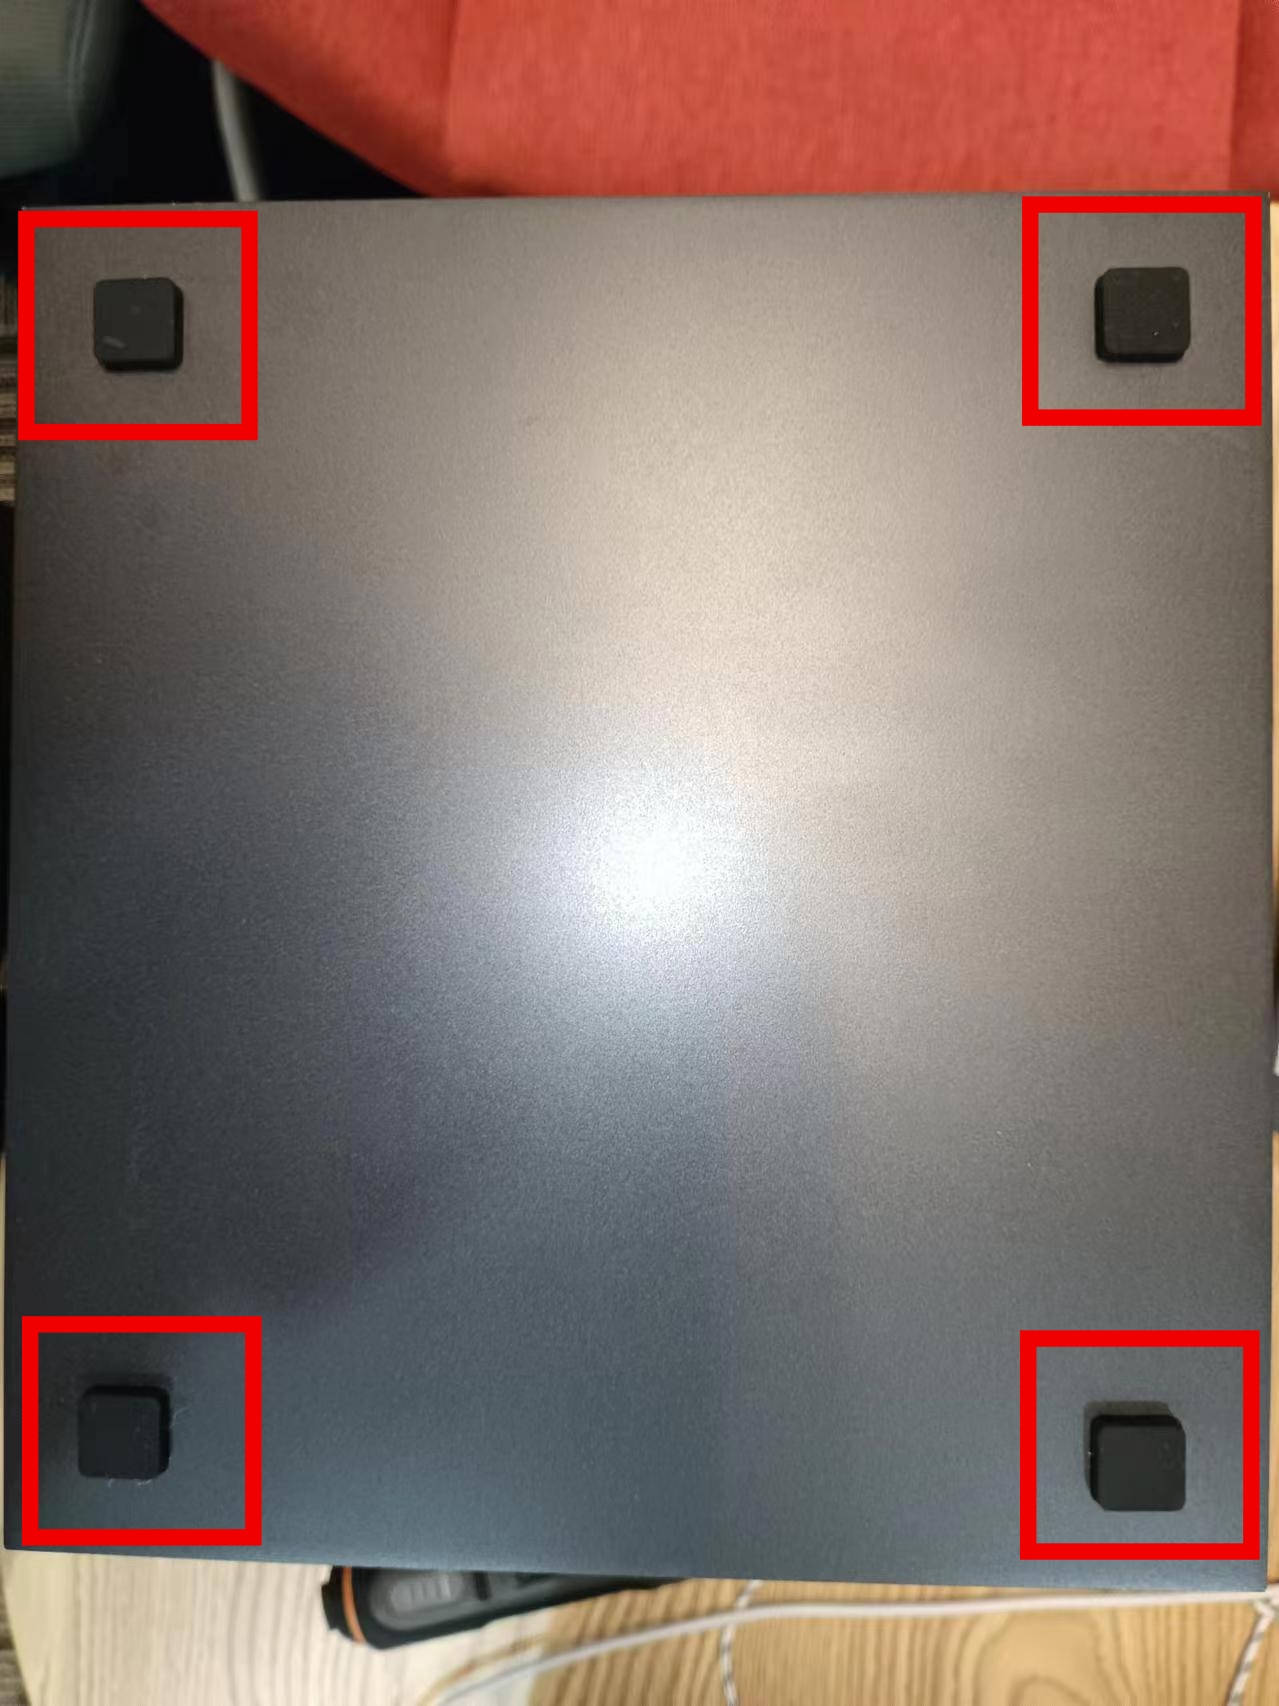
- Lift the four rubber pads on the base and unscrew the screws below
