Install and Remove the 7th Bay
Preparations:
Ensure that the ZimaCube is powered off and unplugged.
Prepare the hard drive to be installed.
Specific Steps:
Step 1: Remove the front panel of the case.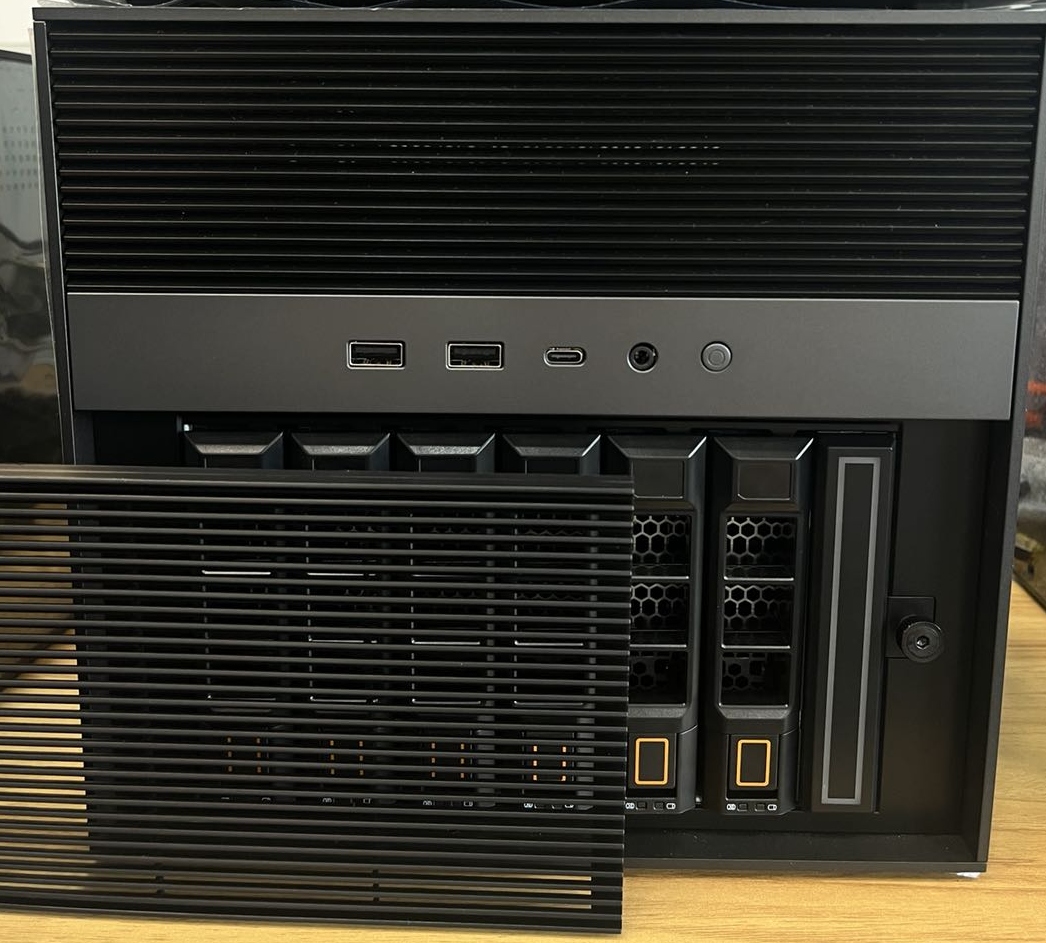
Step 2: Remove the 6th bay.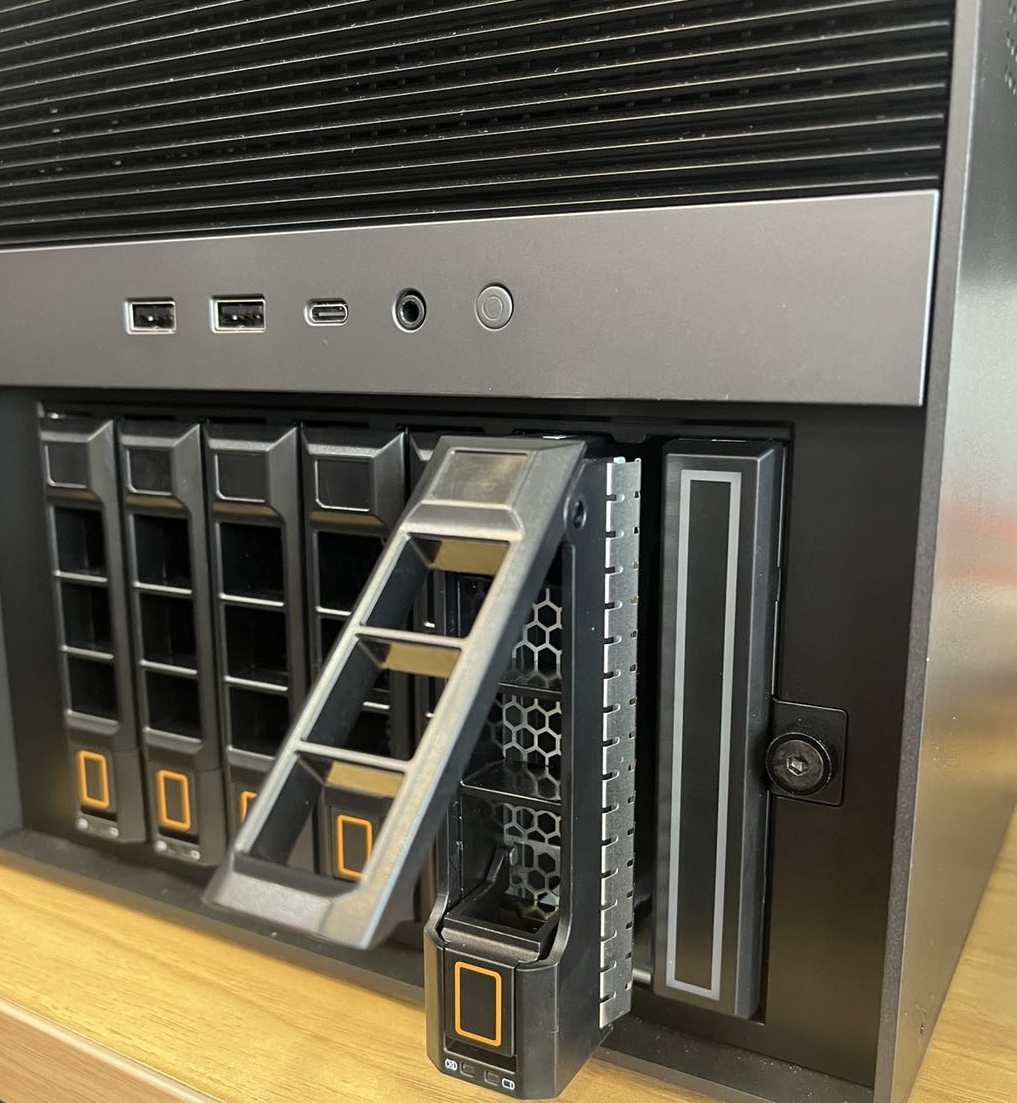
Step 3: Turn counterclockwise to unscrew the screws securing the seventh drive.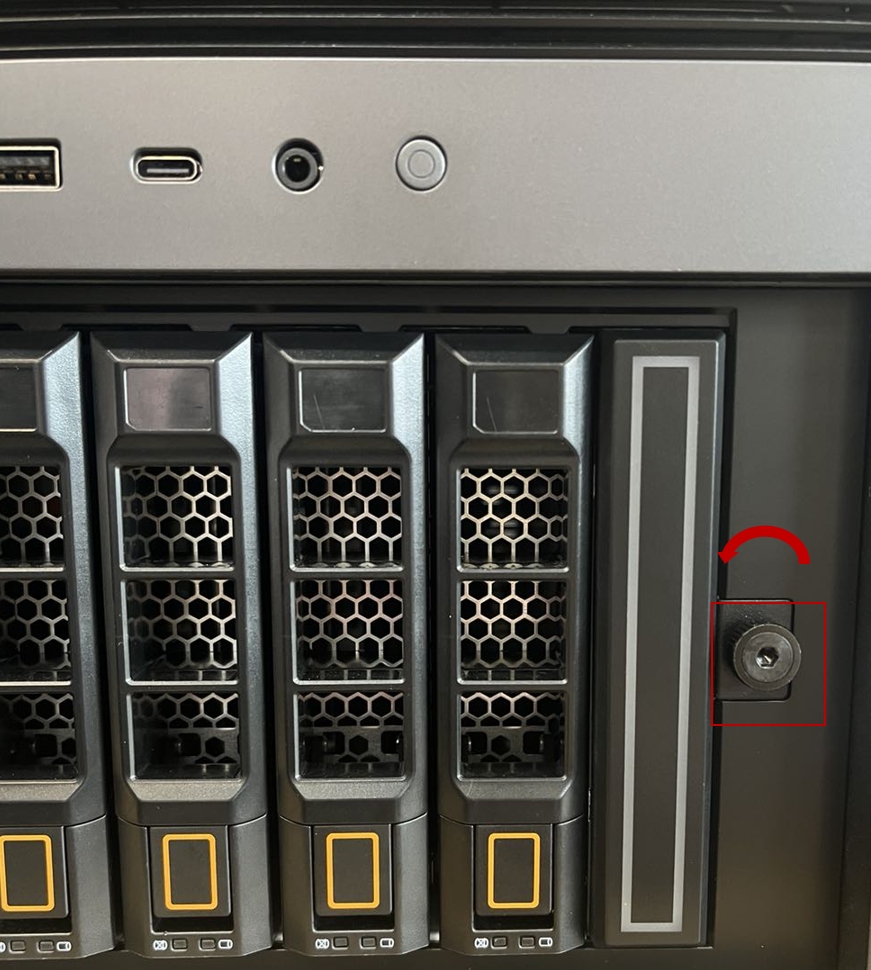
Step 4: Remove the 7th bay.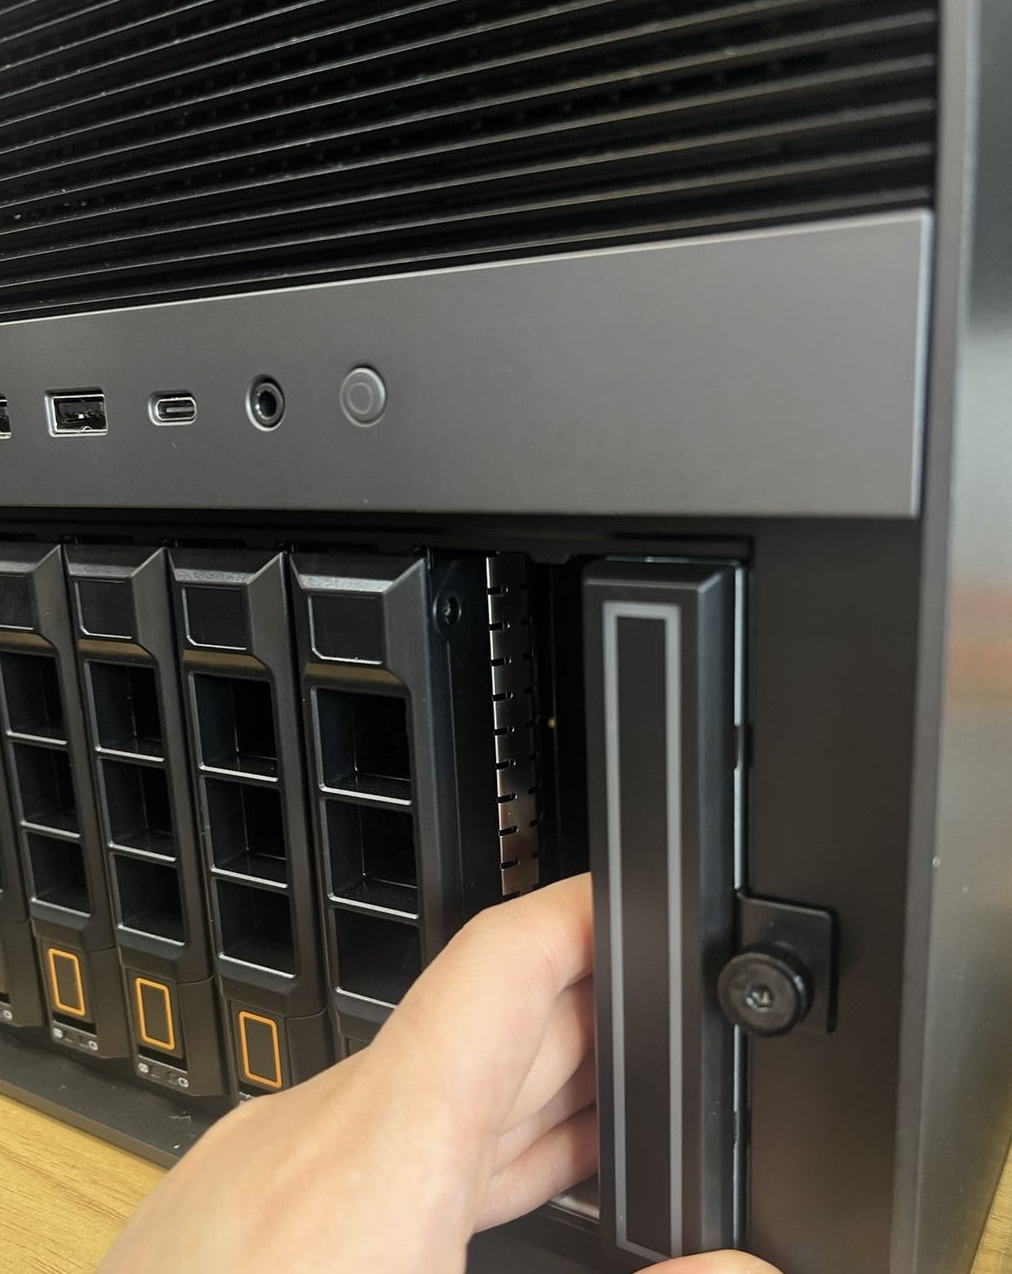
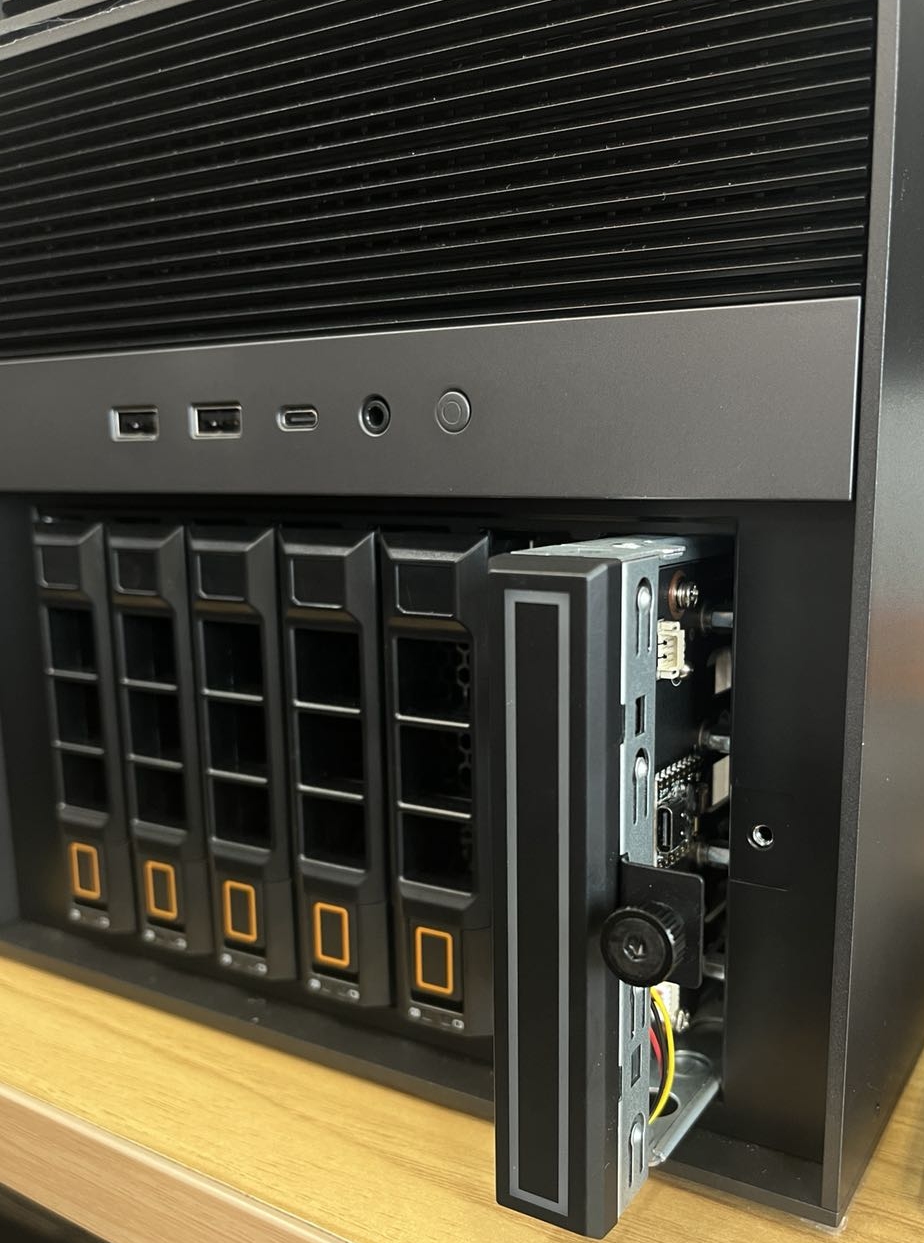
Step 5: Freely install the SSD onto the 7th bay.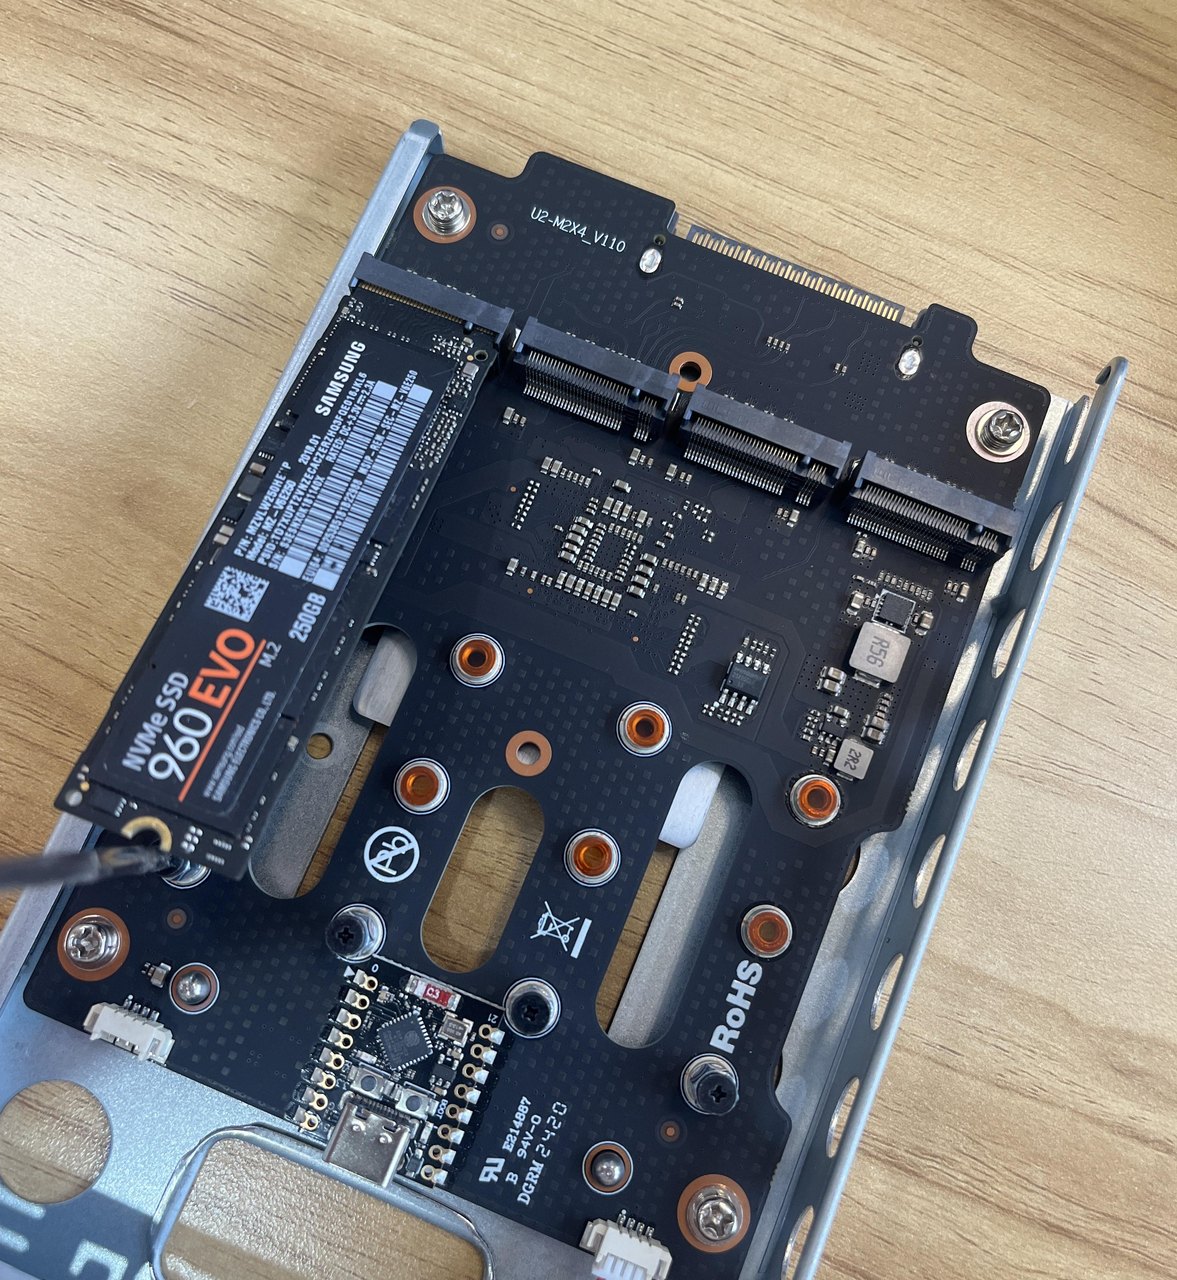
Step 6: Push the 7th bay into the correct position and tighten the screws clockwise.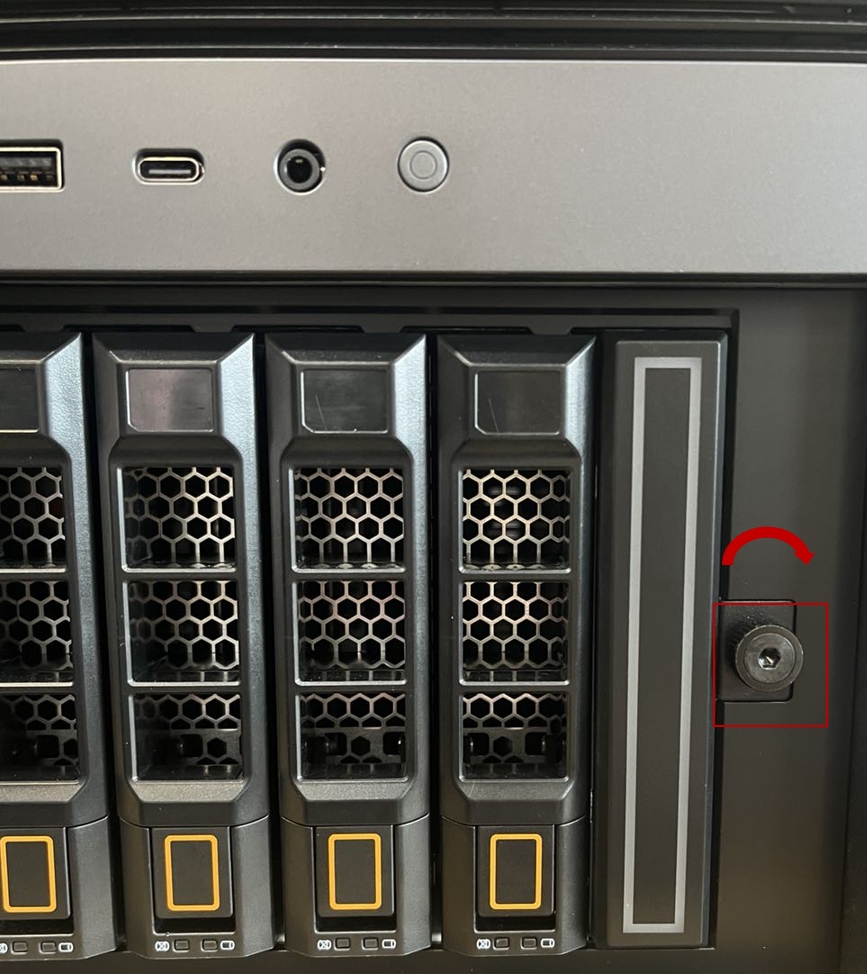
How to upgrade ZimaCube 7th lighting firmware
In order to prevent esp32 from failing in OTA (Over-The-Air) updates, a wired update method is introduced here.
3-step solution
- Connect to WiFi
Connect to WiFi with a computer
Name: “ZimaCube”
Password: “homecloud” - Enter the URL
Enter in the browser: 172.16.1.1 - Upload the firmware
https://drive.google.com/file/d/1h8LKvZ47gdMmpJzu6CFK3awjGFX5ayRE/view?usp=drive_link
Backup plan
Preparation before updating
- Computer
- Data cable tybe-c
- Disk 7
- Download and unzip the compressed package
https://drive.google.com/file/d/15nPalLy-2ieNQ84dT1gchBzLqtEfM--8/view?usp=drive_link
Start updating
3.1 Use the tybe-c data cable to connect the computer to the tybe-c on the chip on the seventh disk
3.2 Open the link espressif.github.io on the computer
3.3 Click ‘Connect’
3.4 Select the serial port for connection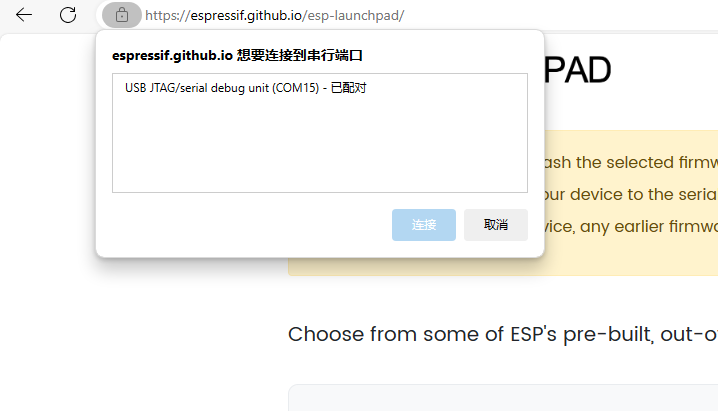
3.5 Click ‘DIY’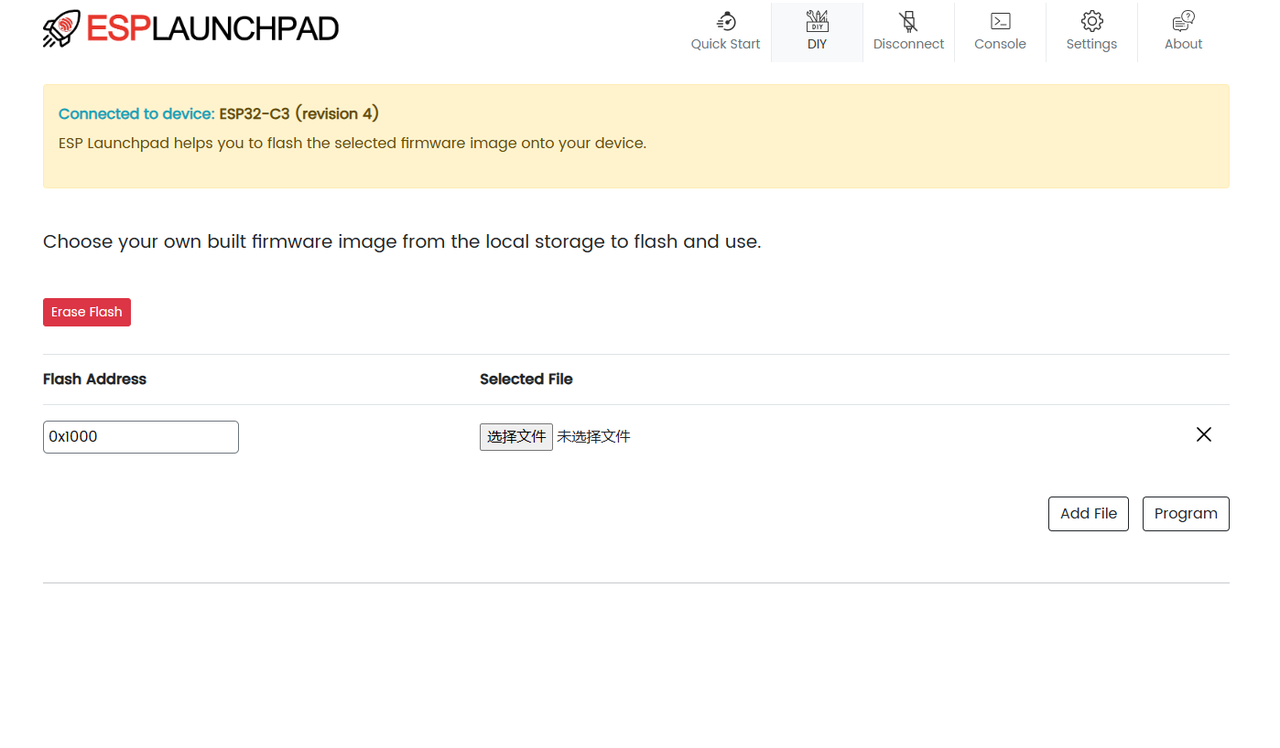
3.6 Click ‘Add File’ twice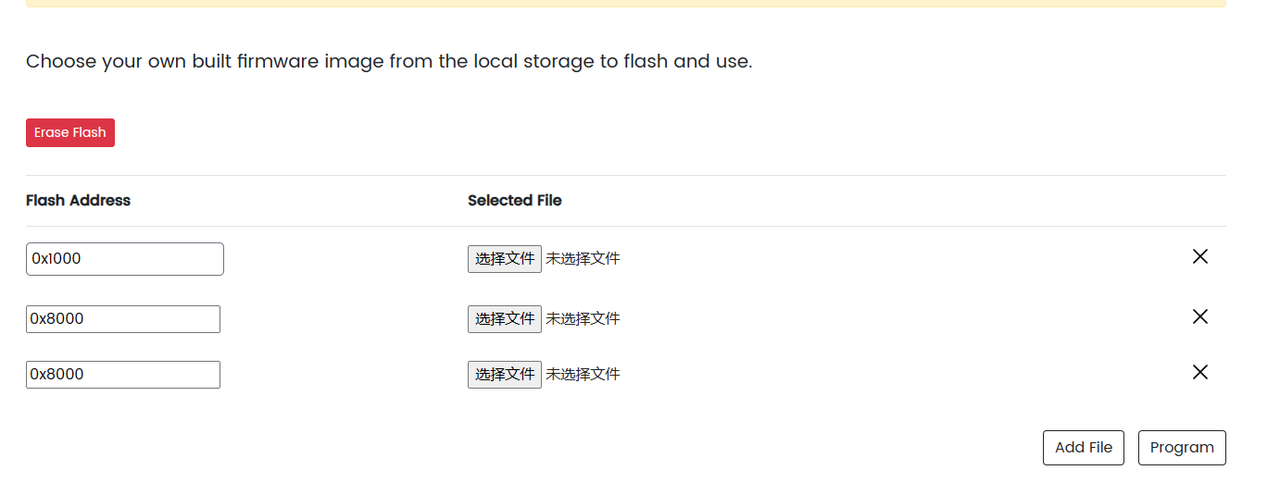
3.7 Change the burning address and select the file
The specific burning address is as shown in the figure, select the three files after decompression in turn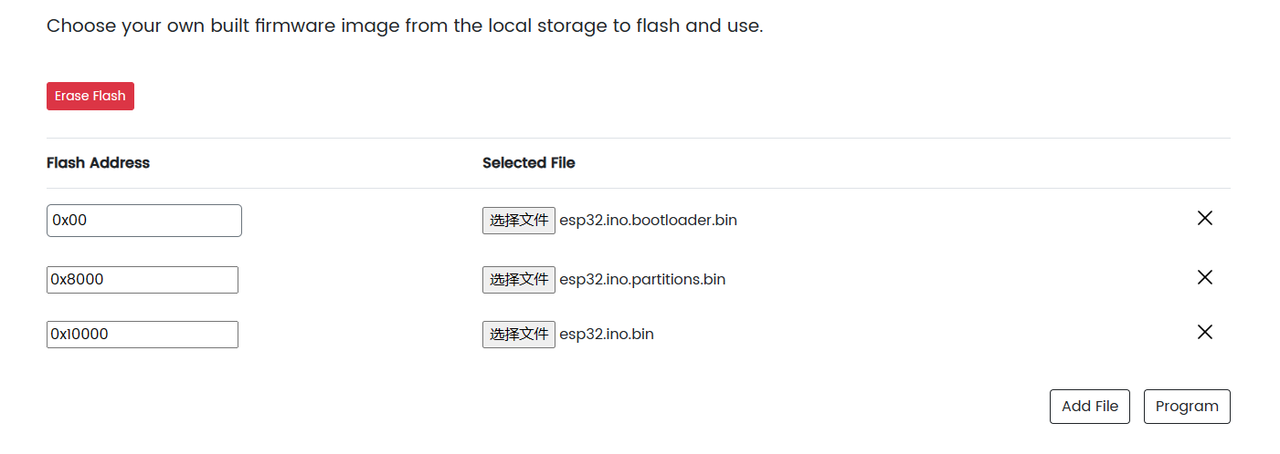
3.8 Click ‘Program’ to start burning
3.9 Burning is complete, press the RST reset button, and the firmware is successfully updated