Want to keep your Mac files safe? With ZimaOS’s new Time Machine feature, you can easily back up your files to ZimaCube. This powerful feature is not only quick and easy, but also ensures that your important data is always protected. Here are the easy-to-follow steps to quickly set up a backup.
Before you begin, make sure you have downloaded and installed the latest version of ZimaOS: https://github.com/IceWhaleTech/ZimaOS/releases
Step 1: Set up a ZimaOS shared folder
- Open your ZimaOS dashboard (e.g., access it via
http://<your_nas_ip>). - Go to the Files page.
- Find the folder you want to use as a backup destination, such as Time Machine.
- Right-click the folder and select Share via Samba.
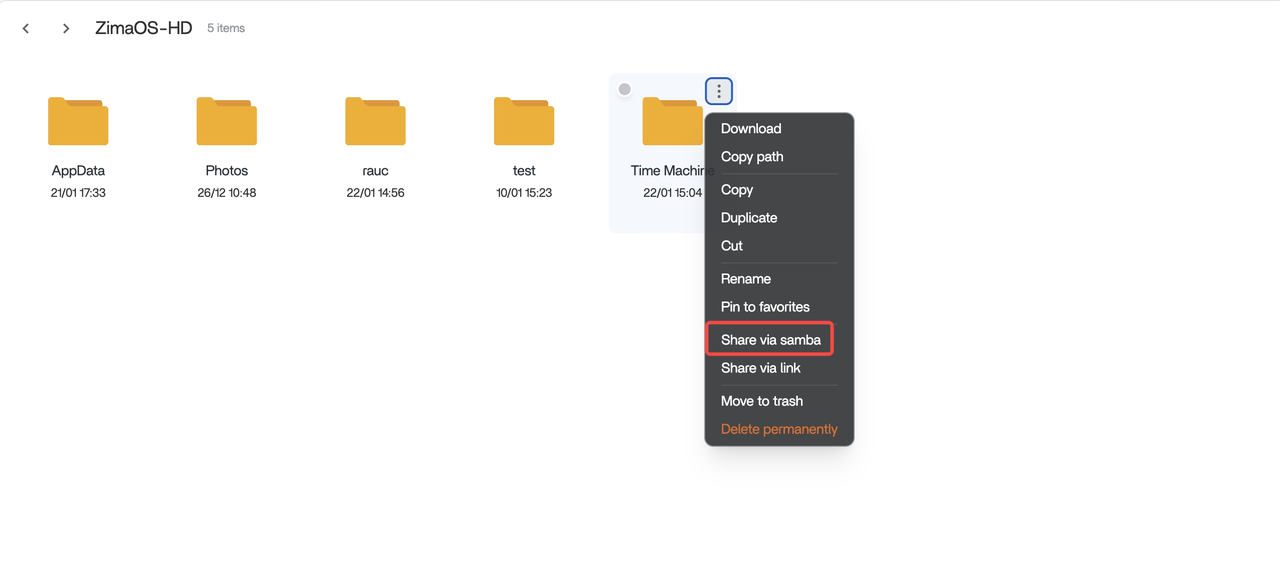
- In the pop-up window:
- Confirm that the folder name and storage location are correct.
- Check the Configure for Time Machine option.
- Remember: your default user will be used for Time Machine authentication.
- (Optional) Click + Add to assign access permissions to other users.

- Click Create to complete the shared folder settings.

Step 2: Set up Time Machine on your Mac
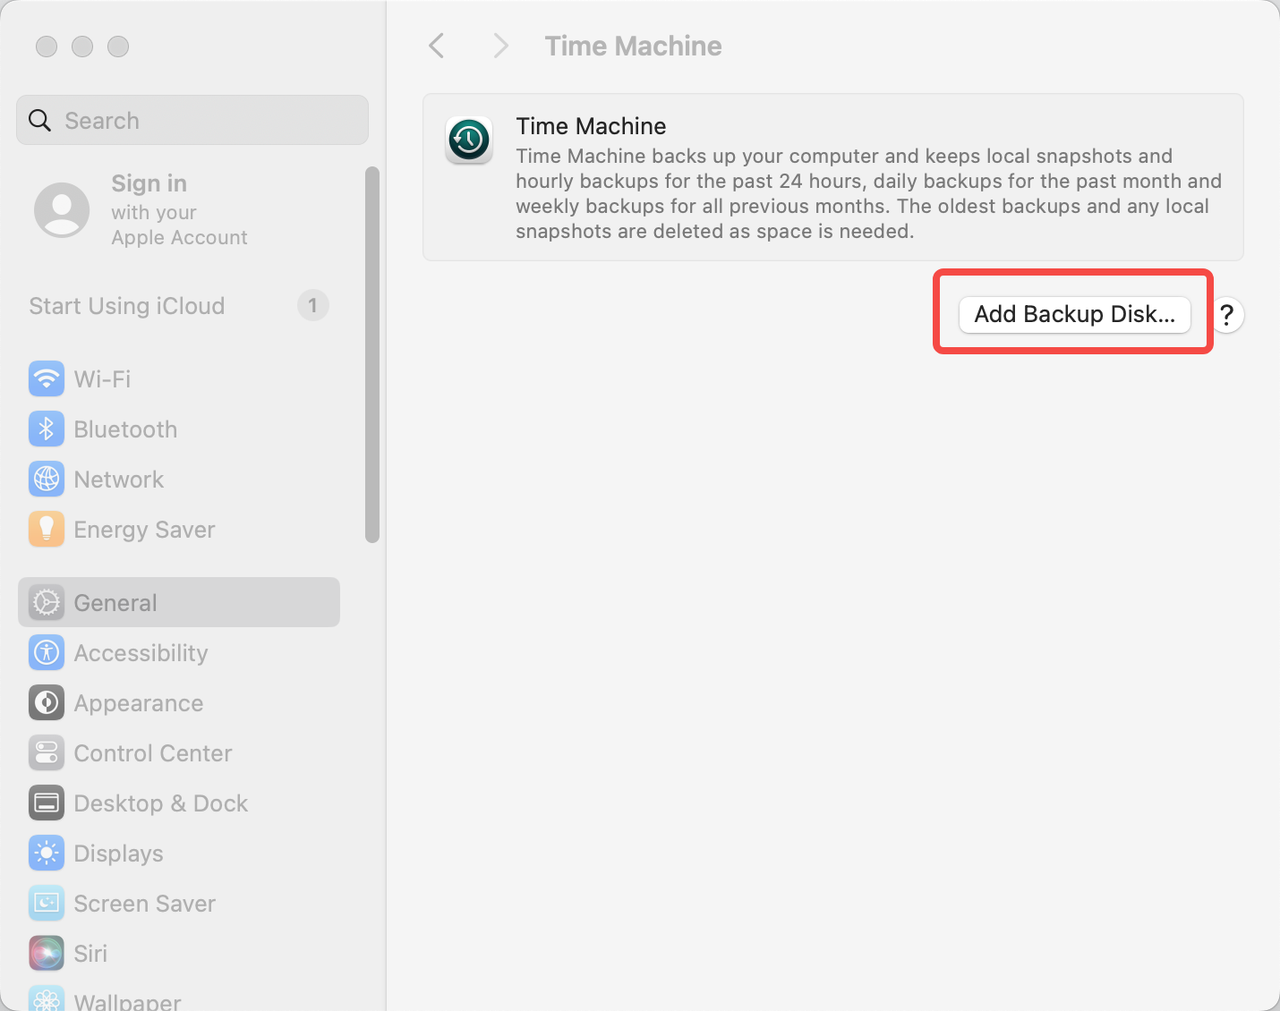
- Open System Preferences or System Settings (macOS Ventura and later).
- Click Time Machine.

- Select Add Back Disk….
- In the disk list, find and select the shared folder previously configured on ZimaOS (for example: Time Machine). Click Set Up Disk.
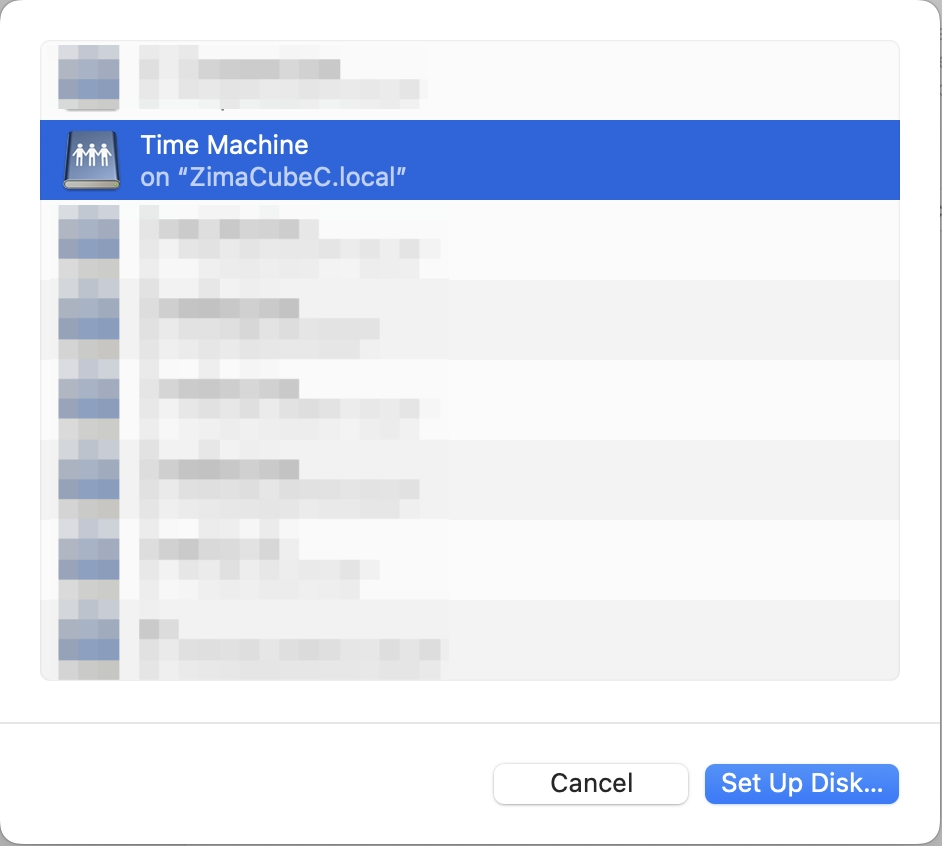
- Enter your username and password as prompted to complete the disk configuration.

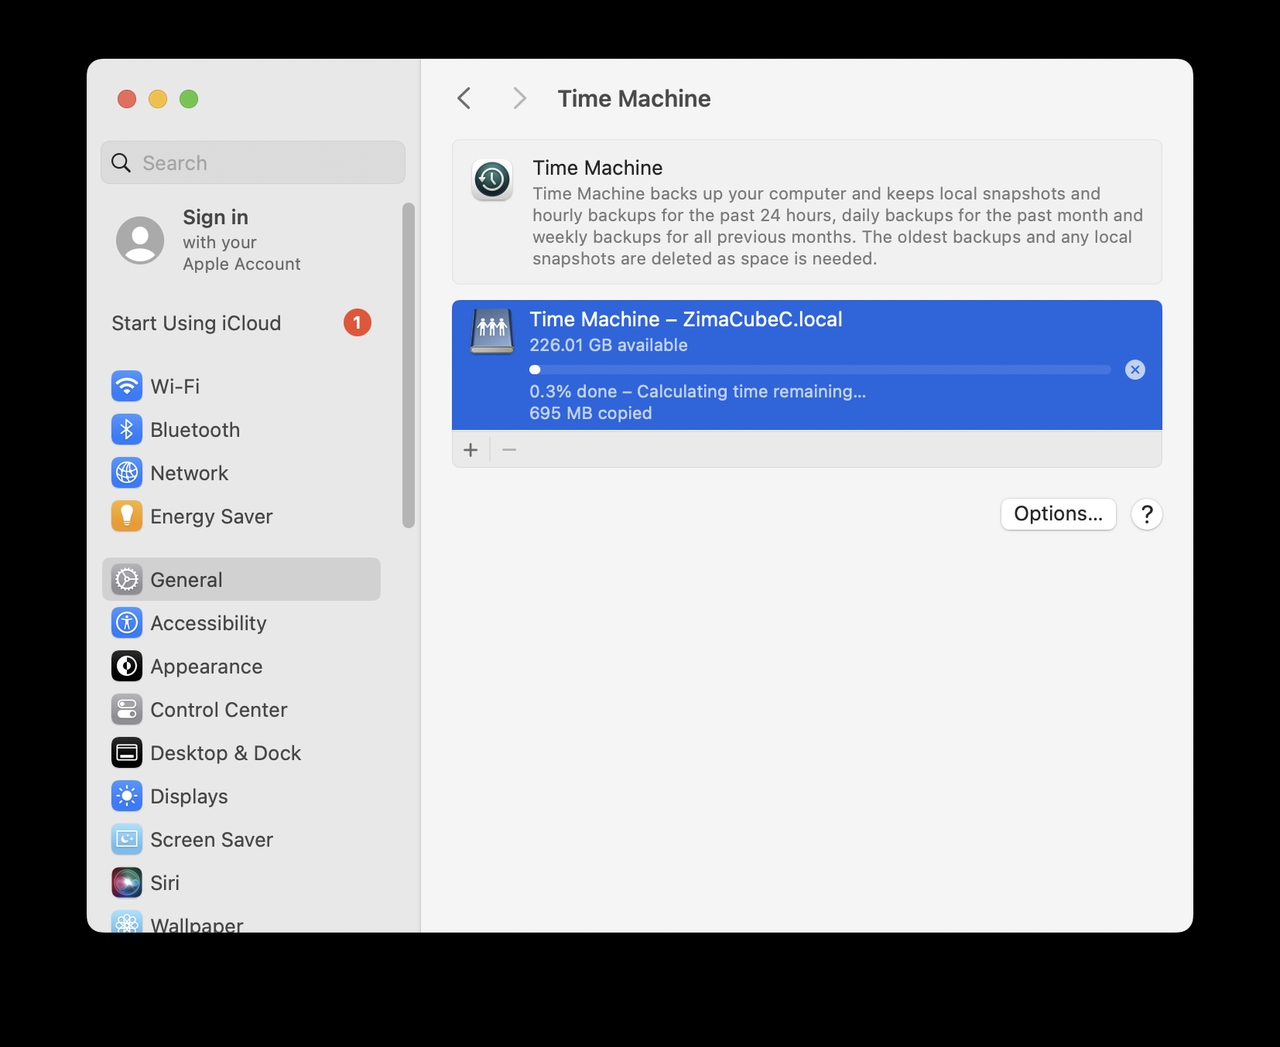
Step 3: Start backup
- Make sure your Mac and ZimaCube are in the same LAN.
- Time Machine will automatically identify the target folder and start backing up.
Precautions
Storage space: Make sure ZimaCube has enough free space to meet the backup requirements.
Network connection: If the backup fails, please check the network connection and confirm that ZimaCube’s SMB service is enabled.
Permission password input problem: When entering the password, macOS may not be able to enter. If you encounter this problem, please click on the blank space first, then click on the password input box again and try again.
Summary
Following the above steps, you have successfully backed up your Mac files to ZimaCube, adding a solid barrier to your data security. If you have any questions during the operation, please feel free to contact our support team feedback@zimaos.com. Let ZimaOS provide more efficient protection for your work and life!
Further reading:
How to restore files using Time Machine: macOS User Guide:Restore items backed up with Time Machine on Mac