Background
In daily life, surveillance cameras have become important tools for both households and businesses. However, traditional monitoring systems usually only record images or simply detect motion, and cannot provide detailed explanations of the content of the images. This often requires users to judge for themselves what happened when viewing videos or receiving notifications.
Frigate is an efficient open-source video analysis tool that can identify targets such as people, cars, and animals in images and trigger related events. But its function mainly stays at the level of “seeing” and cannot directly tell you “what happened”.
To compensate for this deficiency, we introduced Ollama, a tool that can generate natural language descriptions. Through it, we can convert the visual content detected by Frigate into clear textual explanations, such as’ someone walked into the yard ‘or’ a car parked at the door ‘.
This tutorial will guide you on how to use ZimaOS to combine Frigate and Ollama to create a practical visual description system. Whether you want to improve the convenience of home security or add intelligent features to small projects, this solution can meet your needs.
Hardware preparation
- Cameras that support RTSP protocol
Used to provide real-time video stream input to Frigate. - ZimaBoard2 compatible graphics card
Used for locally accelerating AI model inference (such as NVIDIA series graphics cards). Reference graphics card https://www.zimaspace.com/docs/zh/zimacube/GPU-Expansion - A hard drive with a capacity of 6GB or greater
Used for storing AI model files, video snapshots, and system data.
Software installation
The software installation of this system can be divided into the following three steps:
- Data migration
- Install Ollama and configure the LLaVA model
- Install and configure Frigate
Step 1: Data Migration
Due to the large size of AI models, it is recommended to install an independent hard drive in advance and migrate Docker data directories and personal data to the hard drive to avoid problems such as failure or insufficient storage space during the download process, in order to ensure stable system operation and sufficient storage space.
Please backup important files to prevent data loss. There may be risks when migrating data!!!
Connect the graphics card to the hard drive, start the device, and enter the operating system.

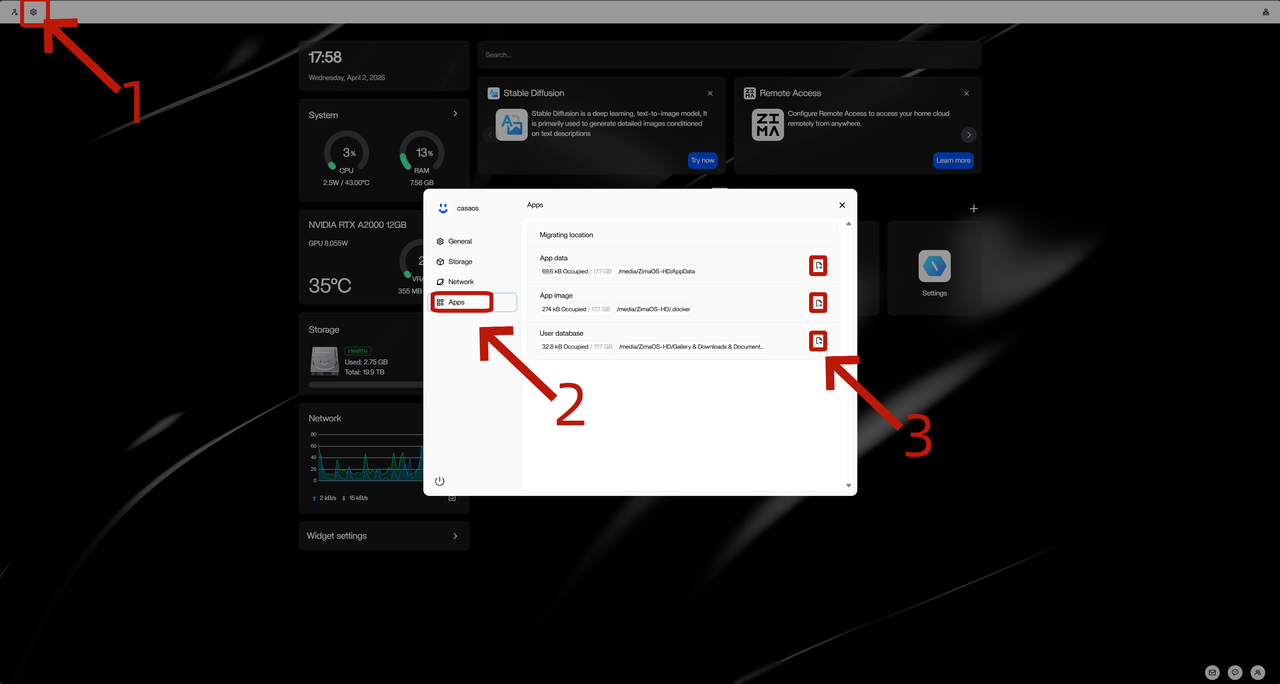
Data migration
- Click on the “Settings” icon in the upper left menu
- Click on “Apps”
- Find the relevant application or data management item, click the “Migration” button, and wait for the migration to complete.
Step 1:Install Ollama and configure LLaVA model
For more details on supported models, please visit the official documentation of Frigate and the official website of Ollama.
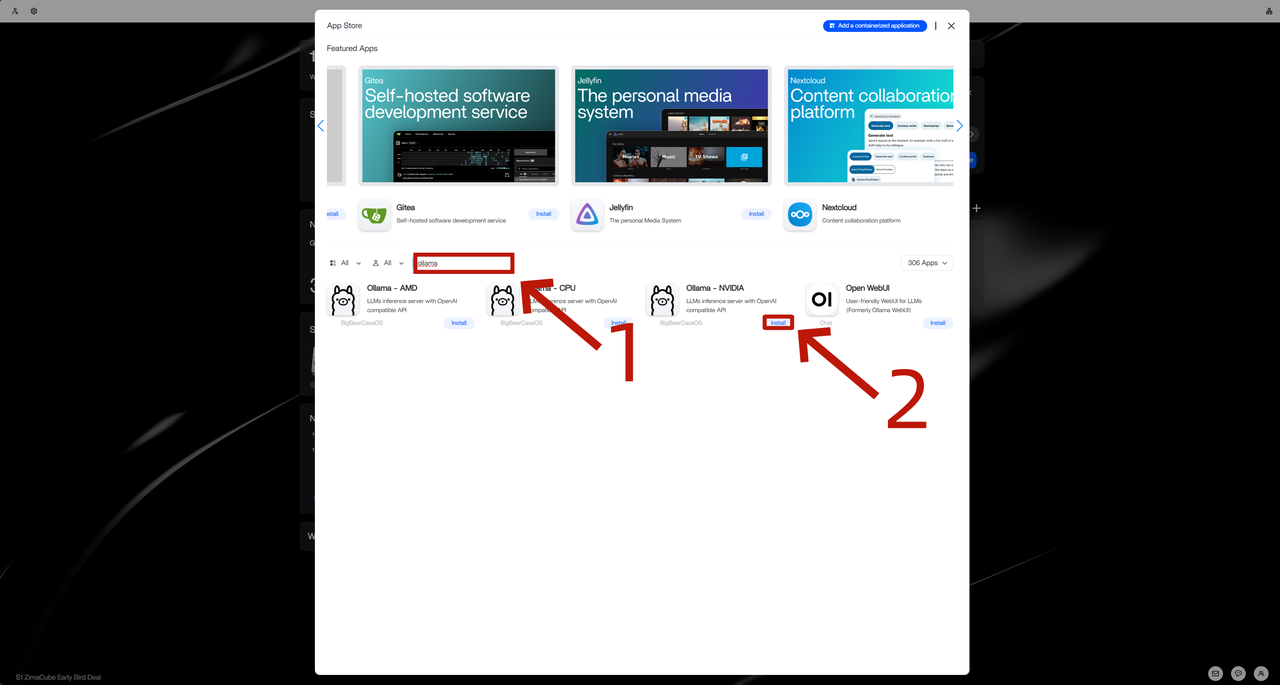
Install Ollama
- Open the App Store and enter “Ollama” in the search bar
- Choose the appropriate version for installation based on your graphics card type (such as a version that supports NVIDIA)
Configure LLaVA model
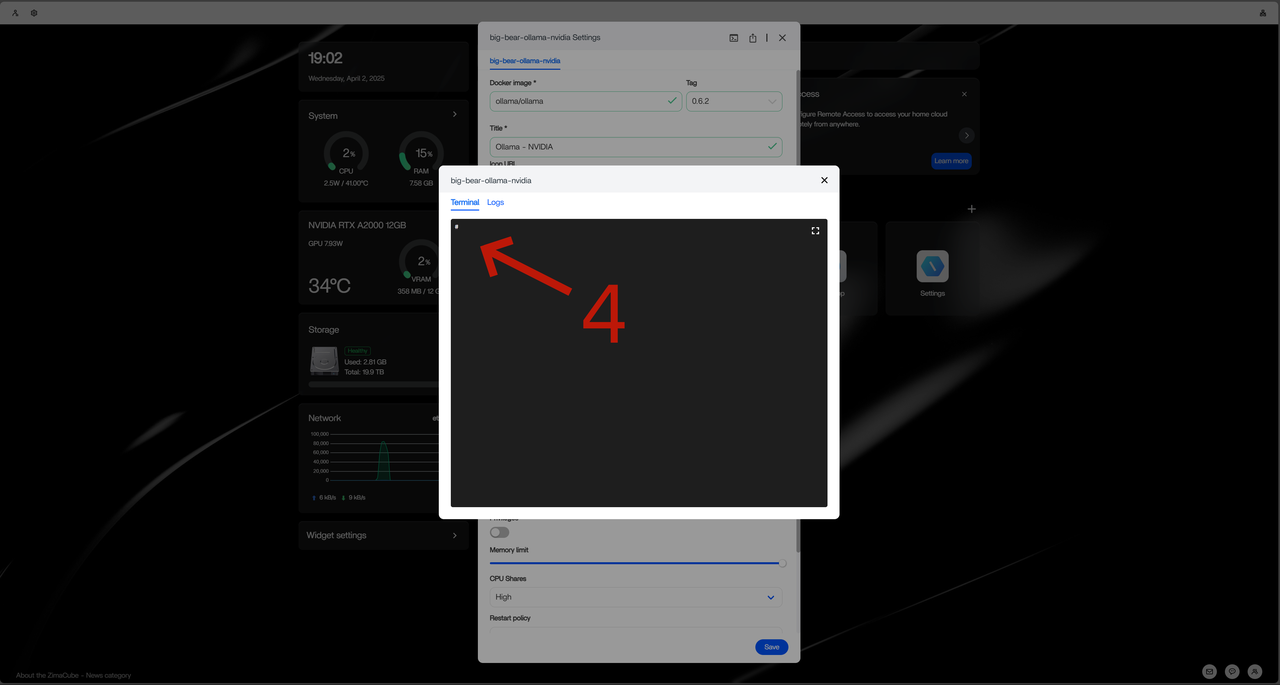
- Open the Olama terminal and click on the menu icon in the upper right corner
- Select “Settings” to enter the settings interface
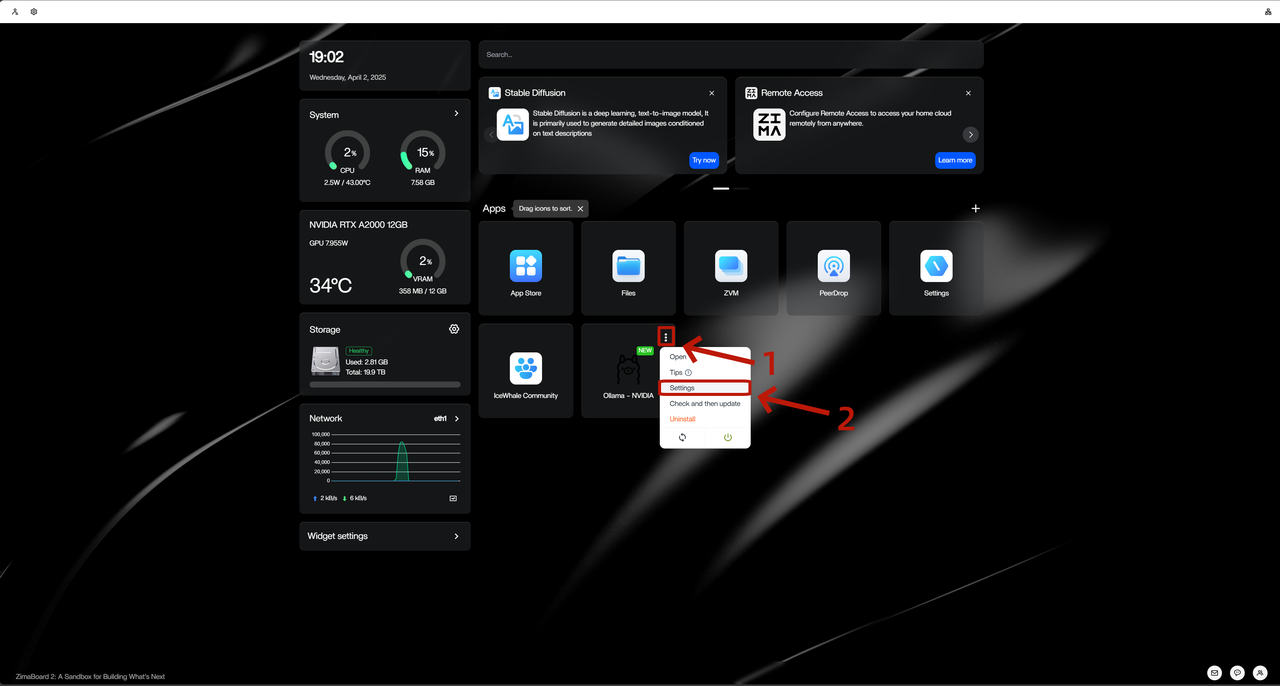
- Click on the “Terminal” icon to enter the command line control interface
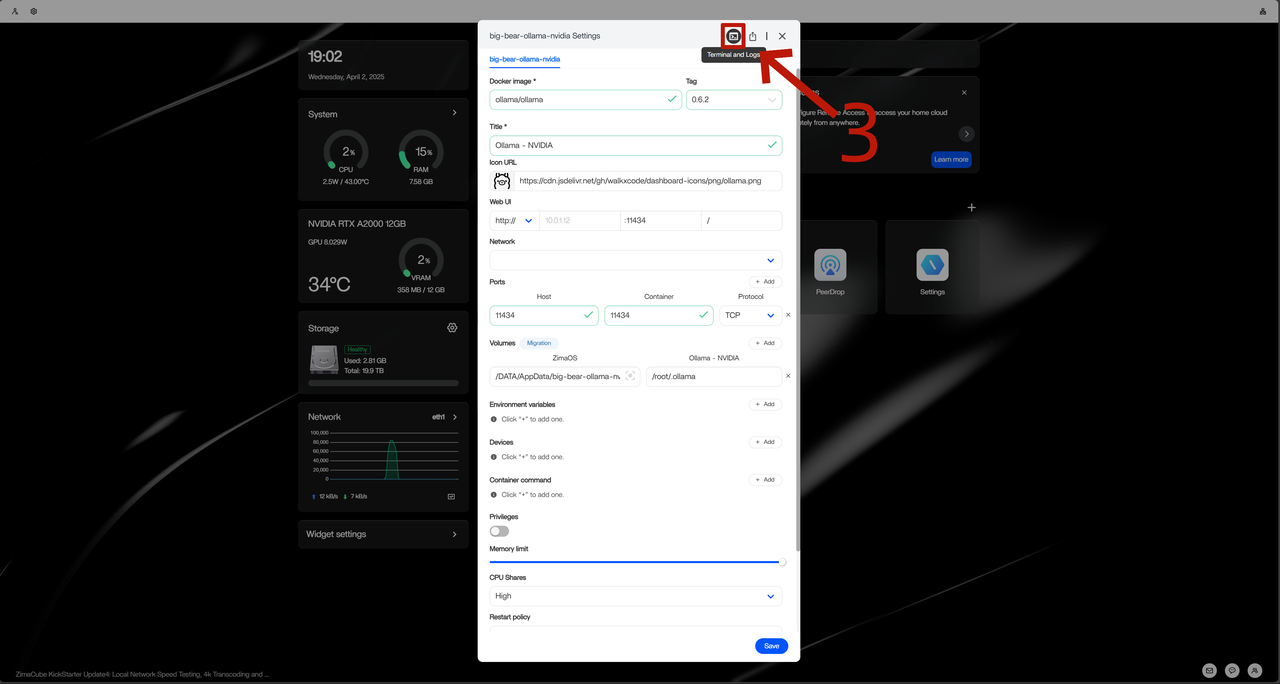
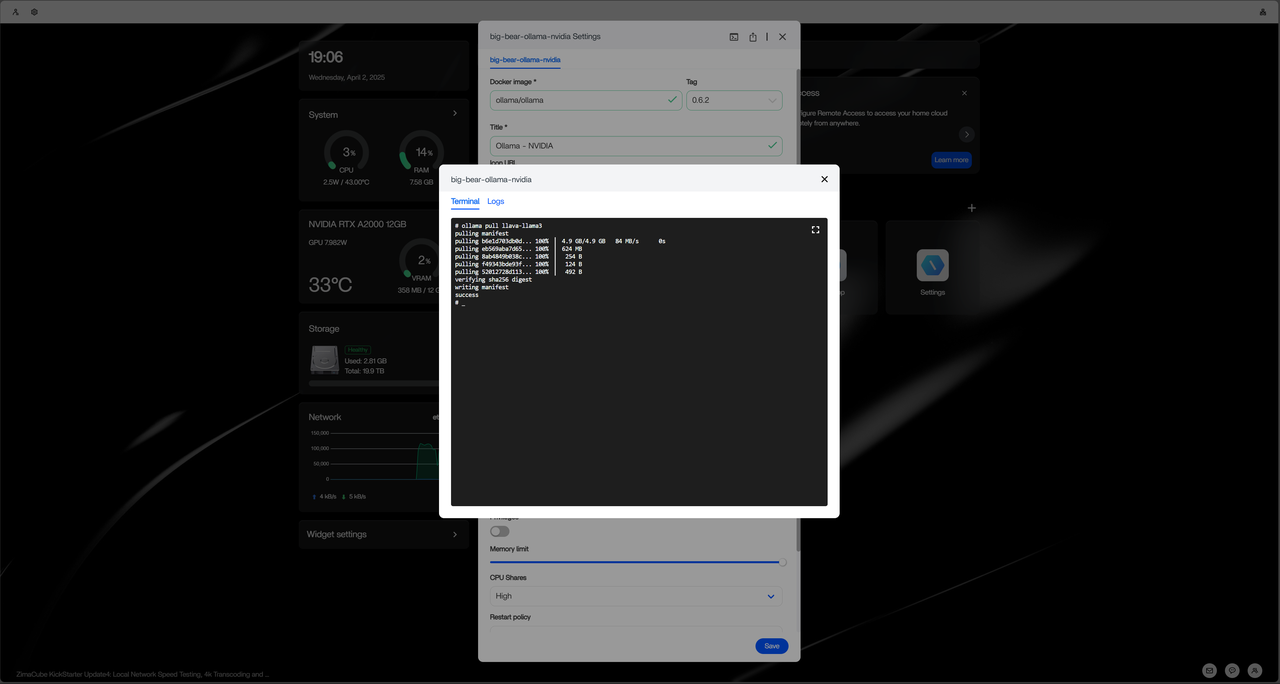
- Enter the following command in the command line to download the model and install llava-llama3
ollama pull llava-llama3
- The appearance of the word “Success” indicates that the model download is complete and Ollama is ready
- After starting Olama, record the IP address and port number of the running IP (such as
http://10.0.1.3:11434)It will be used later when configuring Frigate.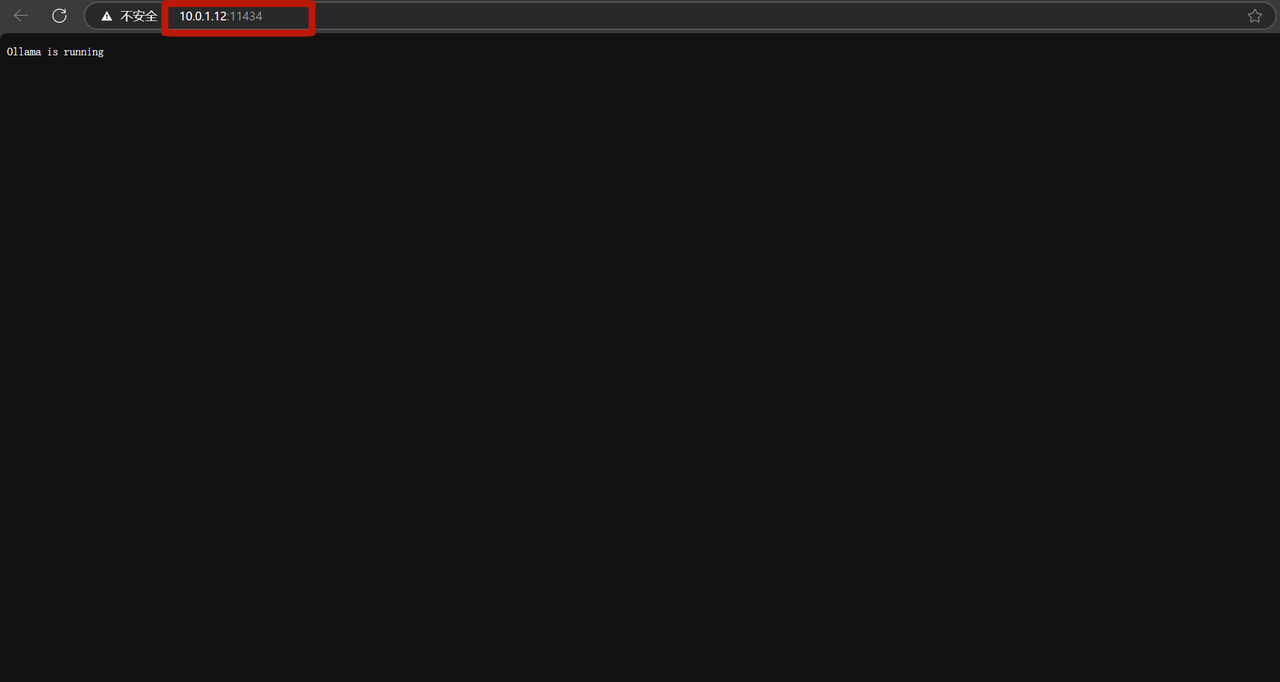
Step 3: Install and configure Frigate
Install Frigate
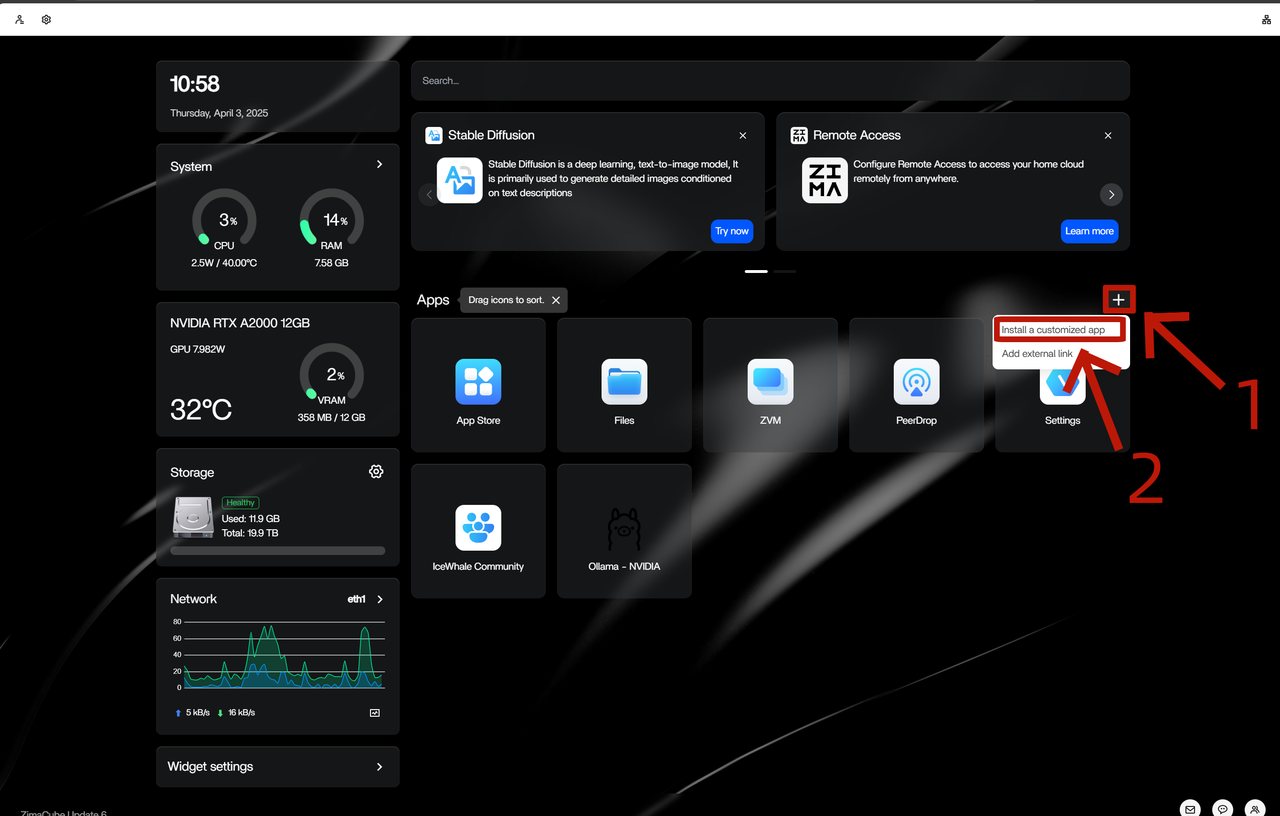
Click the “plus” button in the upper right corner of the main interface.
Select ‘Install a customized app’.
Click on the ‘Import’ button.
Import the frigate.yaml configuration file below.
name: pure_grace
services:
  frigate:
    cpu_shares: 90
    command: []
    container_name: frigate
    deploy:
      resources:
        limits:
          memory: 7766M
    devices:
      - /dev/bus/usb:/dev/bus/usb
      - /dev/apex_0:/dev/apex_0
      - /dev/video11:/dev/video11
      - /dev/dri/renderD128:/dev/dri/renderD128
    image: ghcr.io/blakeblackshear/frigate:0.15.0
    labels:
      icon: https://icon.casaos.io/main/all/frigate.png
    ports:
      - target: 8971
        published: "8971"
        protocol: tcp
      - target: 8554
        published: "8554"
        protocol: tcp
      - target: 8555
        published: "8555"
        protocol: tcp
      - target: 8555
        published: "8555"
        protocol: udp
    privileged: true
    restart: unless-stopped
    shm_size: "67108864"
    volumes:
      - type: bind
        source: /etc/localtime
        target: /etc/localtime
      - type: bind
        source: /DATA/AppData/frigate/config
        target: /config
      - type: bind
        source: /DATA/Media
        target: /media/frigate
    cap_add: []
    environment: []
    network_mode: bridge
x-casaos:
  author: self
  category: self
  hostname: ""
  icon: https://icon.casaos.io/main/all/frigate.png
  index: /
  is_uncontrolled: false
  port_map: "8971"
  scheme: https
  store_app_id: pure_grace
  tips: null
  title:
    custom: ""
    en_us: frigate
Click on “Submit”.
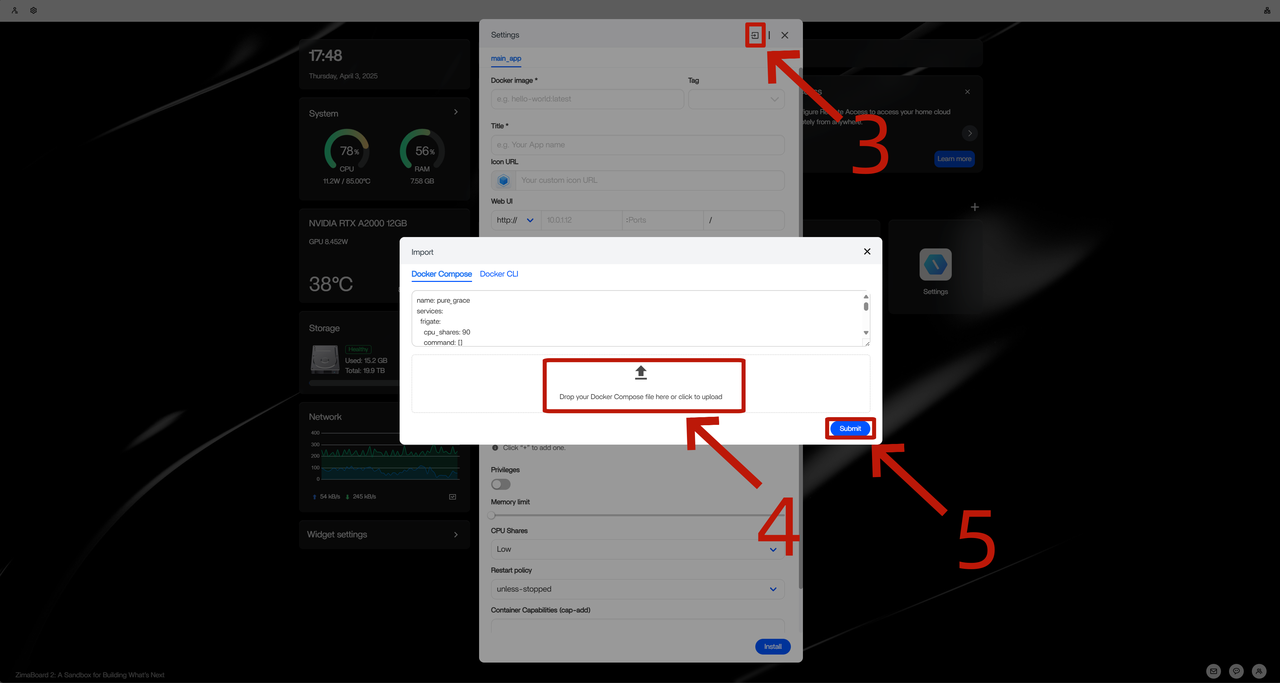
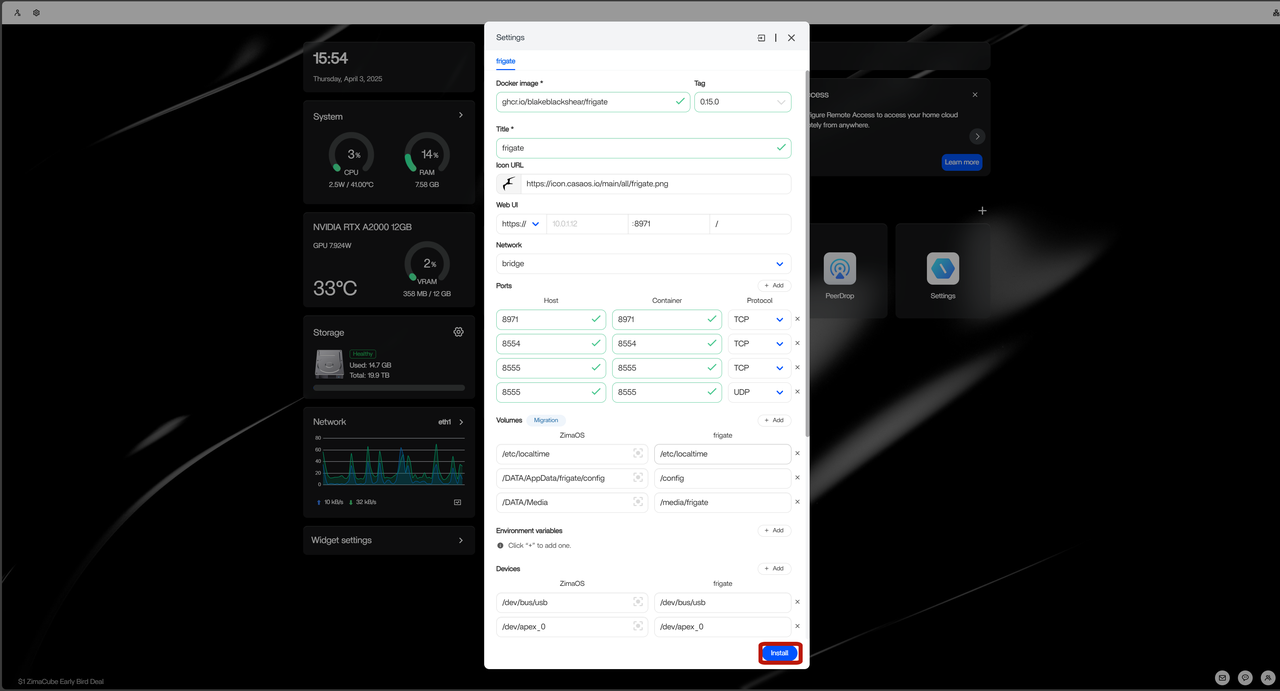
Click “Install” and wait for the installation to complete.
Obtain Frigate’s account and password
After starting Frigate, please check and record the default account and password in the log.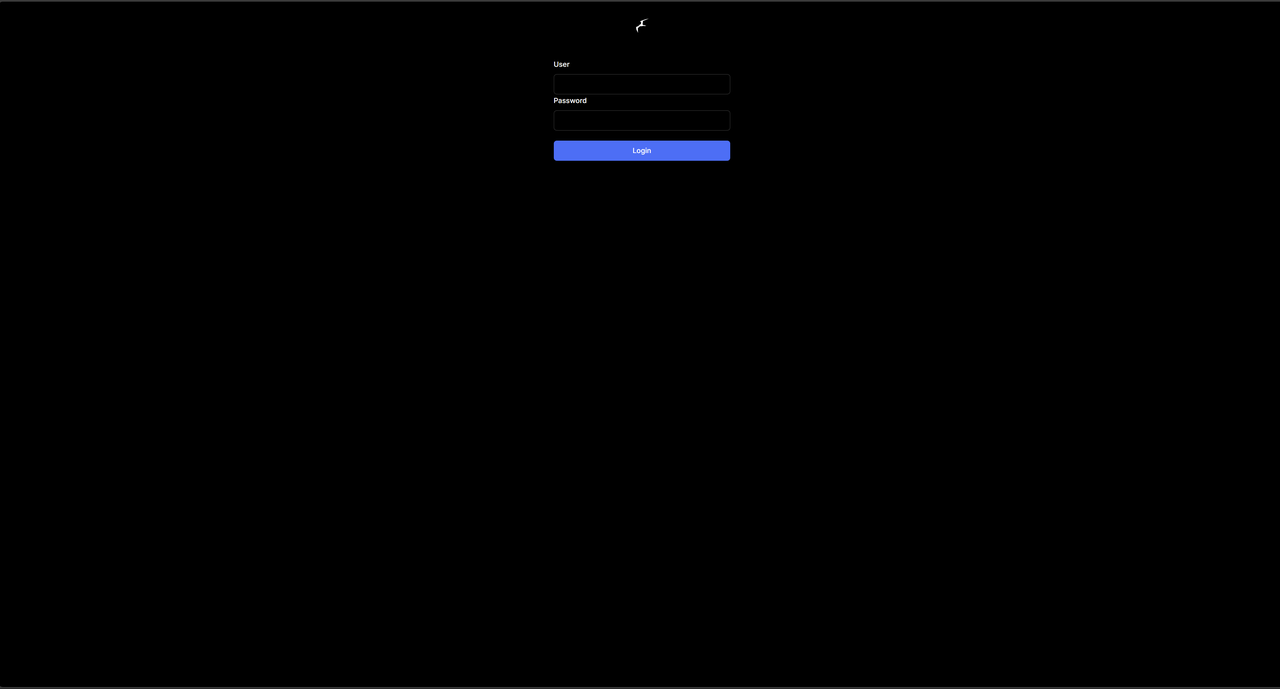
- Open the Frigate terminal and click on the menu icon in the upper right corner.
- Select “Settings” to enter the settings interface.
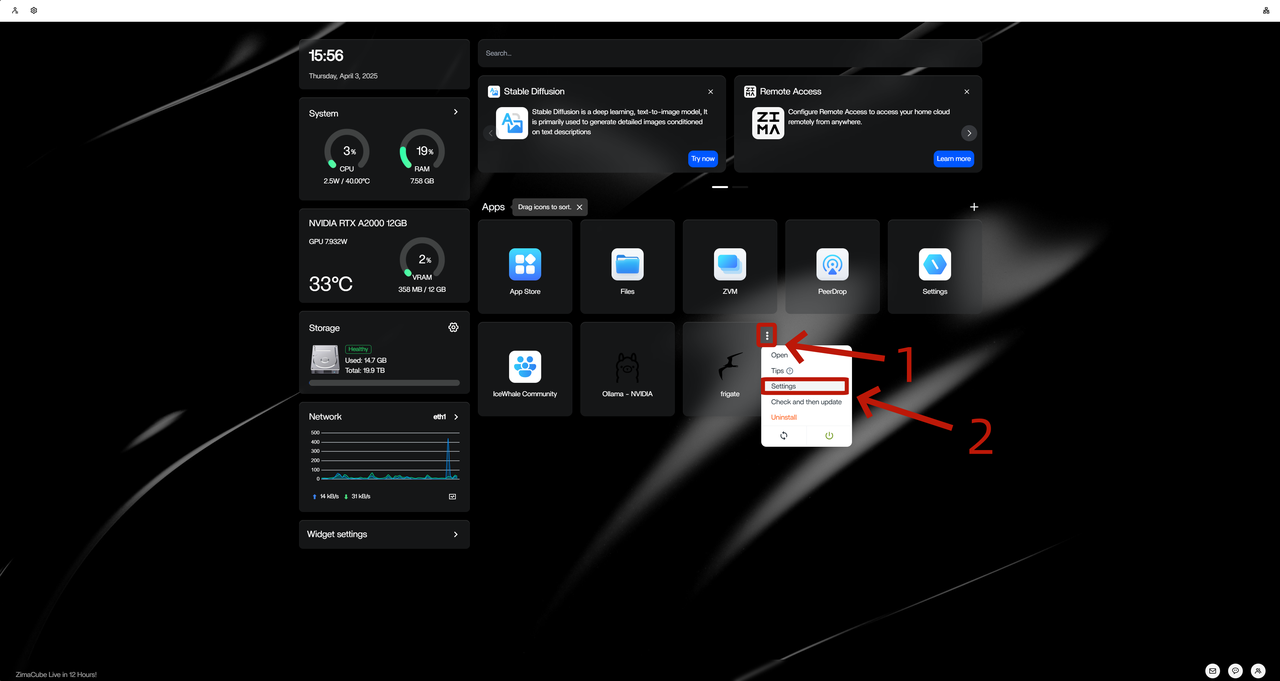
- Click on the “Terminal” icon within the application.
- Switch to the “Logs” tab to view the startup logs.
- Click the “Full Screen” button in the upper right corner to easily find the default username and password.
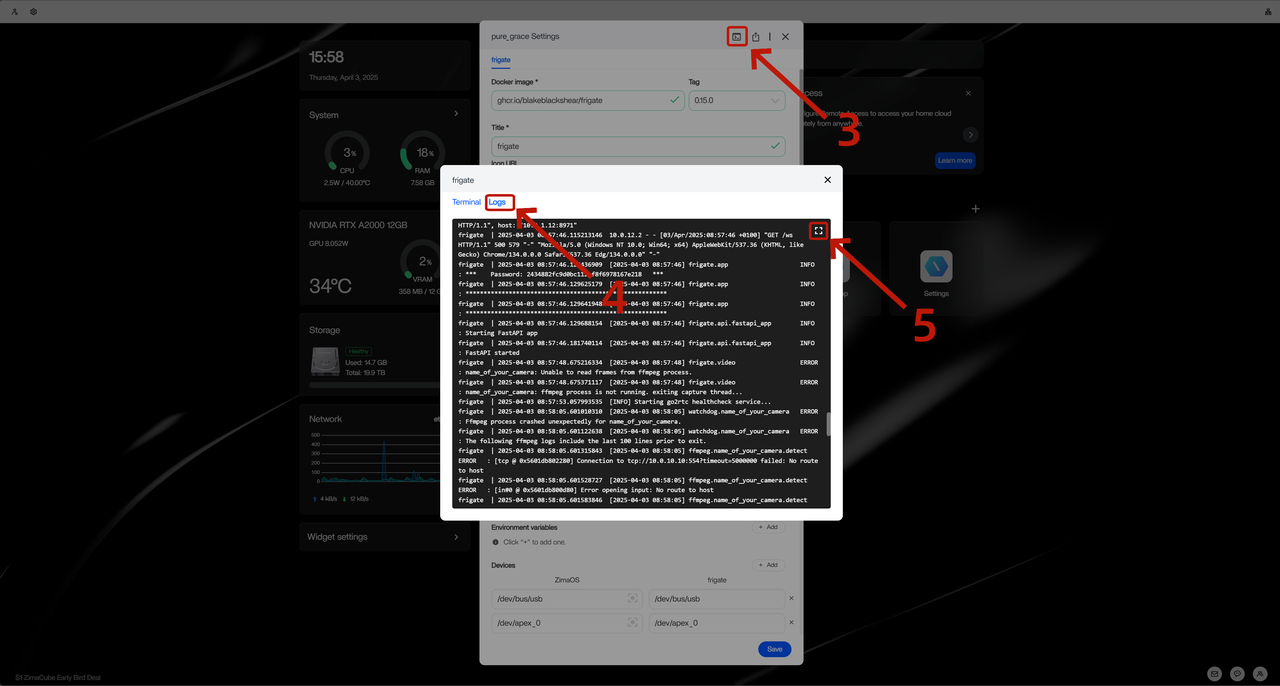
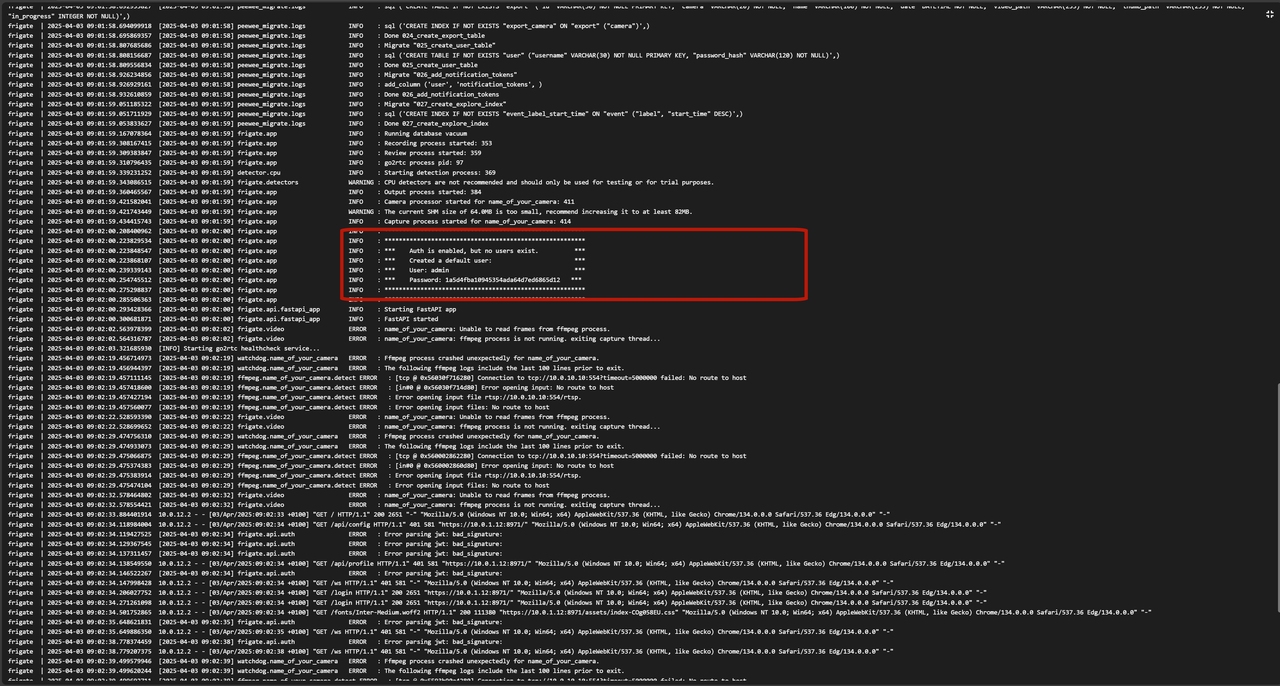
- Account and password information will be displayed here, please record it.
Configure firmate
- Enter the account and password obtained earlier and log in to the system.
- Click on the “Settings” button in the left menu.
- Select “Configuration Editor” to enter the configuration file editing interface.
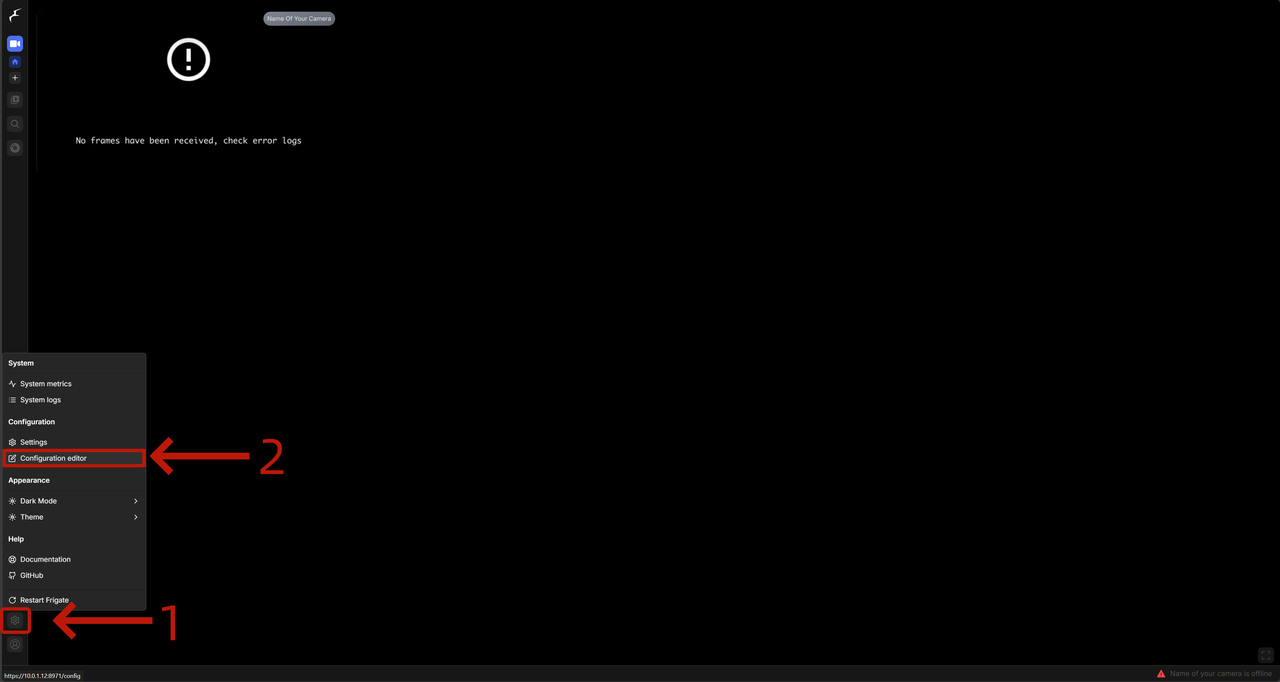
- In the configuration editor, add or modify camera related configurations. You can refer to the following example for setting up:
mqtt: |
Please make sure to replace the rtsp link with your own camera address and set Ollama’s IP and port to the actual running address (e.g http://10.0.1.3:11434 )Otherwise, Frigate will not be able to access video streams or connect AI models for analysis.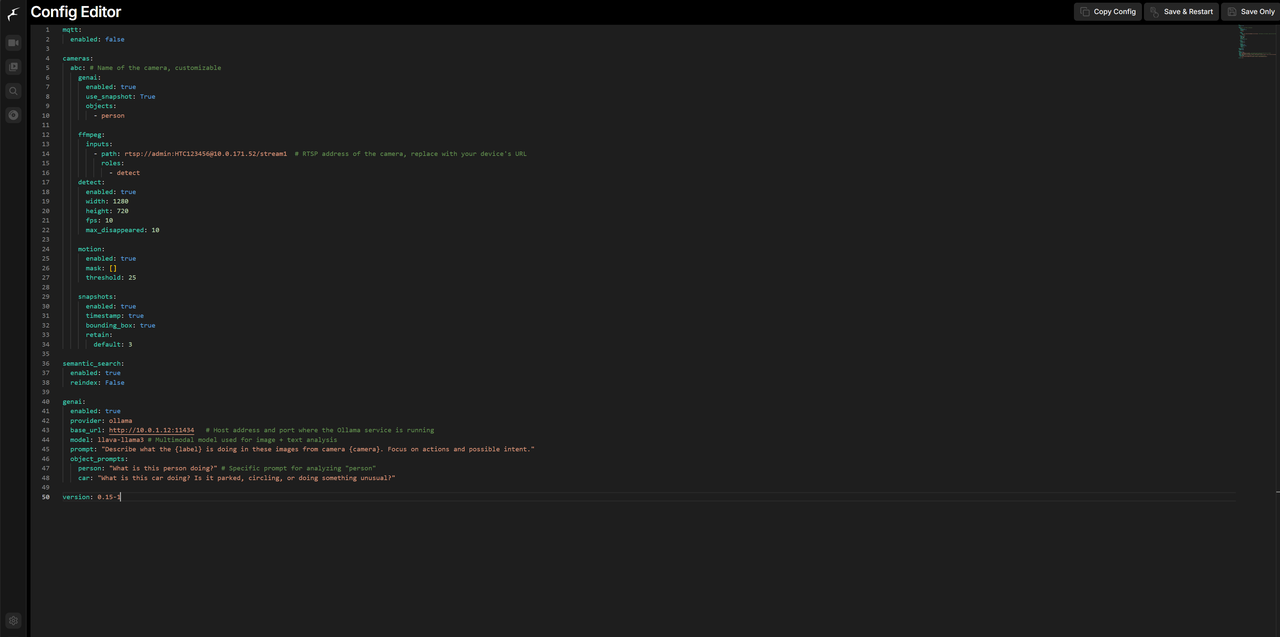
5. After the configuration is completed, click “Save” and Frigate will automatically apply the new configuration and start running.
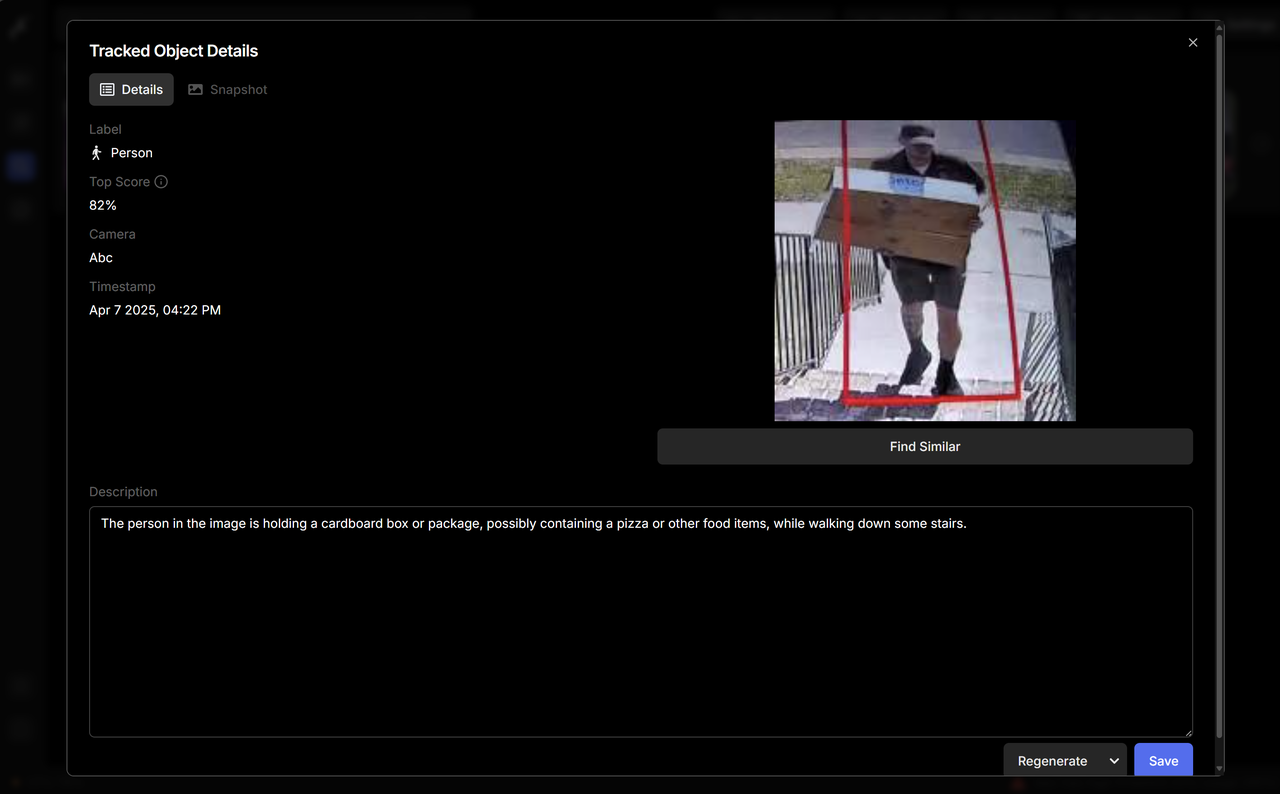
When Frigate detects a person object in the monitoring screen, it will automatically capture a snapshot and call the AI model to generate the corresponding image description. You can also freely adjust the detection object, model used, and prompt content according to the actual application scenario, thus creating a more intelligent and personalized monitoring experience.
Construction completed
At this point, the intelligent monitoring system of Frigate and Ollama has been successfully built. You can check the detection effect through real-time screen, or enter the log and snapshot page to verify whether the AI analysis is running normally.
To further optimize the experience, you can try accessing notification services, adjusting model parameters, or adding more cameras.