Introduction
Pi-hole is a powerful network-level ad blocking tool that can help you block ads and protect your privacy. In this tutorial, we will introduce how to install and configure Pi-hole on ZimaOS to make your home network cleaner and more efficient.
Prerequisites
- A device with ZimaOS installed.
- The ability to access the ZimaOS web interface or SSH.
- Network and administrator privileges have been set up.
Step 1: Install Docker Pi-hole
Enter the ZimaOS web interface.
Enter the App Store and search for Pi-hole to install.

Click Install.
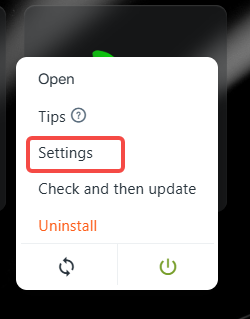
Before logging in to Pi-hole, click the application’s setting interface and find the password (the sample password is your_password).
 |
 |
|---|
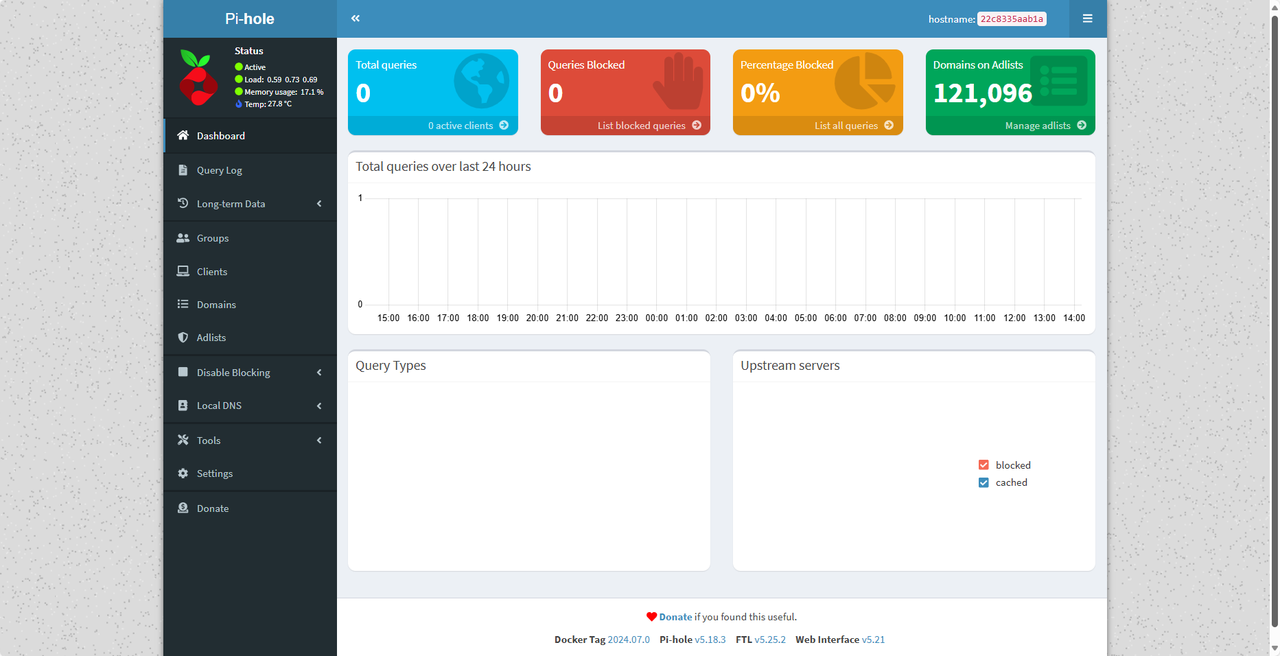
- Click the application and enter the password to enter the interface.

Step 2: Configure the network
2.1 Change the router’s DNS settings
Benefit: Changing the router’s DNS settings will allow the entire network of devices to automatically use Pi-hole for ad blocking, without having to manually configure each one.
- Log in to the router’s management interface.
- Set the router’s DNS server address to the local IP address of the ZimaOS device running Pi-hole.
- Example: If ZimaOS’s local IP is
10.0.201.187, set the DNS server address to10.0.201.187.
2.2 Manually configure DNS on client devices - If you don’t want to modify the settings for the entire network, you can configure a custom DNS address on a single device to the ZimaOS IP.
Configure Windows device DNS
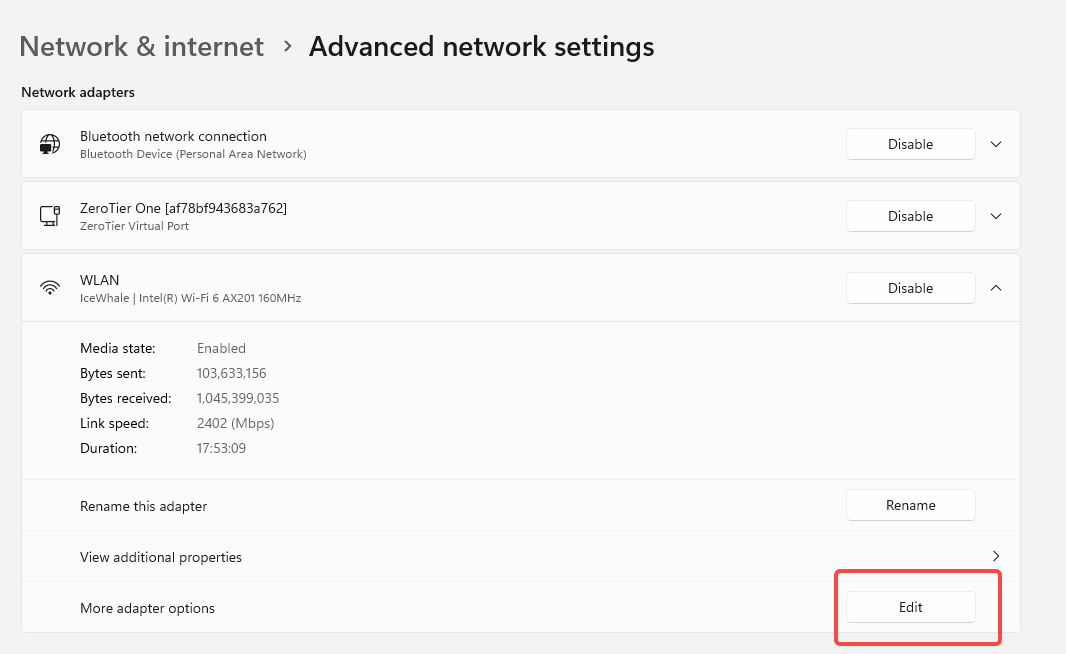
In the settings window, find “More adapter options” and click Edit.
Find and double-click “Internet Protocol Version 4 (TCP/IPv4)”.
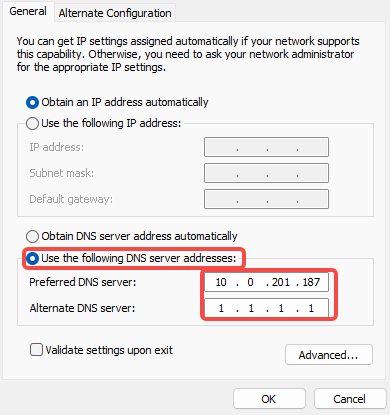
Fill in the following:
- Preferred DNS server: 10.0.201.187 (your Pi-hole server IP).
- Alternate DNS server: 1.1.1.1 (Cloudflare DNS) or 8.8.8.8 (Google DNS, backup).
- Click “OK” to save the settings.
Tips: If ad blocking doesn’t work, try clearing the DNS cache:
In the command prompt, run:ipconfig /flushdns
This will force the device to use the new DNS settings.
Step 3: Optimize settings (optional)
3.1 Enable more ad filter lists
In the Pi-hole dashboard, navigate to Adlists.
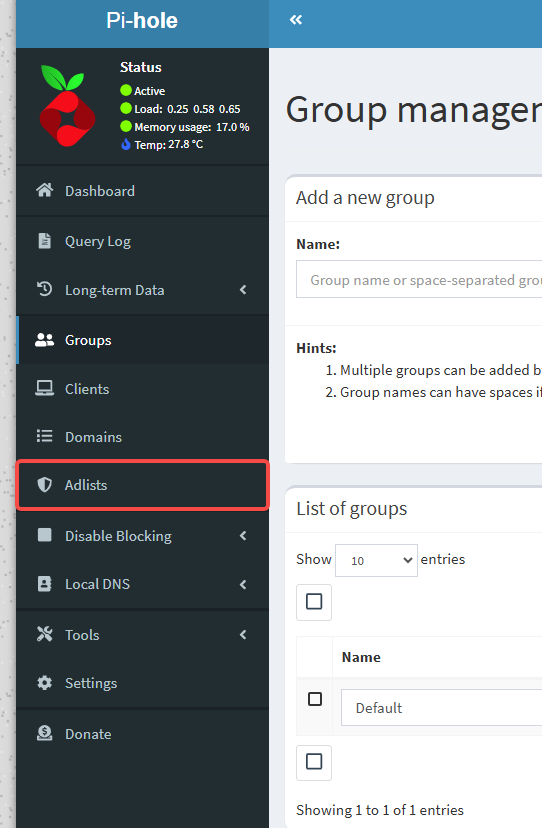
Add more ad blocking lists, for example:
- StevenBlack/hosts
- oisd.nl
Paste the copied url in Address, fill in comment, and click add to add.
3.2 Configure DNS caching and privacy enhancement
In Settings > DNS, select a trusted upstream DNS server (such as Cloudflare or Google).
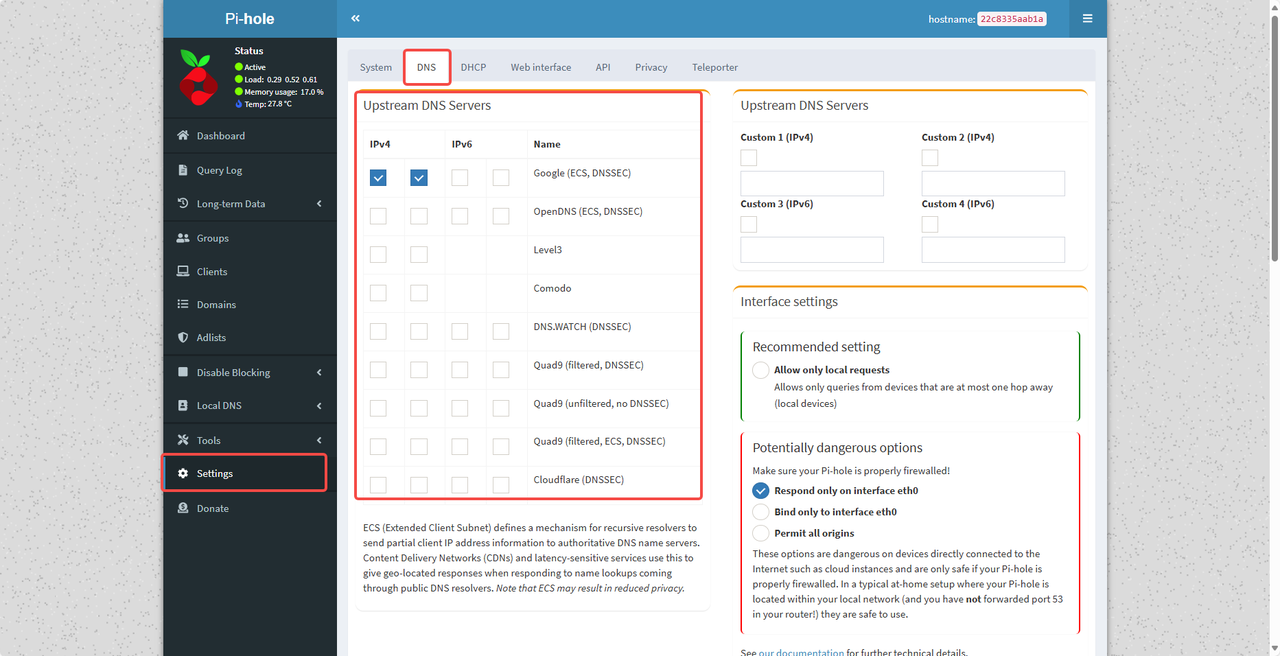
Turn on DNSSEC for added security.

Step 4: Test ad blocking
- Visit a website with a lot of ads (such as a news portal).
- Check if the ads are successfully blocked.
- Check the number of blocked requests in the Pi-hole dashboard.
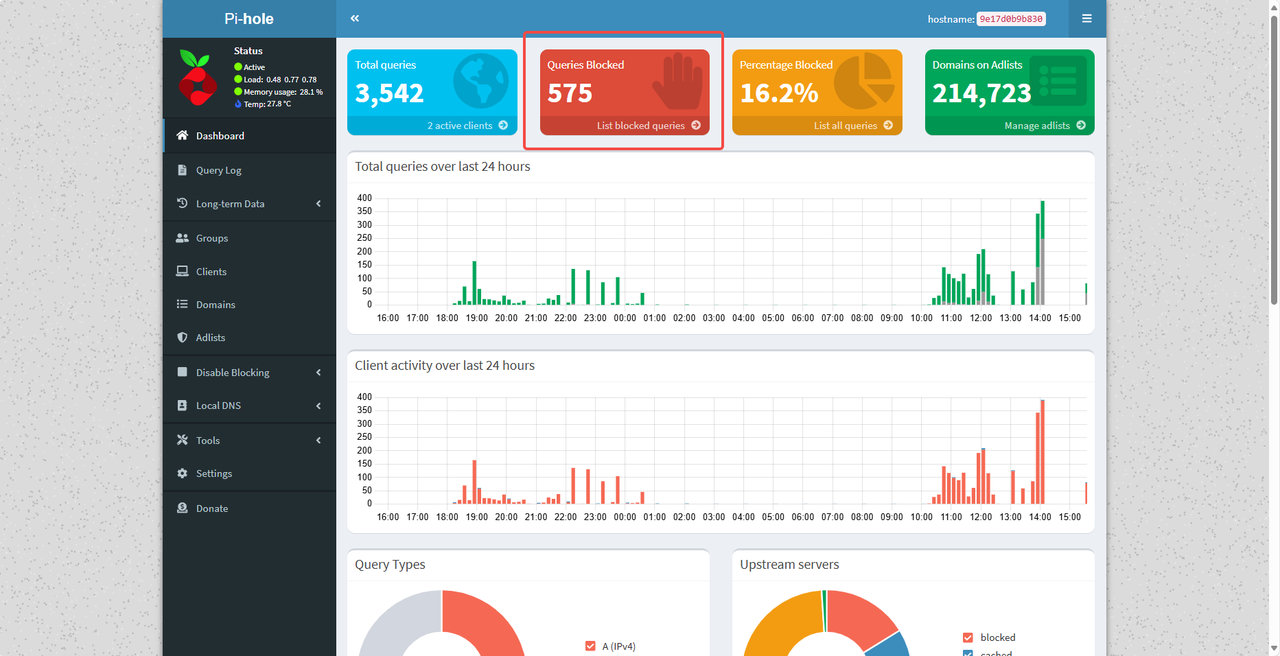
Conclusion
Now that you have successfully deployed Pi-hole on ZimaOS, enjoy an ad-free Internet experience! Pi-hole not only improves your network speed, but also protects your privacy. Feel free to adjust the settings or add more features according to your needs. If you have any questions, please discuss in our community!
F&Q
- Click Install to avoid port occupation. Just change the port.
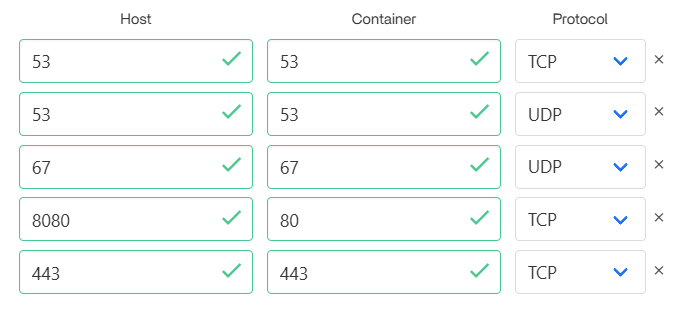
Port 10443 is usually used for Pi-hole’s HTTPS management interface. Changing the port will not affect Pi-hole’s core DNS function.
It is not recommended to change port 67 because it will affect the normal operation of the DHCP service and cause the client to be unable to automatically obtain an IP address. If there is a port conflict, the best solution is to disable the conflicting service.
- First, find the process occupying port 67 in the command line interface and use the command
sudo ss -ulnp | grep :67

- Use the following command to kill the conflicting process and the installation will be successful
sudo kill -9 <PID>